Introduction to Red Velvet Pancakes with Cream Cheese Frosting Recipe
Ah, red velvet pancakes! Just the thought of them makes my heart flutter with joy. I remember the first time I tried them at a cozy little café. The vibrant red color, the fluffy texture, and that creamy frosting—it was love at first bite! I knew I had to recreate this delightful dish in my own kitchen. And let me tell you, it was a culinary adventure that I cherish to this day.
Red velvet pancakes are not just a feast for the eyes; they are a celebration of flavors. The subtle cocoa undertones combined with the tangy cream cheese frosting create a symphony of taste that dances on your palate. Whether it’s a special occasion or just a lazy Sunday morning, these pancakes are sure to elevate your breakfast game.
As a passionate home cook, I believe that cooking is all about sharing experiences and creating memories. This recipe is not just about the ingredients; it’s about the joy of gathering around the table with loved ones, savoring each bite, and relishing the laughter that fills the air. So, grab your apron, and let’s embark on this delicious journey together!
In this article, I’ll guide you through the process of making these scrumptious red velvet pancakes with cream cheese frosting. From the ingredients to the cooking tips, I’ll share everything you need to know to make your pancake dreams come true. Trust me, once you try this recipe, you’ll want to whip it up again and again!
Ingredients for Red Velvet Pancakes with Cream Cheese Frosting Recipe
Before we dive into the cooking process, let’s gather our ingredients. Having everything ready makes the cooking experience smoother and more enjoyable. I always find that when I have my ingredients prepped, it feels like I’m setting the stage for a beautiful performance in the kitchen. So, let’s take a look at what we need to create these delightful red velvet pancakes!
Main Ingredients
- 1 cup all-purpose flour
- 2 tablespoons granulated sugar
- 1 tablespoon unsweetened cocoa powder
- 1 teaspoon baking powder
- 1/2 teaspoon baking soda
- 1/4 teaspoon salt
- 1 large egg
- 1 cup buttermilk (or regular milk with 1 tablespoon vinegar added)
- 2 tablespoons vegetable oil
- 1 teaspoon vanilla extract
- 1 tablespoon red food coloring (gel works best)
When it comes to the flour, I always opt for a high-quality all-purpose variety. It makes a noticeable difference in texture. And if you can find it, using gel food coloring gives a richer hue without altering the pancake’s consistency. Trust me, it’s worth it!
Optional Add-ons
- 1/2 cup chocolate chips (for a sweet surprise)
- Chopped nuts (like pecans or walnuts for added crunch)
- Fresh berries (strawberries or raspberries for a fruity twist)
- Whipped cream (for an extra indulgent topping)
These optional add-ons can take your pancakes to the next level! I love tossing in some chocolate chips for that extra sweetness. And if you’re feeling adventurous, why not top your pancakes with fresh berries? They add a lovely tartness that balances the sweetness of the cream cheese frosting beautifully.
Now that we have our ingredients ready, we’re one step closer to creating a breakfast masterpiece. Let’s move on to the next exciting part—preparing our red velvet pancakes!
How to Prepare Red Velvet Pancakes with Cream Cheese Frosting Recipe
Now that we have our ingredients all lined up like eager little soldiers, it’s time to get cooking! I find that the process of making red velvet pancakes is just as delightful as eating them. Each step is like a mini adventure, and I can’t wait to share it with you. Let’s dive into the preparation!
Step 1: Mixing the Dry Ingredients
First things first, we need to mix our dry ingredients. In a large bowl, combine the flour, sugar, cocoa powder, baking powder, baking soda, and salt. Whisk them together until they’re well blended. This step is crucial because it ensures that the leavening agents are evenly distributed, which helps our pancakes rise beautifully.
Tips for Step 1
- Make sure to sift the cocoa powder to avoid any lumps. Trust me, no one wants a surprise cocoa clump in their pancake!
- Use a whisk instead of a spoon for a fluffier mix. It’s like giving your dry ingredients a little workout!
Step 2: Combining the Wet Ingredients
Next up, let’s move on to the wet ingredients. In another bowl, whisk together the egg, buttermilk, vegetable oil, vanilla extract, and red food coloring. The vibrant red hue is what makes these pancakes so special, so don’t be shy with the food coloring!
Tips for Step 2
- For a richer flavor, let your buttermilk sit at room temperature for about 10 minutes before mixing. It makes a world of difference!
- Use gel food coloring for a more intense color without adding too much liquid. It’s like magic!
Step 3: Creating the Pancake Batter
Now, it’s time to bring our dry and wet ingredients together. Pour the wet mixture into the bowl with the dry ingredients. Gently fold them together using a spatula. Be careful not to overmix; a few lumps are perfectly fine. Overmixing can lead to tough pancakes, and we want them to be light and fluffy!
Tips for Step 3
- Remember, less is more! Stop mixing as soon as the batter comes together. It’s okay if it’s not perfectly smooth.
- If your batter seems too thick, add a splash of milk to loosen it up. We want it to flow like a gentle river!
Step 4: Cooking the Pancakes
Time to heat things up! Preheat a non-stick skillet or griddle over medium heat. Once it’s hot, lightly grease it with a bit of butter or oil. Pour about 1/4 cup of batter onto the skillet for each pancake. Cook until bubbles form on the surface, then flip and cook until golden brown on the other side.
Tips for Step 4
- Don’t rush the cooking process! Patience is key. If the heat is too high, the pancakes will burn before they’re cooked through.
- Keep your pancakes warm in a low oven while you cook the rest. It’s like giving them a cozy blanket!
Step 5: Preparing the Cream Cheese Frosting
While the pancakes are cooking, let’s whip up that luscious cream cheese frosting! In a medium bowl, beat together the cream cheese, butter, powdered sugar, and vanilla extract until smooth and creamy. This frosting is the cherry on top of our pancake masterpiece!
Tips for Step 5
- Make sure your cream cheese and butter are at room temperature for easy mixing. Cold ingredients can lead to lumps!
- If you want a little tanginess, add a splash of lemon juice. It brightens up the flavor beautifully!
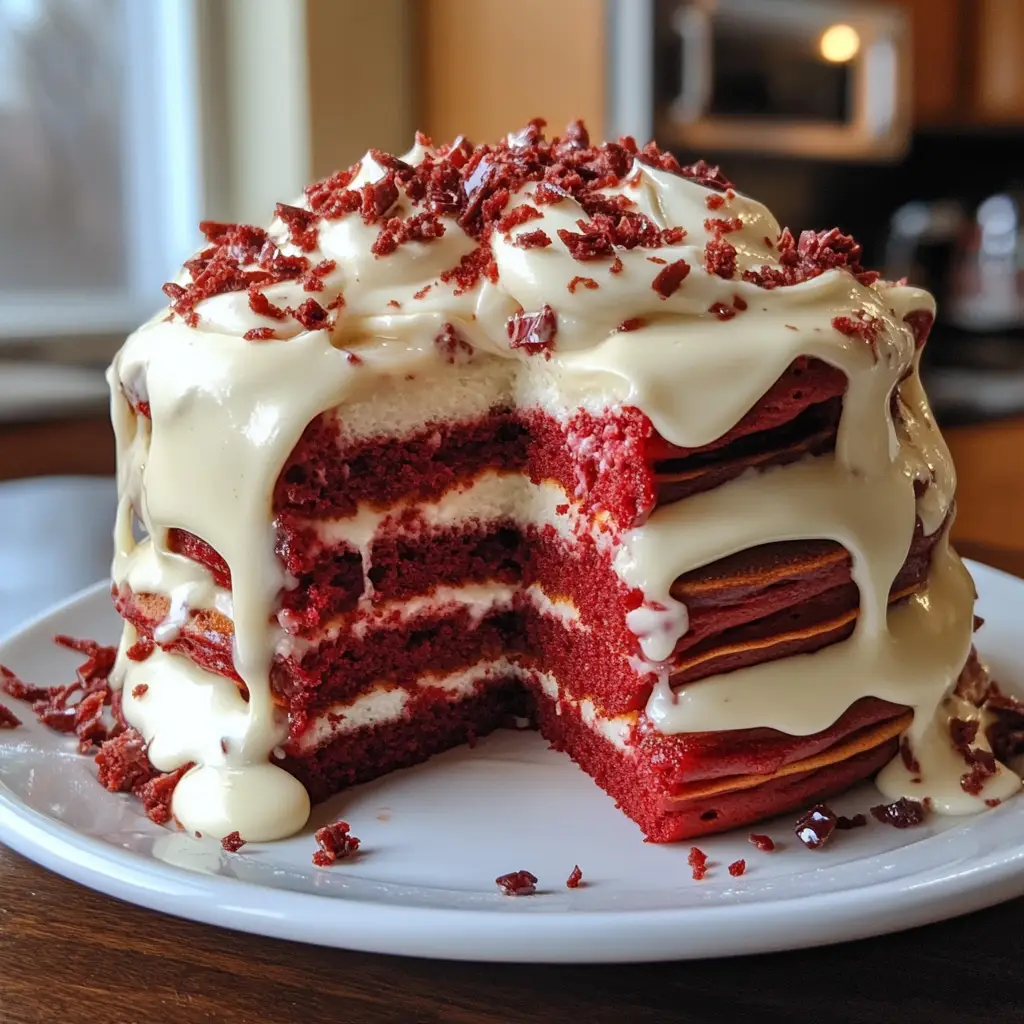
Step 6: Assembling the Pancakes
Finally, it’s time to assemble our delicious creation! Stack your pancakes on a plate, spreading a generous layer of cream cheese frosting between each one. Drizzle some extra frosting on top and, if you’re feeling fancy, add a sprinkle of chocolate chips or fresh berries for that extra flair!
Tips for Step 6
- For a fun presentation, use a piping bag to swirl the frosting on top. It’s like art on a plate!
- Don’t forget to take a moment to admire your work before diving in. It’s a feast for the eyes as much as the stomach!
And there you have it! Your red velvet pancakes with cream cheese frosting are ready to be devoured. I can already smell the sweet aroma wafting through the kitchen. Let’s move on to the next section and talk about the equipment you’ll need for this delightful recipe!
Equipment Needed for Red Velvet Pancakes with Cream Cheese Frosting Recipe
Before we dive into the deliciousness of red velvet pancakes, let’s make sure we have the right tools at our disposal. Having the right equipment can make the cooking process smoother and more enjoyable. Here’s a quick rundown of what you’ll need to whip up these delightful pancakes!
- Mixing Bowls: You’ll need at least two mixing bowls—one for the dry ingredients and another for the wet ingredients. I love using glass bowls because they’re sturdy and easy to clean!
- Whisk: A good whisk is essential for blending your ingredients. It helps incorporate air, making your pancakes light and fluffy. If you don’t have a whisk, a fork will do the trick!
- Spatula: A rubber or silicone spatula is perfect for folding the batter without overmixing. It’s like a gentle hug for your pancake mixture!
- Non-Stick Skillet or Griddle: This is where the magic happens! A non-stick surface ensures your pancakes cook evenly and don’t stick. If you don’t have one, a well-seasoned cast-iron skillet can work wonders too.
- Measuring Cups and Spoons: Accurate measurements are key to a successful pancake recipe. I always keep a set of measuring cups and spoons handy for precise ingredient portions.
- Electric Mixer: For the cream cheese frosting, an electric mixer makes the job easier. If you don’t have one, a good old-fashioned whisk will work, but it may take a bit more elbow grease!
- Piping Bag (Optional): If you want to get fancy with your frosting, a piping bag can help you create beautiful swirls. But don’t worry if you don’t have one; a simple spoon will do just fine!
With these tools in hand, you’re all set to embark on your pancake-making adventure. Remember, the right equipment can make all the difference, turning a simple recipe into a delightful experience. Now, let’s move on to the next section and explore some fun variations of our red velvet pancakes!
Variations of Red Velvet Pancakes with Cream Cheese Frosting Recipe
While the classic red velvet pancakes with cream cheese frosting are a showstopper on their own, I love experimenting with variations to keep things exciting! Each twist adds a unique flair, making breakfast even more delightful. Here are a few fun ideas to inspire your culinary creativity:
- Chocolate Chip Red Velvet Pancakes: For a sweet surprise, fold in some chocolate chips into the batter. The melty chocolate adds a rich depth that pairs beautifully with the cream cheese frosting.
- Red Velvet Pancakes with Berries: Top your pancakes with fresh strawberries or raspberries. The tartness of the berries cuts through the sweetness, creating a perfect balance.
- Nutty Red Velvet Pancakes: Add chopped pecans or walnuts to the batter for a delightful crunch. The nuts bring a lovely texture that complements the fluffy pancakes.
- Red Velvet Pancakes with Coconut: Mix in some shredded coconut for a tropical twist. The coconut adds a chewy texture and a hint of sweetness that’s simply irresistible.
- Spiced Red Velvet Pancakes: Incorporate a pinch of cinnamon or nutmeg into the batter for a warm, cozy flavor. It’s like a hug in pancake form!
These variations are just the tip of the iceberg! Feel free to mix and match to create your own signature version. Cooking is all about having fun and expressing yourself, so don’t be afraid to get creative. Now, let’s move on to some cooking notes that will help you perfect your red velvet pancake game!
Cooking Notes for Red Velvet Pancakes with Cream Cheese Frosting Recipe
As I’ve journeyed through the world of pancake-making, I’ve gathered a few cooking notes that can help you achieve pancake perfection. These little nuggets of wisdom can make a big difference in your red velvet pancake experience. Let’s dive in!
- Don’t Overmix: Remember, a few lumps in your batter are perfectly fine. Overmixing can lead to tough pancakes, and we want them to be light and fluffy, like clouds on a sunny day!
- Temperature Matters: Make sure your skillet is at the right temperature. If it’s too hot, your pancakes will burn on the outside while remaining raw inside. A medium heat is usually just right.
- Resting the Batter: If you have time, let your batter rest for about 10 minutes. This allows the gluten to relax, resulting in even fluffier pancakes. It’s like giving your batter a little nap!
- Keep Them Warm: If you’re making a big batch, keep your pancakes warm in a low oven (around 200°F) while you finish cooking the rest. This way, everyone can enjoy them hot and fresh!
- Experiment with Toppings: Don’t be shy with the toppings! Fresh fruits, whipped cream, or even a drizzle of maple syrup can elevate your pancakes to a whole new level of deliciousness.
These cooking notes are like little secrets I’ve learned along the way. They can help you navigate the pancake-making process with confidence and ease. Now that you’re armed with this knowledge, let’s move on to some serving suggestions that will make your red velvet pancakes shine!
Serving Suggestions for Red Velvet Pancakes with Cream Cheese Frosting Recipe
Now that our red velvet pancakes are beautifully stacked and drizzled with that luscious cream cheese frosting, it’s time to think about how to serve them! Presentation can elevate your dish from ordinary to extraordinary, and I love to get a little creative when it comes to serving. Here are some delightful serving suggestions that will make your pancakes the star of the breakfast table:
- Garnish with Fresh Berries: A handful of fresh strawberries or raspberries on top not only adds a pop of color but also a burst of freshness. The tartness of the berries complements the sweetness of the frosting perfectly!
- Drizzle with Maple Syrup: A light drizzle of warm maple syrup can add an extra layer of sweetness. It’s like a warm hug for your pancakes!
- Sprinkle with Powdered Sugar: A dusting of powdered sugar gives your pancakes a lovely, elegant touch. It’s like a sprinkle of fairy dust that makes everything feel special!
- Serve with Whipped Cream: A dollop of whipped cream on top can take your pancakes to the next level of indulgence. It’s creamy, dreamy, and oh-so-delicious!
- Pair with a Hot Beverage: Serve your pancakes with a steaming cup of coffee or a warm mug of hot chocolate. The cozy drink pairs beautifully with the rich flavors of the pancakes.
These serving suggestions are just a few ways to make your red velvet pancakes shine. Remember, the joy of cooking is not just in the making but also in the sharing. So gather your loved ones around the table, and enjoy the deliciousness together! Now, let’s move on to some tips for making the best red velvet pancakes ever!
Tips for Making the Best Red Velvet Pancakes with Cream Cheese Frosting Recipe
As I’ve whipped up countless batches of red velvet pancakes, I’ve gathered a treasure trove of tips that can help you achieve pancake perfection. These little nuggets of wisdom can elevate your cooking experience and ensure your pancakes turn out fluffy and delicious every time. Let’s dive into my favorite tips!
- Use Fresh Ingredients: Always check the freshness of your baking powder and baking soda. Expired leavening agents can lead to flat pancakes. Fresh ingredients are the secret to fluffy goodness!
- Room Temperature Ingredients: For the best results, let your eggs and buttermilk come to room temperature before mixing. This helps create a smoother batter and ensures even cooking.
- Don’t Rush the Cooking: Patience is key! Allow your pancakes to cook fully on one side before flipping. If you flip too soon, they may not be cooked through, and nobody wants a gooey pancake!
- Experiment with Flavors: Don’t hesitate to add a pinch of cinnamon or a splash of vanilla extract to the batter. These little additions can enhance the flavor profile and make your pancakes even more delightful.
- Make a Test Pancake: If you’re unsure about the heat of your skillet, make a small test pancake first. This way, you can adjust the temperature as needed before cooking the whole batch.
With these tips in your back pocket, you’re well on your way to creating the best red velvet pancakes with cream cheese frosting. Remember, cooking is all about having fun and enjoying the process. So, roll up your sleeves, and let’s make some pancake magic happen!
Breakdown of Time for Red Velvet Pancakes with Cream Cheese Frosting Recipe
Now that we’ve covered the ingredients, preparation, and all the delightful tips, let’s talk about the time it takes to whip up these scrumptious red velvet pancakes with cream cheese frosting. Knowing the time breakdown can help you plan your cooking adventure better. Here’s how it all adds up:
- Prep Time: 15 minutes. This includes gathering your ingredients, mixing the dry and wet components, and preparing the cream cheese frosting. It’s like setting the stage for a beautiful performance!
- Cooking Time: 15-20 minutes. Depending on how many pancakes you’re making, this time can vary. Each pancake takes about 2-3 minutes per side, so keep an eye on them as they cook to golden perfection.
- Total Time: 30-35 minutes. In just over half an hour, you can have a delightful stack of red velvet pancakes ready to impress your family or friends. It’s a quick and rewarding culinary journey!
With this time breakdown, you can easily fit these pancakes into your morning routine or plan for a special brunch. Just imagine the smiles on everyone’s faces as they dig into these fluffy, vibrant pancakes topped with creamy frosting. Now, let’s move on to the nutritional information to see how these delicious treats fit into our diets!
Nutritional Information for Red Velvet Pancakes with Cream Cheese Frosting Recipe
As a passionate home cook, I always find it helpful to know the nutritional information of the dishes I prepare. It allows me to enjoy my culinary creations while being mindful of what I’m eating. Here’s a breakdown of the nutritional information for a serving of red velvet pancakes with cream cheese frosting. Keep in mind that these values can vary based on the specific ingredients and portion sizes you use.
- Calories: Approximately 350-400 calories per serving (2 pancakes with frosting)
- Protein: 8-10 grams
- Carbohydrates: 50-55 grams
- Fat: 15-20 grams
- Sugar: 20-25 grams
- Fiber: 1-2 grams
These pancakes are a delightful treat, perfect for special occasions or a weekend brunch. While they do have a bit of sugar and fat, the joy they bring to the table is worth it! Plus, you can always make adjustments, like using whole wheat flour or reducing the sugar, to suit your dietary preferences. Remember, balance is key, and indulging in a delicious breakfast every now and then is part of the joy of cooking!
Frequently Asked Questions about Red Velvet Pancakes with Cream Cheese Frosting Recipe
As I’ve shared my love for red velvet pancakes, I’ve often encountered a few common questions from fellow home cooks. It’s always great to connect and share insights, especially when it comes to perfecting this delightful recipe. Here are some frequently asked questions that might help you on your pancake-making journey!
Can I make the pancake batter ahead of time?
Absolutely! You can prepare the pancake batter a few hours in advance. Just cover it and store it in the refrigerator. When you’re ready to cook, give it a gentle stir. If it seems too thick, add a splash of milk to loosen it up. It’s like having a delicious breakfast waiting for you!
Can I freeze leftover pancakes?
Yes, you can! Once your pancakes have cooled completely, stack them with parchment paper in between each one to prevent sticking. Place them in an airtight container or freezer bag and freeze for up to a month. When you’re ready to enjoy them, simply reheat in the toaster or microwave. It’s like a little taste of joy on a busy morning!
What can I use instead of buttermilk?
If you don’t have buttermilk on hand, no worries! You can easily make a substitute by adding 1 tablespoon of vinegar or lemon juice to 1 cup of regular milk. Let it sit for about 5-10 minutes until it thickens slightly. It’s a simple trick that works wonders!
Can I use whole wheat flour instead of all-purpose flour?
Yes, you can! Whole wheat flour can be a healthier alternative. However, keep in mind that it may result in denser pancakes. To lighten them up, you can mix half whole wheat flour and half all-purpose flour. It’s a great way to add some nutrition without sacrificing too much fluffiness!
How can I make the cream cheese frosting less sweet?
If you find the cream cheese frosting a bit too sweet for your taste, you can reduce the amount of powdered sugar. Alternatively, adding a splash of lemon juice or a pinch of salt can help balance the sweetness. It’s all about finding that perfect flavor harmony!
These questions are just a glimpse into the wonderful world of red velvet pancakes. I hope they help you feel more confident as you embark on your pancake-making adventure. Remember, cooking is all about experimenting and having fun, so don’t hesitate to make this recipe your own! Now, let’s wrap things up with a delightful conclusion on our red velvet pancakes with cream cheese frosting.
Conclusion on Red Velvet Pancakes with Cream Cheese Frosting Recipe
In conclusion, red velvet pancakes with cream cheese frosting are more than just a breakfast dish; they are a celebration of flavor, color, and joy. Each fluffy bite is a delightful experience that brings a smile to your face and warmth to your heart. Whether you’re treating yourself on a cozy weekend or impressing guests at a brunch gathering, these pancakes are sure to steal the show.
The combination of the rich cocoa flavor, the vibrant red hue, and the creamy frosting creates a symphony of taste that is simply irresistible. Plus, the versatility of this recipe allows you to customize it with your favorite add-ons, making it a canvas for your culinary creativity. From chocolate chips to fresh berries, the possibilities are endless!
So, gather your loved ones, whip up a batch of these scrumptious pancakes, and create lasting memories around the breakfast table. Remember, cooking is about sharing love and laughter, and these red velvet pancakes are the perfect way to do just that. Happy cooking, and may your kitchen always be filled with the sweet aroma of delicious pancakes!


