Introduction to Red Velvet Cake Recipe
Ah, the enchanting allure of a Red Velvet Cake! Every time I think about it, I can almost taste the velvety texture melting in my mouth. This cake isn’t just a dessert; it’s a celebration on a plate. I remember the first time I laid eyes on a Red Velvet Cake at a friend’s birthday party. Its vibrant red hue, contrasted with the creamy white frosting, was like a work of art. I was instantly captivated!
As I took my first bite, the rich cocoa flavor danced on my taste buds, while the tangy cream cheese frosting added a delightful twist. It was love at first bite! Since then, I’ve made it my mission to perfect my own Red Velvet Cake recipe. I’ve experimented with different ingredients and techniques, and I can’t wait to share my journey with you.
Red Velvet Cake has a fascinating history, too. Originating in the southern United States, it was once a simple chocolate cake with a hint of red food coloring. Over the years, it has transformed into the stunning dessert we know today. It’s often associated with special occasions, from weddings to holidays, making it a beloved choice for many.
In this article, I’ll guide you through my favorite Red Velvet Cake recipe, sharing tips and tricks that I’ve learned along the way. Whether you’re a seasoned baker or just starting out, I promise you’ll find joy in creating this masterpiece. So, let’s roll up our sleeves and dive into the world of Red Velvet Cake!
Ingredients for Red Velvet Cake Recipe
Now that we’ve set the stage for our culinary adventure, let’s gather our ingredients! The beauty of a Red Velvet Cake lies not just in its stunning appearance but also in the quality of the ingredients we use. I always say, “Great ingredients make great cakes!” So, let’s make sure we have everything we need to create this delicious masterpiece.
Main Ingredients
- 2 ½ cups all-purpose flour
- 1 ½ cups granulated sugar
- 1 teaspoon baking soda
- 1 teaspoon salt
- 1 teaspoon cocoa powder (unsweetened)
- 1 ½ cups vegetable oil
- 1 cup buttermilk, room temperature
- 2 large eggs, room temperature
- 2 tablespoons red food coloring (gel or liquid)
- 1 teaspoon vanilla extract
- 1 teaspoon white vinegar
When it comes to flour, I prefer using all-purpose flour for its versatility. It gives the cake a lovely structure without being too dense. As for the sugar, granulated sugar is my go-to, but feel free to experiment with alternatives if you’re looking for a healthier option. Just remember, the sweetness is key!
Optional Add-ons
- 1 cup chopped walnuts or pecans (for added crunch)
- 1 cup mini chocolate chips (for a sweet surprise)
- 1 teaspoon almond extract (for a unique flavor twist)
These optional add-ons can elevate your Red Velvet Cake to new heights! I love adding chopped nuts for a delightful crunch, while mini chocolate chips bring a fun surprise in every bite. If you’re feeling adventurous, a splash of almond extract can add a lovely depth of flavor. Just remember, the star of the show is still that beautiful red hue!
Now that we have our ingredients ready, let’s move on to the next exciting step: preparing our cake! But before we do, make sure to gather everything in one place. It makes the process smoother and more enjoyable. Trust me, it’s worth it!
How to Prepare Red Velvet Cake Recipe
Now that we have our ingredients ready, it’s time to roll up our sleeves and get baking! The process of making a Red Velvet Cake is as delightful as the cake itself. I find that each step is like a little adventure, leading us closer to that beautiful, velvety masterpiece. Let’s dive into the steps together!
Step 1: Preheat the Oven and Prepare the Pans
First things first, let’s preheat that oven to 350°F (175°C). This is crucial because a properly heated oven ensures even baking. While the oven warms up, I like to prepare my cake pans. Grease two 9-inch round cake pans with butter or cooking spray, and then dust them lightly with flour. This helps the cake layers release easily after baking.
Tips for Step 1
- For extra assurance, you can line the bottom of the pans with parchment paper. It’s a little trick I learned that guarantees a smooth release!
- Make sure your oven is fully preheated before placing the cake inside. A cold oven can lead to uneven baking.
Step 2: Mix Dry Ingredients
Next, let’s grab a large mixing bowl and combine our dry ingredients. In this bowl, whisk together the flour, baking soda, salt, cocoa powder, and sugar. Mixing these dry ingredients well is essential for an even distribution of flavors.
Tips for Step 2
- Use a sifter if you have one! Sifting helps to aerate the flour and removes any lumps, making for a lighter cake.
- Don’t skip the cocoa powder! It adds that subtle chocolate flavor that makes Red Velvet Cake so special.
Step 3: Cream Butter and Sugar
In another bowl, it’s time to cream together the vegetable oil and sugar. I use an electric mixer for this step, but a whisk works too if you’re feeling strong! Beat them together until the mixture is light and fluffy. This step is crucial as it incorporates air into the batter, giving our cake that lovely rise.
Tips for Step 3
- Don’t rush this step! Creaming should take about 3-5 minutes. The fluffier the mixture, the better the cake!
- Make sure your sugar is fully dissolved before moving on. You don’t want any gritty bits in your cake.
Step 4: Add Eggs and Vanilla
Now, let’s add the eggs and vanilla extract to our creamed mixture. I always crack the eggs into a separate bowl first to avoid any shell mishaps. Beat them in one at a time, ensuring each egg is fully incorporated before adding the next.
Tips for Step 4
- Using room temperature eggs helps them mix in better, creating a smoother batter.
- Don’t forget the vanilla! It adds a wonderful aroma and flavor that complements the cocoa.
Step 5: Incorporate Red Food Coloring
Here comes the fun part! Add the red food coloring to the mixture. I love using gel food coloring because it gives a vibrant hue without adding too much liquid. Mix it in until the color is evenly distributed, and you’ll see that beautiful red come to life!
Tips for Step 5
- Start with a small amount of food coloring and add more if needed. You can always deepen the color, but it’s hard to lighten it!
- Be careful not to stain your hands! I recommend using gloves or a spoon to mix.
Step 6: Alternate Adding Dry Ingredients and Buttermilk
Now, it’s time to bring everything together! Gradually add the dry ingredients to the wet mixture, alternating with the buttermilk. Start with a third of the dry mix, then half of the buttermilk, and repeat until everything is combined. This method helps to keep the batter smooth and prevents overmixing.
Tips for Step 6
- Mix just until combined. Overmixing can lead to a dense cake, and we want it to be light and fluffy!
- Make sure your buttermilk is at room temperature for the best results.
Step 7: Bake the Cake
Pour the batter evenly into the prepared cake pans. I like to use a spatula to smooth the tops. Now, it’s time to bake! Place the pans in the preheated oven and bake for about 25-30 minutes, or until a toothpick inserted in the center comes out clean.
Tips for Step 7
- Rotate the pans halfway through baking for even cooking.
- Keep an eye on the cakes as they bake. Ovens can vary, and you don’t want to overbake!
Step 8: Cool the Cake Layers
Once baked, remove the cakes from the oven and let them cool in the pans for about 10 minutes. Then, carefully transfer them to a wire rack to cool completely. This step is crucial for a perfect frosting application!
Tips for Step 8
- Don’t rush the cooling process. Frosting a warm cake can lead to a melty mess!
- If you’re in a hurry, you can place the cakes in the fridge for a quick cool-down.
And there you have it! Each step brings us closer to that stunning Red Velvet Cake. I can already smell the deliciousness wafting through my kitchen. Next up, we’ll talk about the equipment you’ll need to make this cake a reality!
Equipment Needed for Red Velvet Cake Recipe
Before we dive into the baking process, let’s gather our tools! Having the right equipment makes all the difference in creating a perfect Red Velvet Cake. I’ve learned that a well-equipped kitchen can turn a baking adventure into a delightful experience. Here’s what you’ll need:
- Mixing Bowls: A set of mixing bowls in various sizes is essential. I usually use a large bowl for the dry ingredients and a medium one for the wet ingredients.
- Electric Mixer: While a whisk can do the job, an electric mixer saves time and effort, especially when creaming butter and sugar. If you don’t have one, a sturdy whisk will work just fine!
- Measuring Cups and Spoons: Accurate measurements are key to baking success. I always keep a set of dry and liquid measuring cups handy.
- Rubber Spatula: This tool is perfect for scraping down the sides of bowls and ensuring every bit of batter is mixed in. It’s a must-have in my kitchen!
- 9-inch Round Cake Pans: You’ll need two of these for our cake layers. If you don’t have round pans, square pans can work too; just adjust the baking time accordingly.
- Wire Rack: A wire rack is great for cooling the cake layers evenly. If you don’t have one, you can use a plate or cutting board, but a wire rack is ideal.
- Parchment Paper (optional): Lining your cake pans with parchment paper can help with easy release. If you don’t have it, just greasing and flouring the pans will do the trick!
With these tools at your side, you’re all set to embark on your Red Velvet Cake journey! Remember, the right equipment not only makes the process smoother but also adds to the joy of baking. Now, let’s get ready to explore the delicious variations of this classic cake!
Variations of Red Velvet Cake Recipe
As much as I adore the classic Red Velvet Cake, there’s a whole world of variations waiting to be explored! Each twist adds a unique flair, making this beloved dessert even more exciting. Here are a few delightful variations that I’ve tried and loved:
- Red Velvet Cupcakes: If you’re looking for a fun, portable treat, try turning your cake batter into cupcakes! Just adjust the baking time to about 18-20 minutes. Top them with cream cheese frosting for a delightful bite-sized indulgence.
- Red Velvet Cheesecake: For a rich and creamy twist, layer a cheesecake filling between the cake layers. The combination of tangy cheesecake and the classic red velvet flavor is simply divine!
- Red Velvet Pancakes: Imagine starting your day with fluffy red velvet pancakes! Just use the same batter, and serve them with cream cheese syrup for a breakfast that feels like dessert.
- Red Velvet Trifle: Layer pieces of cake with whipped cream and berries in a glass dish for a stunning dessert. It’s a beautiful way to showcase the vibrant color and flavors!
These variations not only keep things interesting but also allow you to share the joy of Red Velvet Cake in different forms. I love experimenting with these ideas, and I encourage you to get creative in your kitchen! Who knows, you might just discover your new favorite version of this classic treat.
Cooking Notes for Red Velvet Cake Recipe
As I’ve journeyed through the world of baking, I’ve picked up a few essential cooking notes that can make a significant difference in your Red Velvet Cake experience. These little nuggets of wisdom can help you avoid common pitfalls and ensure your cake turns out perfectly every time.
- Room Temperature Ingredients: Always use room temperature eggs and buttermilk. This helps create a smoother batter and ensures even mixing. I like to take them out of the fridge about 30 minutes before I start baking.
- Don’t Overmix: When combining the wet and dry ingredients, mix just until combined. Overmixing can lead to a dense cake, and we want that light, fluffy texture!
- Check for Doneness: Ovens can vary, so keep an eye on your cake as it bakes. A toothpick inserted in the center should come out clean or with a few moist crumbs, but not wet batter.
- Cool Completely: Allow your cake layers to cool completely before frosting. This prevents the frosting from melting and sliding off, ensuring a beautiful presentation.
- Storage Tips: If you have leftovers (which is rare in my house!), store the cake in an airtight container at room temperature for up to three days. For longer storage, refrigerate it, but let it come to room temperature before serving for the best flavor.
These cooking notes are like little secrets I’ve gathered over the years. They help me create a Red Velvet Cake that’s not just good but truly exceptional. I hope they guide you on your baking adventure, making it as enjoyable and rewarding as it can be!
Serving Suggestions for Red Velvet Cake Recipe
Now that we’ve crafted our beautiful Red Velvet Cake, it’s time to think about how to serve it! Presentation can elevate the experience, and I love to get a little creative when it comes to serving this delightful dessert. Here are some of my favorite serving suggestions that will make your cake shine:
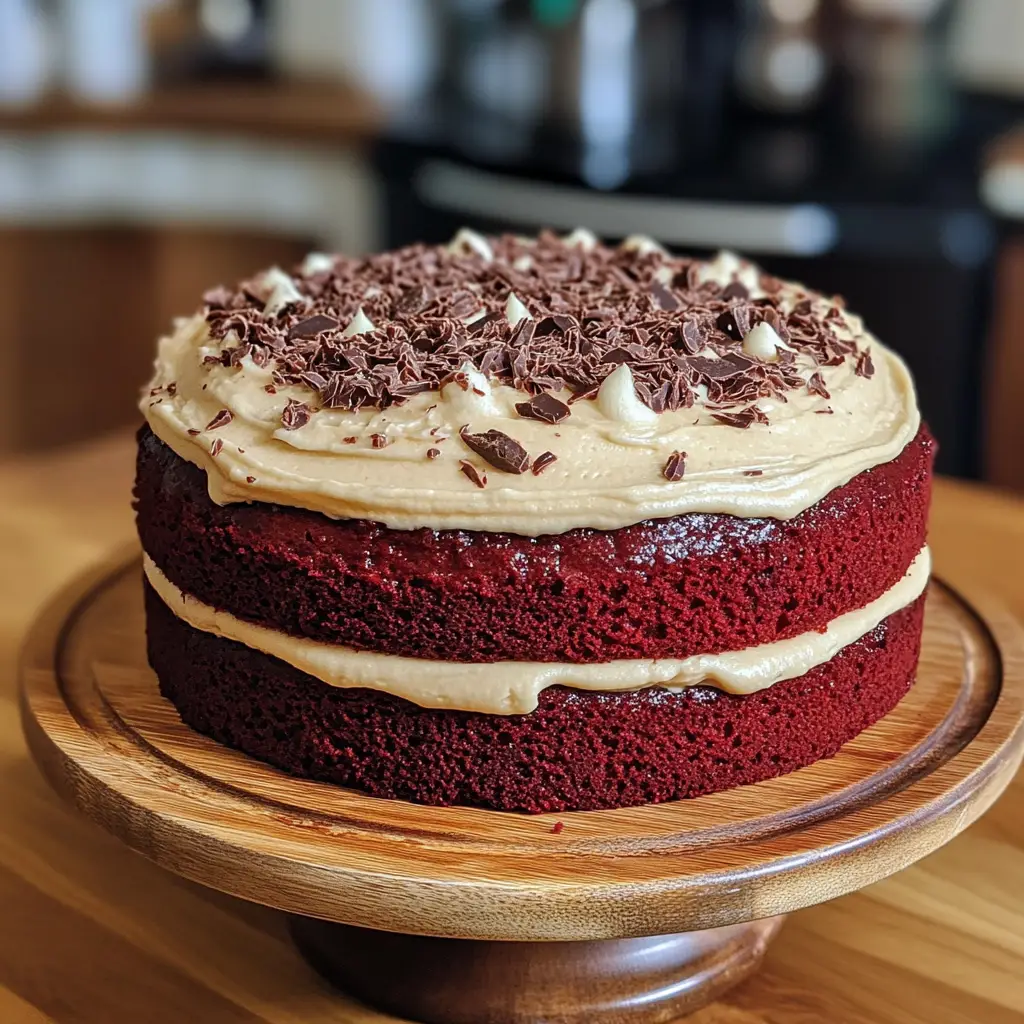
- Classic Cream Cheese Frosting: The traditional pairing of Red Velvet Cake is a rich cream cheese frosting. Spread a generous layer between the cake layers and on top. Don’t forget to let some frosting cascade down the sides for that beautiful, drippy effect!
- Fresh Berries: Add a pop of color and freshness by garnishing your cake with fresh berries like strawberries or raspberries. They not only look stunning but also provide a lovely tart contrast to the sweetness of the cake.
- Chocolate Shavings: For a touch of elegance, sprinkle some chocolate shavings on top. It adds a delightful crunch and a hint of chocolate flavor that complements the cake beautifully.
- Serve with Ice Cream: A scoop of vanilla or cream cheese ice cream on the side takes the indulgence to another level. The cold ice cream pairs perfectly with the warm, soft cake.
- Layered Trifle: If you’re feeling adventurous, consider serving the cake as a trifle. Layer pieces of cake with whipped cream and fruit in a glass dish for a stunning presentation that’s sure to impress!
These serving suggestions not only enhance the visual appeal but also add layers of flavor and texture to your Red Velvet Cake experience. I love to mix and match these ideas depending on the occasion. Whether it’s a birthday celebration or a cozy family dinner, these touches make every slice feel special. So, gather your loved ones, slice that cake, and enjoy every delicious bite!
Tips for Perfecting Your Red Velvet Cake Recipe
As I’ve baked my fair share of Red Velvet Cakes, I’ve gathered a treasure trove of tips that can help you achieve cake perfection. Each little detail can make a world of difference, and I’m excited to share these insights with you. Let’s dive into my top tips for perfecting your Red Velvet Cake!
- Use Quality Ingredients: The better the ingredients, the better the cake! I always opt for high-quality cocoa powder and pure vanilla extract. It truly elevates the flavor.
- Don’t Skip the Vinegar: The vinegar in the recipe reacts with the baking soda, helping the cake rise beautifully. It also adds a subtle tang that balances the sweetness.
- Chill Your Cake Layers: After cooling, I like to wrap my cake layers in plastic wrap and chill them in the fridge for a bit. This makes them easier to frost and helps the flavors meld together.
- Experiment with Frosting: While cream cheese frosting is classic, don’t hesitate to try other frostings like whipped cream or chocolate ganache. Each brings a unique twist to the cake!
- Practice Patience: Baking is a science, and sometimes it requires a little patience. Allow your cake to cool completely before frosting, and take your time with each step. Good things come to those who wait!
These tips have been my guiding stars in the kitchen, helping me create a Red Velvet Cake that’s not just good but truly unforgettable. I hope they inspire you to embrace your baking journey and create your own delicious masterpiece!
Breakdown of Time for Red Velvet Cake Recipe
As a passionate home cook, I know that timing is everything in the kitchen. When it comes to baking a Red Velvet Cake, having a clear understanding of the time involved can help you plan your baking adventure more effectively. Here’s a quick breakdown of the time you’ll need:
- Prep Time: Approximately 30 minutes. This includes gathering your ingredients, mixing the batter, and preparing the pans. I always find that taking my time during prep makes the baking process smoother and more enjoyable.
- Cooking Time: About 25-30 minutes. This is the time it takes for the cake layers to bake to perfection. Keep an eye on them, as every oven is a little different!
- Total Time: Roughly 1 hour. This includes both prep and cooking time. However, don’t forget to factor in additional cooling time before frosting, which can take about 30 minutes to an hour, depending on your kitchen temperature.
So, in total, you’re looking at around 1.5 to 2 hours from start to finish, including cooling. I always find it helpful to set aside a little extra time, just in case. After all, baking should be a joyful experience, not a rushed one! With this time breakdown, you’re all set to embark on your Red Velvet Cake journey. Happy baking!
Nutritional Information for Red Velvet Cake Recipe
As a passionate home cook, I believe that enjoying a delicious slice of Red Velvet Cake can be part of a balanced lifestyle. While this cake is certainly a treat, it’s good to know what you’re indulging in. Here’s a general breakdown of the nutritional information for one slice (about 1/12 of the cake) of classic Red Velvet Cake with cream cheese frosting:
- Calories: Approximately 350-400 calories
- Fat: 20 grams (of which saturated fat is about 8 grams)
- Carbohydrates: 45 grams
- Fiber: 1 gram
- Sugar: 30 grams
- Protein: 4 grams
Keep in mind that these values can vary based on the specific ingredients and portion sizes you use. If you’re looking to lighten things up, consider using less sugar or experimenting with healthier alternatives. I’ve found that even small adjustments can make a difference without sacrificing flavor!
Ultimately, the joy of baking and sharing this delightful cake far outweighs the numbers. So, enjoy every bite, and remember that it’s all about balance and savoring the moments spent in the kitchen!
Frequently Asked Questions about Red Velvet Cake Recipe
As I’ve shared my love for Red Velvet Cake, I often get questions from fellow baking enthusiasts. It’s always exciting to see others eager to dive into this delicious adventure! Here are some of the most frequently asked questions I’ve encountered, along with my answers to help you on your baking journey.
What makes Red Velvet Cake red?
The vibrant red color of Red Velvet Cake comes from the addition of red food coloring. Originally, the cake had a subtle reddish hue due to the reaction between cocoa powder and acidic ingredients like buttermilk and vinegar. However, to achieve that striking red color we know today, food coloring is added. I prefer using gel food coloring for its rich color without altering the cake’s texture.
Can I make Red Velvet Cake without buttermilk?
Absolutely! If you don’t have buttermilk on hand, you can easily make a substitute. Just mix one cup of milk with one tablespoon of vinegar or lemon juice. Let it sit for about 5-10 minutes until it thickens slightly. This will give you a similar tangy flavor and acidity that buttermilk provides.
How do I store leftover Red Velvet Cake?
To keep your Red Velvet Cake fresh, store it in an airtight container at room temperature for up to three days. If you want to keep it longer, you can refrigerate it for up to a week. Just remember to let it come to room temperature before serving for the best flavor and texture!
Can I freeze Red Velvet Cake?
Yes, you can freeze Red Velvet Cake! I recommend wrapping the cooled cake layers tightly in plastic wrap and then placing them in a freezer-safe bag. They can be frozen for up to three months. When you’re ready to enjoy, simply thaw them in the refrigerator overnight and frost as desired.
What frosting goes best with Red Velvet Cake?
The classic pairing for Red Velvet Cake is cream cheese frosting, which complements the cake’s flavors beautifully. However, you can also experiment with other frostings like whipped cream, chocolate ganache, or even a vanilla buttercream. Each option brings a unique twist to this beloved dessert!
These questions reflect the curiosity and excitement that comes with baking. I hope my answers help you feel more confident as you embark on your own Red Velvet Cake adventure. Remember, every baking experience is a chance to learn and grow, so don’t hesitate to ask questions and explore new ideas!
Conclusion on Red Velvet Cake Recipe
As I reflect on my journey with the Red Velvet Cake, I can’t help but smile at the joy it brings. This cake is more than just a dessert; it’s a symbol of celebration, love, and creativity in the kitchen. The vibrant red color, the rich cocoa flavor, and the tangy cream cheese frosting come together to create a delightful experience that’s hard to resist.
Whether you’re baking for a special occasion or simply treating yourself, this Red Velvet Cake recipe is sure to impress. It’s a wonderful way to share your passion for baking with friends and family, creating memories that will last a lifetime. Plus, with the tips and variations I’ve shared, you can make this cake your own, adding your personal touch to each creation.
So, gather your ingredients, roll up your sleeves, and let the magic of baking unfold in your kitchen. I can’t wait for you to experience the joy of making and sharing your very own Red Velvet Cake. Happy baking!


