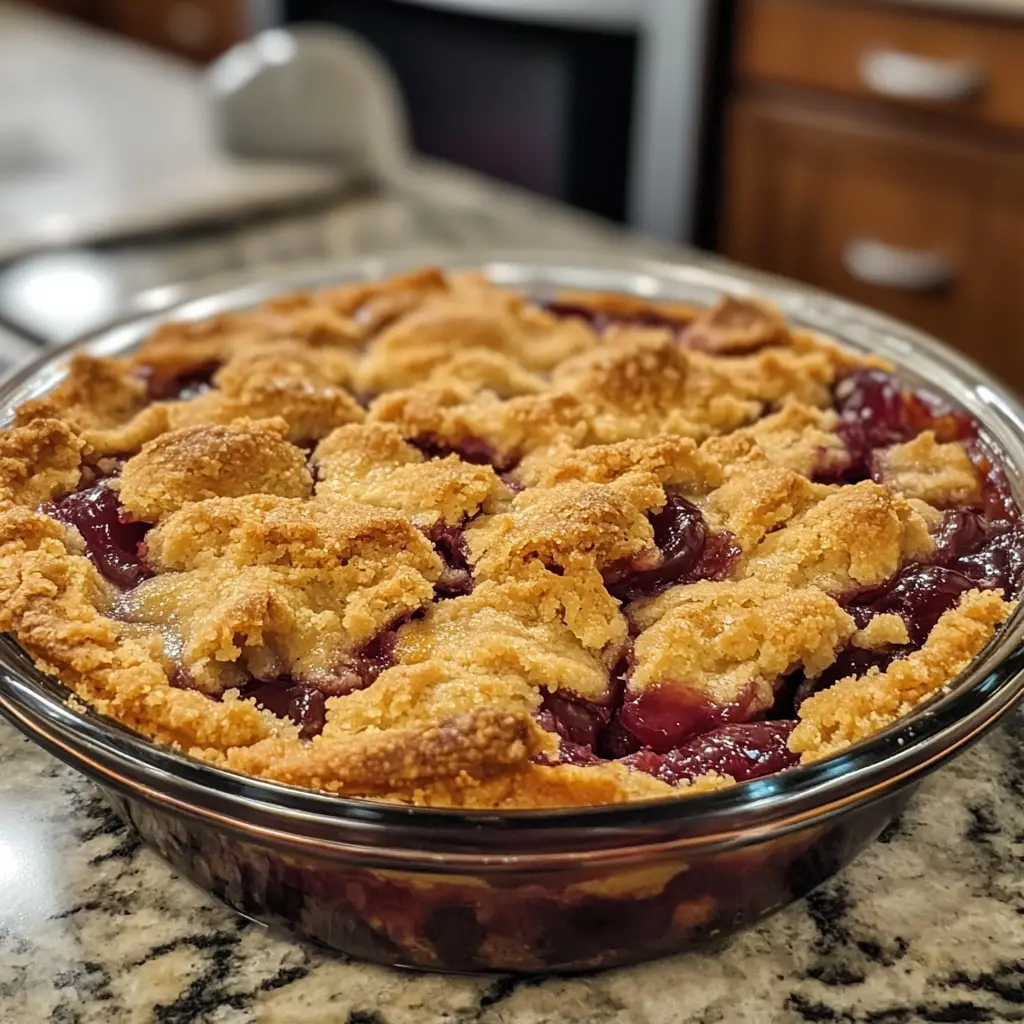
Introduction to Peanut Butter Jelly Cobbler
As a passionate home cook, I often find myself reminiscing about the simple joys of childhood. One of my fondest memories is the delightful combination of peanut butter and jelly sandwiches. They were a staple in my lunchbox, bringing a smile to my face with every bite. Now, imagine taking that nostalgic flavor and transforming it into a warm, gooey dessert. That’s where the magic of Peanut Butter Jelly Cobbler comes in!
This cobbler is not just a dessert; it’s a celebration of flavors that dance together like old friends at a reunion. The creamy richness of peanut butter mingles with the sweet, fruity notes of jelly, creating a symphony of taste that warms the heart. I remember the first time I made this cobbler for my family. The aroma wafted through the kitchen, drawing everyone in like bees to honey. When they took their first bite, their eyes lit up with joy, and I knew I had struck gold!
What I love most about this recipe is its simplicity. It’s perfect for those busy weeknights when you want to whip up something special without spending hours in the kitchen. Plus, it’s a fantastic way to use up any leftover jelly or peanut butter you might have lurking in your pantry. Trust me, once you try this Peanut Butter Jelly Cobbler, it will become a beloved favorite in your home, just like it is in mine.
So, grab your apron and let’s dive into this delightful recipe that’s sure to bring back sweet memories and create new ones!
Ingredients for Peanut Butter Jelly Cobbler
Before we embark on this delicious journey, let’s gather our ingredients. I always believe that the best dishes start with quality ingredients. For this Peanut Butter Jelly Cobbler, you’ll need a few staples that you might already have in your kitchen. Here’s what you’ll need:
Main Ingredients
- 1 cup all-purpose flour
- 1 cup granulated sugar
- 1 tablespoon baking powder
- 1/2 teaspoon salt
- 1 cup milk
- 1/2 cup unsalted butter, melted
- 1 cup creamy peanut butter
- 1 cup jelly (your favorite flavor, but grape or strawberry works wonders!)
When it comes to the jelly, I often opt for homemade if I have some on hand. The fresh taste really elevates the cobbler. If you’re using store-bought, look for brands that use real fruit and minimal additives. It makes a world of difference!
Optional Add-ons
- 1/2 teaspoon vanilla extract for added flavor
- 1/2 cup chopped nuts (like peanuts or walnuts) for a delightful crunch
- 1/2 teaspoon cinnamon for a warm, spicy kick
- Fresh fruit (like sliced bananas or strawberries) to layer with the jelly
These optional add-ons can take your cobbler to the next level. I love adding a sprinkle of cinnamon; it reminds me of cozy autumn days. Feel free to get creative and mix in whatever you have on hand. Cooking is all about experimenting and making it your own!
How to Prepare Peanut Butter Jelly Cobbler
Now that we have our ingredients ready, it’s time to roll up our sleeves and get cooking! Making Peanut Butter Jelly Cobbler is a delightful process that fills your kitchen with warmth and sweet aromas. Let’s dive into the steps together!
Step 1: Preheat the Oven
The first step is to preheat your oven to 350°F (175°C). This ensures that your cobbler bakes evenly and comes out perfectly golden brown.
Tips for Preheating
- Always preheat your oven before mixing your ingredients. This way, you won’t have to wait around when you’re ready to bake.
- Use an oven thermometer to check the temperature. Sometimes, ovens can be a bit off, and you want to make sure it’s just right!
Step 2: Prepare the Cobbler Base
In a large mixing bowl, combine the flour, sugar, baking powder, and salt. Whisk them together until they’re well blended. Then, add in the milk and melted butter. Stir until everything is just combined. It’s okay if there are a few lumps; we don’t want to overmix!
Tips for Mixing Ingredients
- Use a rubber spatula to gently fold the ingredients together. This helps keep the batter light and fluffy.
- If you’re adding vanilla extract or cinnamon, now’s the time to mix it in!
Step 3: Add Peanut Butter and Jelly
Now comes the fun part! Pour half of the batter into a greased baking dish. Then, dollop spoonfuls of peanut butter and jelly over the batter. Use a knife or a toothpick to swirl them together gently. Finally, pour the remaining batter on top, covering the peanut butter and jelly.
Tips for Layering
- For a beautiful presentation, try to keep some of the jelly and peanut butter visible on top.
- Don’t worry about making it perfect; the swirls will create a lovely marbled effect as it bakes!
Step 4: Bake the Cobbler
Place your baking dish in the preheated oven and bake for about 30-35 minutes. You’ll know it’s done when the top is golden brown and a toothpick inserted in the center comes out clean.
Tips for Baking Time
- Keep an eye on the cobbler during the last few minutes of baking. Ovens can vary, and you don’t want it to overbake!
- If the top is browning too quickly, you can cover it loosely with aluminum foil to prevent burning.
Once it’s done, let it cool for a few minutes before serving. The anticipation will be worth it when you take that first warm, gooey bite!
Equipment Needed for Peanut Butter Jelly Cobbler
Before we dive into the baking magic, let’s gather the tools we’ll need to create this delightful Peanut Butter Jelly Cobbler. Don’t worry; you won’t need any fancy gadgets! Here’s a simple list of equipment that will make your baking experience smooth and enjoyable:
- Mixing Bowls: A large mixing bowl is essential for combining your ingredients. If you don’t have one, any large bowl will do the trick!
- Whisk: A whisk helps blend the dry ingredients and mix in the wet ones. If you don’t have a whisk, a fork can work just as well.
- Rubber Spatula: This handy tool is perfect for folding the batter and scraping down the sides of the bowl. If you’re in a pinch, a wooden spoon can also do the job.
- Baking Dish: A 9×13 inch baking dish is ideal for this recipe. If you don’t have one, any similar-sized oven-safe dish will work.
- Measuring Cups and Spoons: Accurate measurements are key to a successful cobbler. If you don’t have measuring tools, you can use a standard coffee mug or spoon, but keep in mind that results may vary.
- Oven Mitts: Safety first! Protect your hands when taking the hot cobbler out of the oven.
With these simple tools at your side, you’re all set to create a delicious Peanut Butter Jelly Cobbler that will have everyone asking for seconds. Let’s get baking!
Variations of Peanut Butter Jelly Cobbler
One of the things I adore about cooking is the endless possibilities for creativity. Peanut Butter Jelly Cobbler is no exception! While the classic version is absolutely delightful, there are several fun variations you can try to keep things exciting. Here are a few ideas that I’ve experimented with and loved:
- Chocolate Peanut Butter Cobbler: Add a touch of cocoa powder to the batter for a rich chocolate flavor. You can even swirl in some chocolate chips along with the peanut butter and jelly for an extra indulgent treat!
- Nutty Banana Cobbler: Layer sliced bananas with the jelly for a fruity twist. The combination of peanut butter, jelly, and bananas is a match made in heaven!
- Berry Medley Cobbler: Instead of just one type of jelly, mix it up with a combination of different berry jellies or even fresh berries. The burst of flavors will make your taste buds dance!
- Gluten-Free Cobbler: Substitute the all-purpose flour with a gluten-free blend. It’s a great way to make this dessert accessible for everyone!
These variations not only add a unique spin to the classic recipe but also allow you to tailor the cobbler to your personal taste. I love experimenting with different flavors, and I encourage you to do the same! After all, cooking is about having fun and making delicious memories.
Cooking Notes for Peanut Butter Jelly Cobbler
As I’ve learned through my culinary adventures, a few cooking notes can make all the difference when preparing Peanut Butter Jelly Cobbler. Here are some tips that I’ve gathered over time to ensure your cobbler turns out perfectly every time:
- Room Temperature Ingredients: For the best results, make sure your eggs, milk, and butter are at room temperature. This helps create a smoother batter and ensures even baking.
- Don’t Overmix: When combining your ingredients, remember that a few lumps are okay! Overmixing can lead to a dense cobbler, and we want it to be light and fluffy.
- Cooling Time: Allow the cobbler to cool for about 10-15 minutes before serving. This helps the flavors meld together and makes it easier to slice.
- Serving Warm: This cobbler is best enjoyed warm, straight from the oven. The gooey peanut butter and jelly create a delightful experience that’s hard to resist!
- Storage Tips: If you have leftovers (which is rare in my house!), store them in an airtight container in the fridge. Reheat in the microwave for a few seconds before enjoying again.
These cooking notes are like little nuggets of wisdom that I’ve picked up along the way. They help me create a Peanut Butter Jelly Cobbler that’s not just good, but truly unforgettable. Happy baking!
Serving Suggestions for Peanut Butter Jelly Cobbler
Now that your Peanut Butter Jelly Cobbler is baked to perfection, it’s time to think about how to serve it! This dessert is incredibly versatile, and I love to get a little creative when it comes to presentation. Here are some of my favorite serving suggestions that will elevate your cobbler experience:
- With a Scoop of Ice Cream: There’s nothing quite like warm cobbler paired with a scoop of vanilla ice cream. The cold creaminess melts into the gooey cobbler, creating a delightful contrast that’s simply irresistible!
- Drizzled with Chocolate Sauce: For a decadent twist, drizzle some chocolate sauce over the top. It adds a rich flavor that complements the peanut butter beautifully.
- Sprinkled with Powdered Sugar: A light dusting of powdered sugar can make your cobbler look like a fancy dessert. It’s a simple touch that adds a bit of elegance!
- With Fresh Fruit: Serve slices of fresh strawberries or bananas on the side. The fruity freshness balances the richness of the cobbler and adds a pop of color to your plate.
- As a Breakfast Treat: Don’t hesitate to enjoy this cobbler for breakfast! Serve it warm with a dollop of yogurt on top for a delightful morning treat.
These serving suggestions not only enhance the flavor but also make your Peanut Butter Jelly Cobbler a feast for the eyes. I love to mix and match these ideas depending on the occasion. Whether it’s a cozy family dinner or a gathering with friends, this cobbler is sure to impress!
Tips for Making the Best Peanut Butter Jelly Cobbler
As I’ve whipped up countless batches of Peanut Butter Jelly Cobbler, I’ve gathered a treasure trove of tips that can help you achieve the best results. These little nuggets of wisdom can make a world of difference in your baking journey. Here are my top tips to ensure your cobbler is a hit every time:
- Use Quality Peanut Butter: Opt for a creamy, natural peanut butter without added sugars or oils. It creates a smoother texture and a richer flavor that shines through in the cobbler.
- Experiment with Jellies: Don’t be afraid to mix and match different jelly flavors! Each one brings its own unique twist, so try raspberry, apricot, or even a spicy jalapeño jelly for a fun kick.
- Check for Doneness: Every oven is different, so keep an eye on your cobbler as it bakes. A toothpick should come out clean, but a few moist crumbs are perfectly fine!
- Let It Rest: Allow your cobbler to cool for about 10 minutes before serving. This helps it set up a bit, making it easier to slice and serve.
- Get Creative with Toppings: Don’t stop at ice cream! Try whipped cream, caramel sauce, or even a sprinkle of granola for added texture and flavor.
These tips are like little secrets I’ve learned along the way, and I’m excited to share them with you. With these in your back pocket, you’ll be well on your way to creating a Peanut Butter Jelly Cobbler that’s not just good, but absolutely unforgettable!
Breakdown of Time for Peanut Butter Jelly Cobbler
As a home cook, I know that time is often of the essence, especially when you’re eager to enjoy a delicious dessert. Here’s a quick breakdown of the time you’ll need to whip up this delightful Peanut Butter Jelly Cobbler:
- Prep Time: Approximately 15 minutes. This includes gathering your ingredients, mixing the batter, and layering the peanut butter and jelly.
- Cooking Time: About 30-35 minutes. This is the time it takes for your cobbler to bake to golden perfection in the oven.
- Total Time: Roughly 50-55 minutes. In less than an hour, you can have a warm, gooey dessert ready to serve!
With this time breakdown, you can easily fit this recipe into your busy schedule. I love how quick and simple it is to create something so delicious. Trust me, the sweet aroma wafting through your kitchen will be well worth the wait!
Nutritional Information for Peanut Butter Jelly Cobbler
As a passionate home cook, I always find it helpful to know the nutritional content of the dishes I prepare. While Peanut Butter Jelly Cobbler is a delightful treat, it’s good to be mindful of what we’re indulging in. Here’s a general breakdown of the nutritional information per serving, assuming the recipe yields about 12 servings:
- Calories: Approximately 250 calories
- Protein: 6 grams
- Carbohydrates: 35 grams
- Fat: 10 grams
- Saturated Fat: 4 grams
- Sugar: 15 grams
- Fiber: 1 gram
Keep in mind that these values can vary based on the specific ingredients you use, such as the type of peanut butter or jelly. If you’re looking to make this dessert a bit healthier, consider using natural peanut butter and low-sugar jelly. You can also swap out some of the sugar for a sugar substitute if you prefer. No matter how you make it, this Peanut Butter Jelly Cobbler is sure to bring joy to your table!
Frequently Asked Questions about Peanut Butter Jelly Cobbler
As I’ve shared my love for Peanut Butter Jelly Cobbler, I’ve often received questions from fellow home cooks eager to try this delightful dessert. I love connecting with others through cooking, and I’m excited to address some of the most common queries I’ve encountered. Here are a few frequently asked questions that might help you on your cobbler-making journey:
Can I use crunchy peanut butter instead of creamy?
Absolutely! Using crunchy peanut butter adds a delightful texture to the cobbler. The little peanut pieces create a fun contrast with the smooth jelly. Just keep in mind that it may alter the overall consistency slightly, but it will still be delicious!
What type of jelly works best for this recipe?
While grape and strawberry jelly are classic choices, feel free to experiment with your favorites! Raspberry, apricot, or even mixed berry jellies can add a unique twist. The key is to choose a jelly that you love, as it will shine through in the final dish.
Can I make this cobbler ahead of time?
Yes, you can prepare the batter and layer the peanut butter and jelly in advance. Just cover it tightly and store it in the fridge for up to a day. When you’re ready to bake, simply pop it in the oven. It’s a great way to save time for gatherings or busy weeknights!
How do I store leftovers?
If you happen to have any leftovers (which is rare in my house!), store them in an airtight container in the fridge. The cobbler will stay fresh for about 3-4 days. To enjoy it again, simply reheat individual portions in the microwave for a few seconds. It’s just as tasty the next day!
Can I freeze Peanut Butter Jelly Cobbler?
Yes, you can freeze the cobbler! Just make sure it’s completely cooled before wrapping it tightly in plastic wrap and then aluminum foil. It can be frozen for up to 2 months. When you’re ready to enjoy it, thaw it in the fridge overnight and reheat in the oven for the best results.
These questions reflect the curiosity and excitement that comes with trying a new recipe. I hope my answers help you feel more confident as you embark on your Peanut Butter Jelly Cobbler adventure. Remember, cooking is all about having fun and making delicious memories, so don’t hesitate to reach out if you have more questions!
Conclusion on Peanut Butter Jelly Cobbler
As I wrap up this delightful journey into the world of Peanut Butter Jelly Cobbler, I can’t help but feel a sense of warmth and nostalgia. This recipe is more than just a dessert; it’s a celebration of flavors that brings back cherished memories while creating new ones. The combination of creamy peanut butter and sweet jelly, all nestled in a warm, fluffy cobbler, is a treat that appeals to both young and old alike.
What I love most about this cobbler is its simplicity and versatility. It’s a quick and easy dessert that can be whipped up on a busy weeknight or served at a special gathering. Plus, with endless variations and serving suggestions, you can make it your own every time. Whether you enjoy it warm with a scoop of ice cream or as a breakfast treat with yogurt, the joy it brings is undeniable.
So, the next time you find yourself craving something sweet, remember this Peanut Butter Jelly Cobbler. It’s a recipe that not only satisfies your taste buds but also fills your home with love and laughter. I hope you enjoy making it as much as I do, and may it become a beloved favorite in your kitchen for years to come!


