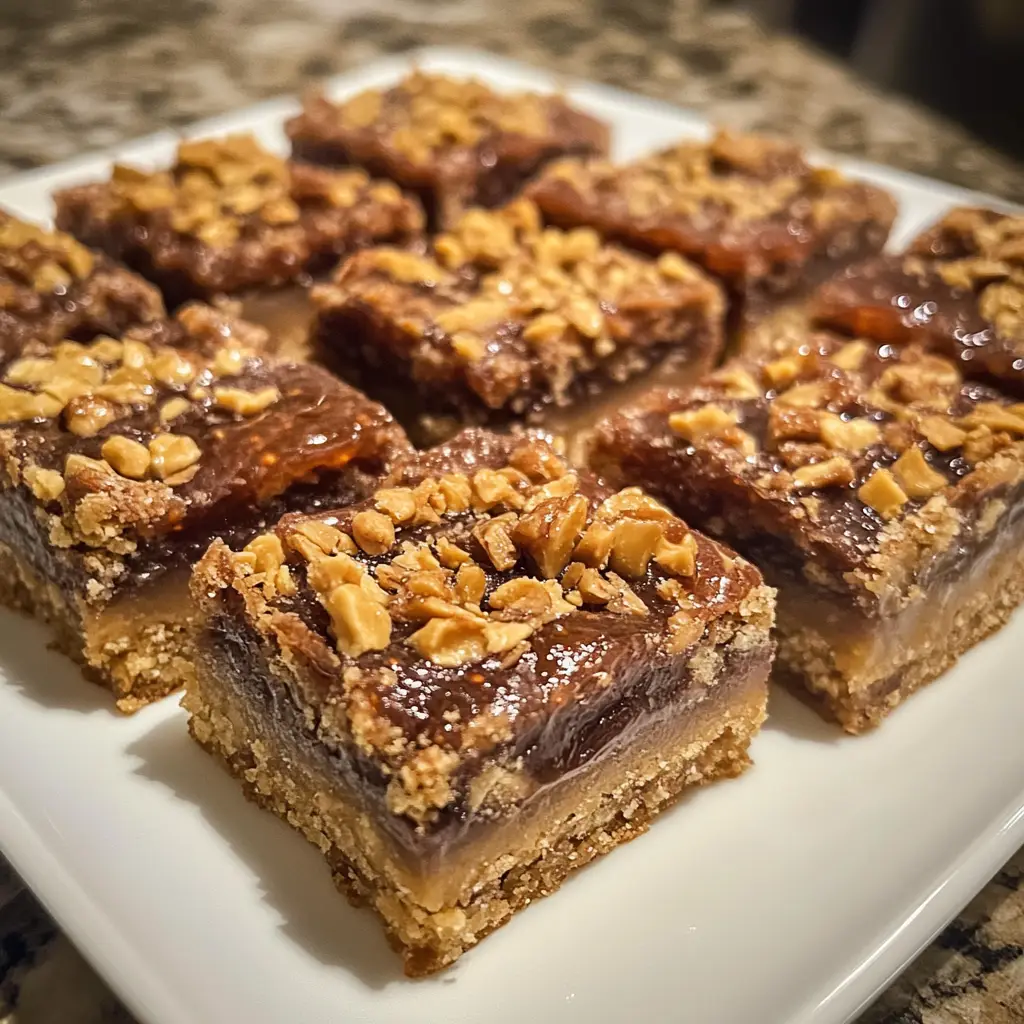
Introduction to Peanut Butter Jam Bars
Ah, the delightful world of baking! There’s something magical about the aroma of freshly baked goods wafting through the kitchen. One of my all-time favorite treats to whip up is the scrumptious Peanut Butter Jam Bars. These bars are not just a dessert; they are a sweet memory wrapped in a chewy, nutty embrace. I remember the first time I made them. It was a rainy afternoon, and I was looking for a way to brighten up the day. With a jar of creamy peanut butter and a half-opened jar of raspberry jam sitting on my counter, inspiration struck!
Peanut Butter Jam Bars are the perfect blend of sweet and salty, with a crumbly texture that melts in your mouth. They remind me of childhood lunches, where peanut butter and jelly sandwiches were a staple. But these bars take that classic combination to a whole new level! They are easy to make, and the best part? You can customize them with your favorite jams or even add a sprinkle of chocolate chips for an extra treat.
As I mix the ingredients, I can’t help but feel a sense of nostalgia. Each layer tells a story, from the creamy peanut butter that sticks to the roof of your mouth to the vibrant jam that adds a burst of flavor. Whether you’re baking for a family gathering, a potluck, or just for yourself, these bars are sure to bring smiles all around. So, grab your apron, and let’s dive into the delicious world of Peanut Butter Jam Bars!
Ingredients for Peanut Butter Jam Bars
Before we embark on this delightful baking adventure, let’s gather our ingredients! Having everything ready makes the process smoother and more enjoyable. I always find that when I have my ingredients laid out, it feels like I’m preparing for a fun culinary journey. Here’s what you’ll need to create these scrumptious Peanut Butter Jam Bars.
Main Ingredients
- 1 cup creamy peanut butter: The star of the show! I prefer using natural peanut butter without added sugars or oils for a wholesome taste.
- 1 cup brown sugar: This adds a lovely caramel flavor. You can use light or dark brown sugar, depending on your preference.
- 1/2 cup granulated sugar: Just a touch to balance the flavors.
- 1 large egg: This helps bind everything together. Make sure it’s at room temperature for better mixing.
- 1 teaspoon vanilla extract: A splash of vanilla elevates the flavor profile beautifully.
- 1 1/2 cups all-purpose flour: This gives the bars their structure. I like to use unbleached flour for a more natural taste.
- 1/2 teaspoon baking powder: This little ingredient helps the bars rise just enough to be fluffy.
- 1/4 teaspoon salt: A pinch of salt enhances all the flavors, making them pop!
- 1 cup jam or jelly: Choose your favorite flavor! I often go for raspberry or strawberry, but feel free to experiment.
Optional Add-ons
- 1/2 cup chocolate chips: If you’re a chocolate lover like me, adding chocolate chips can take these bars to a whole new level!
- 1/2 cup chopped nuts: Walnuts or pecans add a delightful crunch and extra flavor.
- 1/2 teaspoon cinnamon: A sprinkle of cinnamon can add warmth and depth to the bars.
- Flaky sea salt: A sprinkle on top before baking can create a beautiful contrast with the sweetness.
When selecting your ingredients, I always recommend going for high-quality products. Fresh, organic peanut butter and homemade or artisanal jams can make a world of difference in flavor. Trust me, your taste buds will thank you!
How to Prepare Peanut Butter Jam Bars
Now that we have our ingredients ready, it’s time to roll up our sleeves and get baking! The process of making Peanut Butter Jam Bars is as enjoyable as the final product. I love how each step brings me closer to that warm, gooey goodness. Let’s dive into the steps together!
Step 1: Preheat the Oven
First things first, we need to preheat our oven to 350°F (175°C). This ensures that our bars bake evenly and come out perfectly golden.
Tips for Preheating
- Make sure to set a timer for about 10 minutes. This gives the oven enough time to reach the right temperature.
- While the oven is heating, you can start preparing your base mixture. Multitasking is key!
Step 2: Prepare the Base Mixture
In a large mixing bowl, combine the creamy peanut butter, brown sugar, and granulated sugar. I like to use a hand mixer for this step, but a sturdy wooden spoon works just as well.
Tips for Mixing Ingredients
- Mix until the mixture is smooth and creamy. This usually takes about 2-3 minutes.
- Don’t forget to scrape down the sides of the bowl to ensure everything is well combined.
Step 3: Spread the Base in the Pan
Once your mixture is ready, it’s time to spread it into a greased 9×13 inch baking pan. I like to use parchment paper for easy removal later.
Tips for Even Spreading
- Use a spatula to spread the mixture evenly across the pan. This helps the bars bake uniformly.
- If the mixture is sticky, dampen your hands slightly to help with spreading.
Step 4: Add the Jam Layer
Now comes the fun part! Spoon your favorite jam over the base mixture. I usually go for a generous layer, as it adds a delightful burst of flavor.
Tips for Choosing the Right Jam
- Opt for a jam that’s not too runny. A thicker jam will hold its shape better during baking.
- Feel free to mix different flavors for a unique twist!
Step 5: Prepare the Topping
In a separate bowl, combine the remaining base mixture with a bit of flour to create a crumbly topping. This will add a lovely texture to our bars.
Tips for Crumbly Texture
- Use your fingers to mix the ingredients until they resemble coarse crumbs. This adds a delightful crunch!
- If you’re adding chocolate chips or nuts, fold them in gently at this stage.
Step 6: Bake the Bars
Now, it’s time to bake! Sprinkle the crumbly topping over the jam layer and pop the pan into the preheated oven.
Tips for Perfect Baking
- Bake for about 25-30 minutes, or until the top is golden brown. Keep an eye on them to avoid overbaking!
- When you smell that delicious aroma, you’ll know they’re close to being done.
Step 7: Cool and Cut
Once baked, remove the pan from the oven and let it cool completely. This is the hardest part, but trust me, it’s worth the wait!
Tips for Cutting Bars
- Use a sharp knife to cut the bars into squares. For cleaner cuts, run the knife under hot water and dry it before slicing.
- Letting them cool in the pan for about 10 minutes before transferring to a wire rack can help maintain their shape.
And there you have it! Your Peanut Butter Jam Bars are ready to be devoured. I can already imagine the smiles on everyone’s faces as they take that first bite. Happy baking!
Equipment Needed for Peanut Butter Jam Bars
Before we dive into the baking process, let’s make sure we have all the right tools at our fingertips. Having the right equipment can make a world of difference in your baking experience. Here’s a quick list of what you’ll need to whip up those delightful Peanut Butter Jam Bars!
- Mixing Bowls: A large mixing bowl is essential for combining your ingredients. If you don’t have one, any large bowl will do the trick!
- Measuring Cups and Spoons: Accurate measurements are key to baking success. If you don’t have a set, you can use a standard cup or spoon, but be mindful of the quantities.
- Hand Mixer or Wooden Spoon: A hand mixer makes mixing easier, but a sturdy wooden spoon works just as well for combining the ingredients.
- Spatula: A spatula is perfect for spreading the base mixture evenly in the pan. If you don’t have one, a butter knife can work in a pinch!
- Baking Pan: A 9×13 inch baking pan is ideal for this recipe. If you don’t have one, you can use a similar-sized dish, just keep an eye on the baking time.
- Parchment Paper (optional): Lining your baking pan with parchment paper makes for easy removal of the bars. If you don’t have it, just greasing the pan will work fine.
- Wire Rack: A wire rack is great for cooling the bars evenly. If you don’t have one, you can simply let them cool in the pan.
With these tools in hand, you’re all set to create your Peanut Butter Jam Bars! Remember, the joy of baking comes not just from the end result, but from the process itself. So, let’s get started!
Variations of Peanut Butter Jam Bars
One of the things I love most about Peanut Butter Jam Bars is their versatility! You can easily switch things up to suit your taste or to use what you have on hand. Here are a few fun variations that I’ve tried and absolutely adored:
- Nutty Delight: Swap out the peanut butter for almond or cashew butter. The flavor is slightly different but just as delicious!
- Fruit Medley: Instead of just one type of jam, mix two or three flavors together. I once combined strawberry, blueberry, and apricot, and it was a hit!
- Chocolate Swirl: For a decadent twist, swirl in some melted chocolate with the jam layer. It adds a rich, gooey texture that’s simply irresistible.
- Granola Crunch: Add a layer of granola on top of the jam before sprinkling the crumbly topping. This gives an extra crunch and a wholesome feel.
- Spiced Up: Incorporate spices like nutmeg or ginger into the base mixture for a warm, cozy flavor that’s perfect for fall.
These variations not only keep things exciting but also allow you to experiment and find your perfect combination. So, don’t hesitate to get creative in the kitchen! Each twist brings a new story to your baking adventure.
Cooking Notes for Peanut Butter Jam Bars
As I’ve baked these Peanut Butter Jam Bars time and time again, I’ve gathered a few cooking notes that can help you achieve the best results. These little tips can make a big difference in your baking journey!
- Room Temperature Ingredients: Always use room temperature ingredients, especially the egg and peanut butter. This helps them blend more easily, creating a smoother batter.
- Don’t Overmix: When combining the flour with the wet ingredients, mix just until combined. Overmixing can lead to tough bars, and we want them to be soft and chewy!
- Cooling Time: Patience is key! Allow the bars to cool completely in the pan before cutting. This helps them set and makes slicing easier.
- Storage Tips: Store any leftovers in an airtight container at room temperature for up to a week. You can also freeze them for longer storage—just make sure to wrap them well!
- Experiment with Jams: Don’t be afraid to try different jams or even homemade versions. Each flavor brings its own unique twist to the bars!
These cooking notes are like little nuggets of wisdom I’ve picked up along the way. They help ensure that every batch of Peanut Butter Jam Bars turns out delicious and brings joy to those who get to enjoy them. Happy baking!
Serving Suggestions for Peanut Butter Jam Bars
Now that your Peanut Butter Jam Bars are baked to perfection, it’s time to think about how to serve them! I love to get creative with presentation, as it adds an extra touch of joy to the experience. Here are some delightful serving suggestions that I often use:
- Warm and Gooey: Serve the bars warm, straight from the oven. A scoop of vanilla ice cream on top creates a heavenly dessert that’s hard to resist!
- With a Dusting of Powdered Sugar: A light sprinkle of powdered sugar adds a touch of elegance. It’s like a little snow on top of your delicious creation!
- Pair with Fresh Fruit: Fresh berries or sliced bananas on the side not only add color but also a refreshing contrast to the rich flavors of the bars.
- Drizzle of Chocolate: For chocolate lovers, a drizzle of melted chocolate or a chocolate sauce over the top can elevate the bars to a whole new level of indulgence.
- Pack for Lunch: These bars make a fantastic snack for school or work lunches. Just cut them into smaller squares and pack them in a container for a sweet treat on the go!
Each of these serving suggestions brings a unique twist to the Peanut Butter Jam Bars, making them even more enjoyable. Whether you’re sharing them with friends or savoring them solo, these bars are sure to bring a smile to your face. So, get ready to dig in and enjoy every delicious bite!
Tips for Making the Best Peanut Butter Jam Bars
As I’ve baked my fair share of Peanut Butter Jam Bars, I’ve gathered a treasure trove of tips that can help you create the best batch possible. These little nuggets of wisdom can make all the difference in your baking journey. Let’s dive into my favorite tips!
- Use Quality Ingredients: The better the ingredients, the better the bars! Opt for natural peanut butter and high-quality jam for a richer flavor.
- Don’t Skip the Salt: A pinch of salt enhances the sweetness and balances the flavors. It’s a small step that makes a big impact!
- Chill the Dough: If your mixture feels too sticky, pop it in the fridge for about 15 minutes. This makes it easier to spread in the pan.
- Check for Doneness: Keep an eye on the bars as they bake. They should be golden brown on top and slightly firm to the touch. A toothpick inserted should come out with a few moist crumbs.
- Let Them Rest: Allow the bars to cool completely before cutting. This helps them set and makes for cleaner slices.
With these tips in your back pocket, you’re well on your way to baking the most delicious Peanut Butter Jam Bars. Each tip is like a little secret I’ve learned over the years, and I can’t wait for you to experience the joy of baking these delightful treats!
Breakdown of Time for Peanut Butter Jam Bars
When it comes to baking, timing is everything! I always find it helpful to have a clear idea of how long each step will take. This way, I can plan my baking adventure without any surprises. Here’s a quick breakdown of the time you’ll need to whip up these delightful Peanut Butter Jam Bars:
- Prep Time: Approximately 15-20 minutes. This includes gathering your ingredients, mixing the base, and spreading it in the pan.
- Cooking Time: About 25-30 minutes. Keep an eye on the bars as they bake to achieve that perfect golden brown color.
- Total Time: Roughly 45-50 minutes. This includes both prep and cooking time, but remember to factor in cooling time before cutting!
Knowing this timeline helps me stay organized and makes the baking process feel more manageable. Plus, it builds the anticipation for that first delicious bite of Peanut Butter Jam Bars! So, set your timers and get ready for a delightful baking experience!
Nutritional Information for Peanut Butter Jam Bars
As a passionate home cook, I always find it helpful to know the nutritional content of the treats I bake. It allows me to enjoy them mindfully and share that information with friends and family. Here’s a general breakdown of the nutritional information for one serving of Peanut Butter Jam Bars, assuming you cut the batch into 16 squares:
- Calories: Approximately 200 calories
- Protein: 5 grams
- Fat: 10 grams (mostly healthy fats from peanut butter)
- Carbohydrates: 25 grams
- Fiber: 1 gram
- Sugar: 10 grams (depending on the jam used)
Keep in mind that these values can vary based on the specific ingredients you choose, such as the type of jam or whether you add chocolate chips or nuts. If you’re looking to make these bars a bit healthier, consider using less sugar or opting for a sugar substitute. Regardless of the nutritional content, I believe that enjoying a homemade treat like Peanut Butter Jam Bars is all about balance. So, savor each bite and share the joy with others!
Frequently Asked Questions about Peanut Butter Jam Bars
As I’ve shared my love for Peanut Butter Jam Bars, I often get questions from fellow bakers eager to try this delightful recipe. It’s always fun to connect with others who share the same passion for baking! Here are some of the most frequently asked questions I receive, along with my answers to help you on your baking journey.
Can I use crunchy peanut butter instead of creamy?
Absolutely! Using crunchy peanut butter adds a delightful texture to the bars. The little peanut pieces create a lovely contrast with the smooth jam. Just keep in mind that it may change the overall consistency slightly, but it will still be delicious!
What type of jam works best for these bars?
While I love raspberry and strawberry jams, you can use any flavor you enjoy! Blueberry, apricot, or even mixed berry jams work wonderfully. The key is to choose a jam that isn’t too runny, so it holds its shape during baking.
Can I make these bars gluten-free?
Yes, you can! Simply substitute the all-purpose flour with a gluten-free flour blend. I recommend using a blend that includes xanthan gum for the best texture. Your bars will still be just as tasty!
How should I store leftover bars?
To keep your Peanut Butter Jam Bars fresh, store them in an airtight container at room temperature for up to a week. If you want to keep them longer, you can freeze them! Just wrap them tightly in plastic wrap and place them in a freezer-safe container. They’ll be good for up to three months!
Can I add other ingredients to the bars?
Definitely! Feel free to get creative. You can add chocolate chips, nuts, or even a sprinkle of cinnamon to the base mixture. Each addition brings a new flavor and texture, making your bars uniquely yours!
What if my bars are too crumbly?
If your bars turn out too crumbly, it might be due to overbaking or not enough moisture in the mixture. Make sure to keep an eye on the baking time and check for doneness. If you find they’re too dry, you can try adding a bit more peanut butter or jam next time to enhance the moisture.
These questions reflect the curiosity and excitement that come with baking Peanut Butter Jam Bars. I hope my answers help you feel more confident as you embark on your own baking adventure. Remember, every batch is a chance to learn and create something delicious!
Conclusion on Peanut Butter Jam Bars
As I wrap up this delightful journey into the world of Peanut Butter Jam Bars, I can’t help but feel a sense of joy. These bars are more than just a sweet treat; they are a celebration of flavors and memories. The combination of creamy peanut butter and fruity jam creates a harmonious balance that’s hard to resist. Plus, they are incredibly easy to make, making them perfect for both novice bakers and seasoned pros alike.
What I love most about these bars is their versatility. You can customize them to suit your taste, whether you prefer a nutty crunch or a chocolatey twist. They are perfect for sharing at gatherings, packing in lunchboxes, or simply enjoying as a cozy snack at home. Each bite is a reminder of the simple pleasures in life, and I hope you find as much joy in baking and sharing them as I do.
So, gather your ingredients, roll up your sleeves, and let the aroma of freshly baked Peanut Butter Jam Bars fill your kitchen. Happy baking, and may your culinary adventures be filled with sweetness and smiles!


