Introduction to Peanut Butter and Jelly Cupcakes Recipe
Ah, the classic combination of peanut butter and jelly! It takes me back to my childhood, where lunchboxes were filled with those delightful sandwiches. The sweet and salty flavors danced together, creating a symphony of taste that was simply irresistible. Now, as a passionate home cook, I’ve found a way to elevate this nostalgic treat into something even more special: Peanut Butter and Jelly Cupcakes!
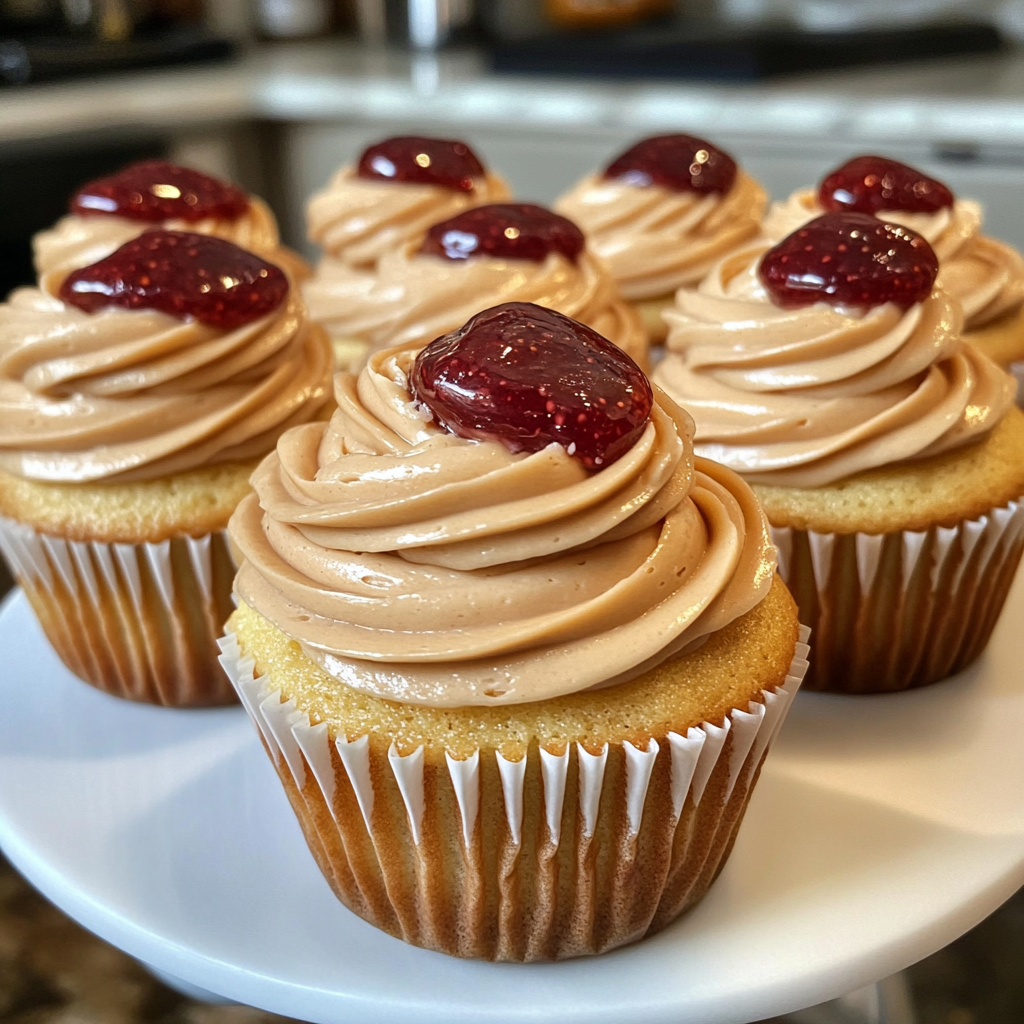
Imagine biting into a soft, fluffy cupcake that’s bursting with the rich flavor of peanut butter, only to discover a hidden treasure of sweet jelly in the center. It’s like a party in your mouth! These cupcakes are not just a treat; they’re a celebration of flavors that remind us of simpler times. Whether you’re baking for a birthday, a picnic, or just because it’s Tuesday, these cupcakes are sure to bring smiles and joy to everyone who takes a bite.
What I love most about this recipe is how easy it is to make. With just a handful of ingredients, you can whip up a batch that will impress your family and friends. Plus, the aroma of baking cupcakes fills the kitchen with warmth and happiness, making it a perfect activity for a cozy afternoon.
So, grab your apron and let’s dive into this delightful Peanut Butter and Jelly Cupcakes Recipe! I promise you, once you try them, you’ll be hooked. Let’s create some sweet memories together!
Ingredients for Peanut Butter and Jelly Cupcakes Recipe
Before we embark on our baking adventure, let’s gather all the ingredients we’ll need for these scrumptious Peanut Butter and Jelly Cupcakes. I always believe that quality ingredients make a world of difference in baking. So, let’s make sure we have everything ready to go!
Main Ingredients
- 1 ½ cups all-purpose flour
- 1 cup granulated sugar
- ½ cup unsalted butter, softened
- 2 large eggs
- ½ cup creamy peanut butter (I prefer natural peanut butter for a richer flavor)
- 1 teaspoon baking powder
- ½ teaspoon baking soda
- ¼ teaspoon salt
- ½ cup milk (whole milk works best for moisture)
- ½ cup jelly or jam (your favorite flavor, but grape or strawberry are classic choices)
When I make these cupcakes, I always opt for high-quality peanut butter. It really enhances the flavor and gives that creamy texture we all love. And don’t skimp on the jelly! A good quality jam can elevate the entire cupcake experience.
Optional Add-ons
- 1 teaspoon vanilla extract (for an extra layer of flavor)
- Chopped peanuts (for a crunchy topping)
- Chocolate chips (if you want to add a chocolatey twist)
- Powdered sugar (for dusting on top)
Feel free to get creative with these optional add-ons! I sometimes sprinkle chopped peanuts on top for a delightful crunch. And if you’re a chocolate lover like me, adding chocolate chips to the batter is a game-changer. It’s all about making these cupcakes your own!
Now that we have our ingredients lined up, we’re one step closer to baking these delightful treats. Let’s move on to the next part of our journey: preparing the cupcakes!
How to Prepare Peanut Butter and Jelly Cupcakes Recipe
Now that we have our ingredients ready, it’s time to roll up our sleeves and get baking! I find that following each step carefully makes all the difference. So, let’s dive into the delightful process of creating these Peanut Butter and Jelly Cupcakes!
Step 1: Preheat the Oven and Prepare the Cupcake Liners
First things first, preheat your oven to 350°F (175°C). This ensures that your cupcakes bake evenly. While the oven warms up, line a cupcake pan with liners. I love using colorful liners to add a fun touch!
Tips for Step 1
- Make sure your oven is fully preheated before placing the cupcakes inside. This helps them rise perfectly.
- If you don’t have cupcake liners, you can lightly grease the pan with butter or cooking spray.
Step 2: Mix the Dry Ingredients
In a medium bowl, whisk together the flour, baking powder, baking soda, and salt. This step is crucial as it helps to evenly distribute the leavening agents throughout the flour.
Tips for Step 2
- Use a sifter if you have one! It helps to aerate the flour and makes for lighter cupcakes.
- Don’t skip the salt; it enhances the flavors of the other ingredients.
Step 3: Cream the Butter and Sugar
In a large mixing bowl, beat the softened butter and granulated sugar together until the mixture is light and fluffy. This usually takes about 3-5 minutes. The fluffiness is key to achieving that perfect cupcake texture!
Tips for Step 3
- Make sure your butter is at room temperature for easy creaming.
- Use an electric mixer for the best results, but a whisk works too if you’re feeling strong!
Step 4: Add Eggs and Peanut Butter
Next, add the eggs one at a time, mixing well after each addition. Then, stir in the creamy peanut butter until everything is well combined. The peanut butter adds that rich flavor we all adore!
Tips for Step 4
- Crack the eggs into a separate bowl first to avoid any shell mishaps.
- If your peanut butter is too thick, you can warm it slightly in the microwave for easier mixing.
Step 5: Combine Wet and Dry Ingredients
Now, it’s time to combine the dry ingredients with the wet mixture. Alternate adding the dry ingredients and the milk, starting and ending with the dry ingredients. Mix until just combined; overmixing can lead to dense cupcakes.
Tips for Step 5
- Use a spatula to scrape down the sides of the bowl to ensure everything is mixed well.
- Don’t worry if the batter looks a bit lumpy; that’s perfectly fine!
Step 6: Fill Cupcake Liners and Add Jelly
Using a spoon or an ice cream scoop, fill each cupcake liner about two-thirds full with batter. Then, add a small dollop of jelly in the center of each cupcake. This hidden surprise is what makes these cupcakes so special!
Tips for Step 6
- Be careful not to overfill the liners; they need room to rise!
- Use a teaspoon to add the jelly; it helps control the amount you’re adding.
Step 7: Bake the Cupcakes
Place the cupcake pan in the preheated oven and bake for 18-20 minutes. You’ll know they’re done when a toothpick inserted into the center comes out clean. The smell will be heavenly!
Tips for Step 7
- Rotate the pan halfway through baking for even cooking.
- Keep an eye on them; ovens can vary, and you don’t want to overbake!
Step 8: Cool and Frost the Cupcakes
Once baked, remove the cupcakes from the oven and let them cool in the pan for about 5 minutes. Then, transfer them to a wire rack to cool completely. Once cooled, frost them with your favorite frosting, and don’t forget to add a sprinkle of chopped peanuts on top if you like!
Tips for Step 8
- Letting them cool completely is important; otherwise, the frosting will melt!
- For a fun twist, you can use a peanut butter frosting or even a cream cheese frosting!
And there you have it! Your Peanut Butter and Jelly Cupcakes are ready to be devoured. I can’t wait for you to experience the joy of baking and tasting these delightful treats!
Equipment Needed for Peanut Butter and Jelly Cupcakes Recipe
Before we dive into the baking process, let’s make sure we have all the right tools at our fingertips. Having the right equipment can make your baking experience smoother and more enjoyable. Here’s what you’ll need to whip up these delightful Peanut Butter and Jelly Cupcakes!
- Cupcake Pan: A standard 12-cup cupcake pan is essential for baking your cupcakes. If you don’t have one, you can use a muffin tin, but keep an eye on the baking time as they may take longer.
- Cupcake Liners: These help keep your cupcakes from sticking and make for easy cleanup. If you’re out of liners, you can grease the pan with butter or cooking spray.
- Mixing Bowls: A set of mixing bowls in various sizes will help you combine your ingredients easily. I love using glass bowls because they’re sturdy and easy to clean!
- Electric Mixer: An electric mixer is a game-changer for creaming butter and sugar. If you don’t have one, a whisk will do the trick, but it may take a bit more elbow grease!
- Measuring Cups and Spoons: Accurate measurements are key in baking. Make sure you have a set of dry and liquid measuring cups, along with measuring spoons.
- Spatula: A rubber spatula is perfect for scraping down the sides of your mixing bowl and folding in ingredients.
- Ice Cream Scoop or Spoon: This is handy for filling your cupcake liners evenly. If you don’t have a scoop, a regular spoon works just fine!
- Wire Rack: A wire rack is ideal for cooling your cupcakes evenly. If you don’t have one, you can use a plate, but make sure to let them cool for a bit longer.
With these tools in hand, you’re all set to create some scrumptious Peanut Butter and Jelly Cupcakes! Remember, the joy of baking comes not just from the end result, but from the process itself. So, let’s get started!
Variations of Peanut Butter and Jelly Cupcakes Recipe
As a passionate home cook, I love experimenting with recipes to create new flavors and textures. These Peanut Butter and Jelly Cupcakes are no exception! Here are a few fun variations that can take your cupcakes to the next level:
- Chocolate Peanut Butter and Jelly Cupcakes: Swap out half of the all-purpose flour for cocoa powder to create a rich chocolate base. The combination of chocolate and peanut butter is simply divine!
- Nutty Banana Cupcakes: Add mashed ripe bananas to the batter for a moist and flavorful twist. The banana pairs beautifully with peanut butter and jelly, making for a delightful treat.
- Gluten-Free Option: Substitute the all-purpose flour with a gluten-free flour blend. Just make sure to check that your baking powder and other ingredients are gluten-free as well!
- Vegan Peanut Butter and Jelly Cupcakes: Replace the eggs with flaxseed meal mixed with water and use a plant-based milk. You can also use coconut oil instead of butter for a delicious vegan version.
- Fruity Swirls: Instead of just adding jelly in the center, swirl some into the batter before baking for a marbled effect. It adds a beautiful touch and extra flavor!
These variations not only keep things exciting but also allow you to cater to different dietary preferences. I encourage you to get creative and make these cupcakes your own. After all, the kitchen is a playground for flavors!
Cooking Notes for Peanut Butter and Jelly Cupcakes Recipe
As I’ve learned through my culinary adventures, a few cooking notes can make all the difference in achieving the perfect Peanut Butter and Jelly Cupcakes. Here are some tips that I always keep in mind while baking:
- Room Temperature Ingredients: Make sure your butter, eggs, and milk are at room temperature. This helps them blend together smoothly, creating a light and fluffy batter.
- Don’t Overmix: When combining the wet and dry ingredients, mix just until combined. Overmixing can lead to dense cupcakes, and we want them to be light and airy!
- Check for Doneness: Ovens can vary, so keep an eye on your cupcakes as they bake. A toothpick inserted into the center should come out clean or with a few moist crumbs.
- Cool Completely: Allow your cupcakes to cool completely before frosting. This prevents the frosting from melting and ensures a beautiful presentation.
- Storage Tips: Store any leftover cupcakes in an airtight container at room temperature for up to three days. If you want to keep them longer, you can freeze them for up to a month!
These little notes have helped me perfect my baking skills, and I hope they do the same for you! Remember, every baking experience is a chance to learn and grow, so don’t be afraid to experiment and have fun in the kitchen!
Serving Suggestions for Peanut Butter and Jelly Cupcakes Recipe
Now that our Peanut Butter and Jelly Cupcakes are baked and frosted, it’s time to think about how to serve them! Presentation can elevate the experience, and I love to get a little creative when it comes to serving these delightful treats. Here are some of my favorite serving suggestions:
- Platter Display: Arrange the cupcakes on a colorful platter. You can mix and match different flavors or variations for a fun visual treat. A sprinkle of chopped peanuts or a drizzle of chocolate sauce on the platter adds a nice touch!
- Pair with Milk: Nothing beats the classic combination of cupcakes and a cold glass of milk. Set out some milk in cute glasses for a nostalgic feel that complements the flavors perfectly.
- Ice Cream Sidekick: Serve the cupcakes with a scoop of vanilla or chocolate ice cream. The creamy texture pairs beautifully with the rich peanut butter and sweet jelly.
- Garnish with Fresh Fruit: Add some fresh strawberries or banana slices on the side. They not only look beautiful but also enhance the fruity flavors of the jelly.
- Creative Toppings: For an extra special touch, top each cupcake with a dollop of whipped cream or a drizzle of caramel sauce. It adds a luxurious feel that everyone will love!
These serving suggestions not only make your cupcakes look appealing but also enhance the overall experience. Whether it’s a birthday party, a picnic, or just a cozy afternoon at home, these cupcakes are sure to be a hit. So, gather your loved ones, serve up these delightful treats, and enjoy the smiles they bring!
Tips for Perfecting Peanut Butter and Jelly Cupcakes Recipe
As I’ve baked these Peanut Butter and Jelly Cupcakes time and time again, I’ve gathered a treasure trove of tips that can help you achieve cupcake perfection. Here are my top suggestions to ensure your cupcakes turn out as delightful as you envision:
- Measure Accurately: Baking is a science, so precise measurements are crucial. Use dry measuring cups for flour and sugar, and liquid measuring cups for milk. It makes a world of difference!
- Don’t Skip the Sifting: Sifting your flour and dry ingredients can help aerate them, resulting in lighter cupcakes. It’s a small step that yields big results!
- Experiment with Flavors: Don’t hesitate to play around with different jelly flavors or even add spices like cinnamon or nutmeg to the batter. It can create a unique twist that surprises your taste buds!
- Use a Cookie Scoop: For even cupcake sizes, a cookie scoop is your best friend. It helps you fill the liners uniformly, ensuring they bake evenly.
- Frosting Techniques: When frosting, use a piping bag for a professional look. You can create swirls or rosettes that make your cupcakes even more inviting!
With these tips in your back pocket, you’re well on your way to mastering the art of Peanut Butter and Jelly Cupcakes. Remember, baking is all about having fun and enjoying the process. So, embrace your inner chef and let your creativity shine!
Breakdown of Time for Peanut Butter and Jelly Cupcakes Recipe
As a passionate home cook, I know that time management is key when it comes to baking. Knowing how long each step takes can help you plan your baking adventure better. Here’s a quick breakdown of the time you’ll need for these delightful Peanut Butter and Jelly Cupcakes:
- Prep Time: Approximately 20 minutes. This includes gathering your ingredients, mixing the batter, and filling the cupcake liners.
- Cooking Time: About 18-20 minutes. This is the time your cupcakes will spend in the oven, filling your kitchen with that irresistible aroma!
- Total Time: Roughly 40-45 minutes. This includes both prep and cooking time, plus a few minutes for cooling before frosting.
With this time breakdown, you can easily fit these cupcakes into your day. Whether you’re baking for a special occasion or just treating yourself, it’s a quick and rewarding process. So, let’s get those cupcakes in the oven and enjoy the sweet rewards of our efforts!
Nutritional Information for Peanut Butter and Jelly Cupcakes Recipe
As a passionate home cook, I always find it helpful to know the nutritional content of the treats I bake. It allows me to enjoy them mindfully while sharing them with family and friends. Here’s a general breakdown of the nutritional information for one Peanut Butter and Jelly Cupcake, assuming the recipe yields 12 cupcakes:
- Calories: Approximately 210 calories
- Protein: 4 grams
- Carbohydrates: 30 grams
- Fat: 9 grams
- Saturated Fat: 3 grams
- Cholesterol: 30 mg
- Sodium: 150 mg
- Fiber: 1 gram
- Sugar: 12 grams
Keep in mind that these values can vary based on the specific ingredients you use, such as the type of peanut butter or jelly. If you’re looking to make these cupcakes a bit healthier, consider using natural sweeteners or reducing the amount of sugar. Regardless, these cupcakes are a delightful treat that brings joy to any occasion!
Frequently Asked Questions about Peanut Butter and Jelly Cupcakes Recipe
As I’ve shared my Peanut Butter and Jelly Cupcakes with friends and family, I’ve received quite a few questions along the way. I love that people are curious and eager to learn! Here are some of the most frequently asked questions about this delightful recipe, along with my answers:
Can I use crunchy peanut butter instead of creamy?
Absolutely! Using crunchy peanut butter will add a delightful texture to your cupcakes. The little peanut pieces create a fun surprise in every bite. Just keep in mind that it may slightly change the overall consistency of the batter.
What type of jelly works best for these cupcakes?
While grape and strawberry jelly are classic choices, feel free to experiment! Raspberry, blueberry, or even apricot jelly can add a unique twist. Choose your favorite flavor, and let your taste buds guide you!
Can I make these cupcakes ahead of time?
Yes, you can! These cupcakes can be baked a day in advance. Just store them in an airtight container at room temperature. Frost them right before serving to keep the frosting fresh and beautiful!
How do I store leftover cupcakes?
To keep your cupcakes fresh, store them in an airtight container at room temperature for up to three days. If you want to keep them longer, you can freeze them for up to a month. Just make sure to wrap them well to prevent freezer burn!
Can I make these cupcakes gluten-free?
Definitely! Simply substitute the all-purpose flour with a gluten-free flour blend. Just be sure to check that your baking powder and other ingredients are gluten-free as well. You’ll still get that delicious flavor without the gluten!
What frosting pairs well with Peanut Butter and Jelly Cupcakes?
While a classic buttercream frosting is always a hit, I love using peanut butter frosting for an extra punch of flavor. Cream cheese frosting also complements the sweetness of the jelly beautifully. Get creative and find your favorite pairing!
These FAQs are just a glimpse into the wonderful world of Peanut Butter and Jelly Cupcakes. I hope they help you feel more confident as you embark on your baking adventure. Remember, the kitchen is a place for creativity and joy, so don’t hesitate to ask questions and explore new ideas!
Conclusion on Peanut Butter and Jelly Cupcakes Recipe
As I wrap up this delightful journey of baking Peanut Butter and Jelly Cupcakes, I can’t help but feel a sense of joy and nostalgia. These cupcakes are more than just a sweet treat; they’re a celebration of flavors that remind us of our childhood. The combination of creamy peanut butter and sweet jelly creates a harmonious blend that dances on your taste buds, making every bite a delightful experience.
What I love most about this recipe is its simplicity. With just a handful of ingredients, you can create something truly special that brings smiles to faces young and old. Whether you’re baking for a special occasion or simply to indulge in a little sweetness, these cupcakes are sure to impress. Plus, the variations and personal touches you can add make them uniquely yours!
So, gather your loved ones, roll up your sleeves, and dive into the world of baking. I promise that the joy of creating and sharing these Peanut Butter and Jelly Cupcakes will be a memory you cherish. Happy baking, and may your kitchen always be filled with love and laughter!


