Introduction to PB&J Thumbprint Cookies Recipe
Ah, the sweet nostalgia of childhood! When I think of my favorite snacks, peanut butter and jelly sandwiches instantly come to mind. They were my go-to lunch, packed with flavor and comfort. But what if I told you that you could transform that classic combo into a delightful cookie? That’s right! Today, I’m excited to share my PB&J Thumbprint Cookies Recipe with you.
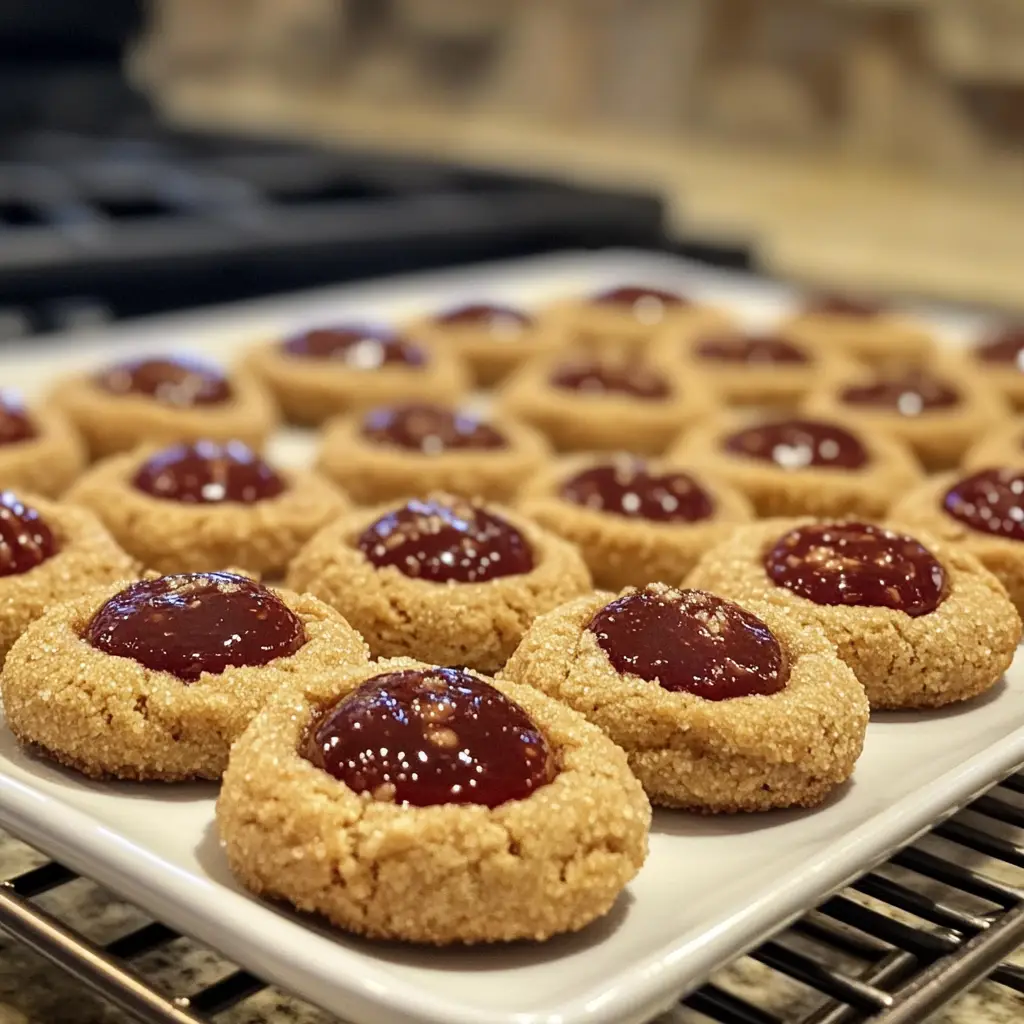
These cookies are not just any ordinary treat; they are a delicious blend of buttery goodness and fruity sweetness. Each bite takes me back to sunny afternoons spent in the backyard, where I would savor my sandwich while dreaming up adventures. The thumbprint design is not only charming but also practical, creating the perfect little well for your favorite jam or jelly. It’s like a tiny edible hug!
As I began experimenting in my kitchen, I realized that these cookies are incredibly easy to make. They are perfect for baking with kids or for impressing guests at a gathering. Plus, they are versatile! You can use any jam you love, whether it’s strawberry, raspberry, or even a zesty lemon curd. The possibilities are endless, and that’s what makes this recipe so special.
So, grab your apron and let’s dive into the world of PB&J Thumbprint Cookies! I promise you’ll find joy in every step, and the aroma wafting through your kitchen will be irresistible. Let’s create some sweet memories together!
Ingredients for PB&J Thumbprint Cookies Recipe
Before we roll up our sleeves and get baking, let’s gather all the ingredients we need for these delightful PB&J Thumbprint Cookies. I always believe that quality ingredients make a world of difference in baking. So, let’s make sure we have everything ready to go!
Main Ingredients
- 1 cup unsalted butter, softened (Make sure it’s at room temperature for easy mixing!)
- 1 cup granulated sugar
- 1 large egg
- 1 teaspoon vanilla extract (I love using pure vanilla for that rich flavor!)
- 2 cups all-purpose flour
- 1/2 teaspoon baking powder
- 1/4 teaspoon salt
- 1 cup peanut butter (Creamy or crunchy, it’s your choice!)
- 1/2 cup jam or jelly (Strawberry, raspberry, or whatever tickles your taste buds!)
Optional Add-ons
- 1/2 cup chopped nuts (Walnuts or pecans add a nice crunch!)
- 1/4 teaspoon cinnamon (For a warm, cozy flavor twist!)
- Powdered sugar (For dusting on top after baking, if you want a little extra sweetness!)
- Chocolate chips (If you’re feeling adventurous, mix in some chocolate for a decadent touch!)
When I shop for ingredients, I often visit local farmers’ markets for fresh jams and high-quality butter. It’s amazing how much better the flavors can be when you choose local and organic options. Plus, supporting local businesses always warms my heart!
Now that we have our ingredients lined up, we’re ready to embark on this baking adventure. Let’s move on to the next step and mix up some cookie magic!
How to Prepare PB&J Thumbprint Cookies Recipe
Now that we have our ingredients ready, it’s time to bring them together and create some cookie magic! I love the process of baking; it’s like a dance in the kitchen. Each step is a rhythm that leads to a delicious finale. Let’s get started!
Step 1: Preheat the Oven
First things first, we need to preheat our oven to 350°F (175°C). This step is crucial because it ensures that our cookies bake evenly and come out perfectly golden.
Tips for Preheating
- Always preheat your oven before mixing the dough. This way, the cookies go straight into a hot oven, which helps them rise beautifully.
- If you have an oven thermometer, use it! Sometimes, ovens can be a bit tricky, and you want to make sure it’s at the right temperature.
Step 2: Mix the Dough
In a large mixing bowl, combine the softened butter and granulated sugar. I like to use a hand mixer for this part, but a wooden spoon works just as well if you’re feeling strong!
Tips for Mixing
- Beat the butter and sugar until it’s light and fluffy. This usually takes about 2-3 minutes. It’s like giving your cookies a little love!
- Add in the egg and vanilla extract, mixing until well combined. The aroma of vanilla will fill your kitchen, and it’s simply delightful!
Step 3: Shape the Cookies
Once your dough is mixed, it’s time to shape the cookies. I like to use a cookie scoop for this, but you can also use your hands. Just make sure they’re about 1 inch in diameter.
Tips for Shaping
- Roll the dough into balls and place them on a baking sheet lined with parchment paper. Leave some space between each cookie, as they will spread a little while baking.
- If the dough is too sticky, you can chill it in the fridge for about 15 minutes. This makes it easier to handle!
Step 4: Create the Thumbprint
Now comes the fun part! Using your thumb (or the back of a spoon), gently press down in the center of each cookie to create a little well. This is where the jam will go!
Tips for Creating the Thumbprint
- Be careful not to press too hard; you want a nice indentation without breaking the cookie.
- If you’re baking with kids, this is their favorite step! It’s a great way to get them involved in the kitchen.
Step 5: Fill with Jam
Now it’s time to fill those lovely thumbprints with your chosen jam or jelly. I usually use a teaspoon for this part, but you can also use a piping bag for a more precise fill.
Tips for Filling
- Don’t overfill! Leave a little space at the top to prevent the jam from bubbling over while baking.
- If you’re feeling adventurous, mix different jams for a colorful surprise!
Step 6: Bake the Cookies
Finally, it’s time to bake! Place the baking sheet in the preheated oven and let the cookies work their magic.
Tips for Baking
- Bake for about 12-15 minutes, or until the edges are lightly golden. Keep an eye on them; every oven is a little different!
- Once baked, let them cool on the baking sheet for a few minutes before transferring them to a wire rack. This helps them set perfectly!
And there you have it! Each step brings us closer to those delightful PB&J Thumbprint Cookies. I can already smell the sweet aroma wafting through my kitchen, and I can’t wait for you to experience it too!
Equipment Needed for PB&J Thumbprint Cookies Recipe
Before we dive into the baking process, let’s make sure we have all the right tools at our fingertips. Having the right equipment can make a world of difference in your baking experience. Here’s what you’ll need for these delightful PB&J Thumbprint Cookies:
- Mixing Bowls: A large mixing bowl is essential for combining your ingredients. If you have a set of nesting bowls, that’s even better for easy storage!
- Hand Mixer or Wooden Spoon: A hand mixer makes it easy to cream the butter and sugar, but a sturdy wooden spoon will do just fine if you prefer a workout!
- Cookie Scoop: This handy tool helps you portion out the dough evenly. If you don’t have one, just use your hands to roll the dough into balls.
- Baking Sheet: A standard baking sheet lined with parchment paper is perfect for baking your cookies. If you don’t have parchment, you can lightly grease the sheet instead.
- Wire Rack: This is great for cooling your cookies after baking. If you don’t have one, a plate will work in a pinch!
- Teaspoon or Piping Bag: Use a teaspoon to fill the thumbprints with jam. A piping bag can give you more control if you want to get fancy!
With these tools in hand, you’re all set to create some cookie magic! Remember, the kitchen is a place for creativity, so feel free to improvise if you don’t have something on this list. Let’s get ready to bake those scrumptious PB&J Thumbprint Cookies!
Variations of PB&J Thumbprint Cookies Recipe
While the classic PB&J Thumbprint Cookies are absolutely delightful, I love to experiment with different flavors and ingredients to keep things exciting! Here are a few variations that I’ve tried and absolutely adored:
- Nut Butter Swaps: Instead of peanut butter, try almond or cashew butter for a unique twist. Each nut butter brings its own flavor profile, and it’s fun to mix things up!
- Fruit Jam Alternatives: Experiment with different jams or jellies. I’ve used apricot, blueberry, and even fig jam! Each one adds a new layer of sweetness and character.
- Chocolate Lovers: For a decadent treat, add chocolate chips to the dough or drizzle melted chocolate over the cooled cookies. It’s like a PB&J with a chocolatey surprise!
- Spiced Up: Add a pinch of nutmeg or ginger to the dough for a warm, spiced flavor. It’s perfect for cozy fall baking!
- Oatmeal Crunch: Mix in some rolled oats for a chewy texture. It adds a wholesome touch and makes the cookies even more satisfying.
These variations not only keep the recipe fresh but also allow you to cater to different tastes and preferences. I encourage you to get creative and find your own favorite twist on these delightful cookies. After all, baking is all about having fun and making it your own!
Cooking Notes for PB&J Thumbprint Cookies Recipe
As I’ve baked these PB&J Thumbprint Cookies time and time again, I’ve gathered a few cooking notes that can help you achieve the best results. These little tips can make a big difference in your baking journey!
- Room Temperature Ingredients: Make sure your butter and egg are at room temperature. This helps them blend smoothly, creating a light and fluffy dough.
- Chill the Dough: If your dough feels too soft or sticky, don’t hesitate to chill it for about 15-30 minutes. This makes it easier to shape and helps the cookies hold their form while baking.
- Watch the Baking Time: Every oven is different, so keep an eye on your cookies as they bake. They should be lightly golden around the edges but still soft in the center when you take them out.
- Storage Tips: Store your cookies in an airtight container at room temperature for up to a week. If you want to keep them longer, you can freeze them for up to three months!
- Experiment with Jams: Don’t be afraid to mix and match your favorite jams! Each flavor brings a unique twist, and it’s a fun way to discover new combinations.
These cooking notes are like little nuggets of wisdom I’ve picked up along the way. They help ensure that each batch of cookies turns out just as delightful as the last. Happy baking!
Serving Suggestions for PB&J Thumbprint Cookies Recipe
Now that our PB&J Thumbprint Cookies are baked to perfection, it’s time to think about how to serve them! I love to get creative with presentation, as it adds an extra touch of joy to the experience. Here are some of my favorite serving suggestions:
- Classic Pairing: Serve these cookies with a glass of cold milk. The creamy texture complements the sweet and nutty flavors beautifully!
- Cookie Platter: Arrange the cookies on a colorful platter alongside fresh fruit like strawberries or apple slices. It makes for a delightful snack spread!
- Ice Cream Sandwiches: For a fun twist, sandwich a scoop of vanilla or chocolate ice cream between two cookies. It’s a delicious way to elevate your dessert!
- Gift Idea: Package a few cookies in a cute box or jar tied with a ribbon. They make a thoughtful homemade gift for friends or family!
- Tea Time Treat: Enjoy these cookies with a warm cup of tea or coffee. The flavors meld together perfectly, making it a cozy afternoon treat.
These serving suggestions not only enhance the enjoyment of the cookies but also create memorable moments with loved ones. Whether it’s a casual snack or a special occasion, these PB&J Thumbprint Cookies are sure to bring smiles all around!
Tips for Perfecting PB&J Thumbprint Cookies Recipe
As a passionate home cook, I’ve learned that the little details can make a big difference in baking. Here are some of my favorite tips to ensure your PB&J Thumbprint Cookies turn out perfectly every time:
- Measure Accurately: Baking is a science, so be sure to measure your ingredients accurately. Use a kitchen scale for precision, especially with flour and sugar.
- Don’t Overmix: When combining the dry ingredients with the wet, mix just until combined. Overmixing can lead to tough cookies, and we want them to be soft and tender!
- Experiment with Jams: Try different flavors of jam or jelly to find your favorite combination. Each one adds a unique twist, so don’t be afraid to get creative!
- Chill the Dough: If your dough feels too soft, chilling it for 15-30 minutes can help. This makes it easier to shape and helps the cookies hold their form while baking.
- Cool Completely: Allow the cookies to cool completely on a wire rack before storing them. This helps maintain their texture and prevents them from becoming soggy.
With these tips in your back pocket, you’ll be well on your way to baking the most delightful PB&J Thumbprint Cookies. Remember, the joy of baking comes from experimenting and having fun, so don’t hesitate to make this recipe your own!
Breakdown of Time for PB&J Thumbprint Cookies Recipe
As a home cook, I know that time management is key in the kitchen. When I’m baking my PB&J Thumbprint Cookies, I like to keep track of how long each step takes. This way, I can plan my baking session and enjoy the process without feeling rushed. Here’s a quick breakdown of the time you’ll need:
- Prep Time: 20 minutes – This includes gathering your ingredients, mixing the dough, and shaping the cookies.
- Cooking Time: 12-15 minutes – The cookies will bake to golden perfection during this time.
- Total Time: 35-40 minutes – From start to finish, you can have these delightful cookies ready in under an hour!
Knowing the time it takes helps me enjoy the baking experience even more. I often use this time to listen to my favorite music or catch up on a podcast. It’s all about making the most of the moments spent in the kitchen. Happy baking!
Nutritional Information for PB&J Thumbprint Cookies Recipe
As a passionate home cook, I always find it helpful to know the nutritional content of the treats I bake. It allows me to enjoy them mindfully while sharing them with family and friends. Here’s a general breakdown of the nutritional information for one PB&J Thumbprint Cookie, assuming the recipe yields about 24 cookies:
- Calories: Approximately 120 calories
- Protein: 3 grams
- Carbohydrates: 15 grams
- Fat: 6 grams
- Saturated Fat: 1.5 grams
- Cholesterol: 15 mg
- Sodium: 50 mg
- Fiber: 1 gram
- Sugar: 5 grams
Keep in mind that these values can vary based on the specific ingredients you use, such as the type of jam or nut butter. If you’re looking to make these cookies a bit healthier, consider using natural peanut butter and low-sugar jam. It’s all about balance, and I believe that enjoying a sweet treat can fit into a healthy lifestyle!
Now that we have the nutritional information, let’s continue our baking adventure with confidence, knowing we’re creating something delicious and delightful!
Frequently Asked Questions about PB&J Thumbprint Cookies Recipe
As I’ve shared my PB&J Thumbprint Cookies Recipe with friends and family, I’ve noticed a few common questions pop up. It’s always great to clarify any doubts, especially when it comes to baking. Here are some frequently asked questions that I hope will help you on your baking journey!
Can I use natural peanut butter for this recipe?
Absolutely! Natural peanut butter works wonderfully in this recipe. Just keep in mind that it may be a bit more runny than regular peanut butter, so you might need to adjust the flour slightly to achieve the right dough consistency. The flavor will be just as delicious!
What type of jam or jelly should I use?
The beauty of this recipe is its versatility! You can use any jam or jelly you love. Strawberry and raspberry are classic choices, but I’ve also enjoyed apricot and blueberry. Feel free to experiment and find your favorite flavor combination!
How do I store the cookies after baking?
To keep your cookies fresh, store them in an airtight container at room temperature. They should stay good for about a week. If you want to keep them longer, you can freeze them for up to three months. Just make sure to separate layers with parchment paper to prevent sticking!
Can I make the dough ahead of time?
Yes, you can! If you want to prepare the dough in advance, simply wrap it tightly in plastic wrap and refrigerate it for up to 2 days. When you’re ready to bake, let it sit at room temperature for a few minutes before shaping the cookies.
Why are my cookies spreading too much while baking?
If your cookies are spreading too much, it could be due to a few reasons. Make sure your butter is softened but not melted. Also, chilling the dough for about 15-30 minutes before baking can help prevent excessive spreading. Lastly, ensure you’re measuring your flour accurately, as too little flour can lead to flat cookies.
These questions are just a few of the common concerns I’ve encountered while baking these delightful cookies. I hope this section helps clear up any uncertainties you might have. Remember, baking is all about having fun and learning along the way, so don’t hesitate to reach out if you have more questions!
Conclusion on PB&J Thumbprint Cookies Recipe
As we wrap up our delightful journey into the world of PB&J Thumbprint Cookies, I can’t help but feel a sense of joy and nostalgia. These cookies are more than just a sweet treat; they are a celebration of childhood memories and the simple pleasures of life. The buttery cookie base, combined with the fruity jam, creates a perfect harmony of flavors that brings smiles to faces young and old.
What I love most about this recipe is its versatility. Whether you’re baking for a special occasion, a cozy afternoon snack, or simply to indulge your sweet tooth, these cookies fit the bill. Plus, they’re a fantastic way to get kids involved in the kitchen, making memories that will last a lifetime.
So, gather your ingredients, put on your apron, and let the aroma of freshly baked cookies fill your home. I hope you find as much joy in baking and sharing these PB&J Thumbprint Cookies as I do. Happy baking, and may your kitchen always be filled with love and laughter!


