Introduction to No-Bake Biscoff Swirl Cheesecake
As a passionate home cook, I find joy in creating desserts that not only taste divine but also bring a smile to the faces of my loved ones. One of my all-time favorites is the No-Bake Biscoff Swirl Cheesecake. This delightful treat combines the creamy richness of cheesecake with the unique, caramelized flavor of Biscoff cookies. It’s like a hug in dessert form!
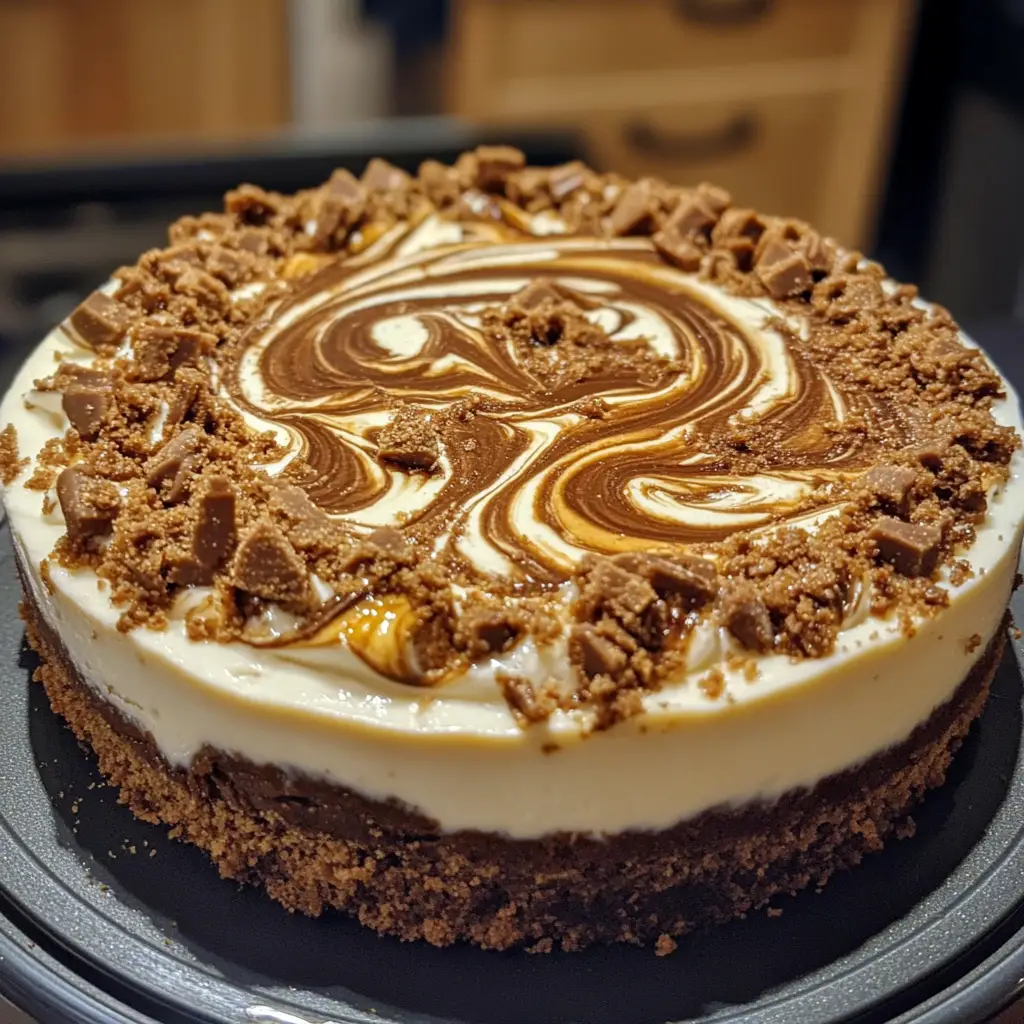
Let me take you back to the first time I made this cheesecake. It was a warm summer evening, and I wanted to impress my friends at a gathering. I had just discovered Biscoff spread, and the idea of swirling it into a cheesecake seemed like a match made in heaven. The moment I took that first bite, I was transported to a world of sweet, velvety bliss. The combination of the crunchy crust and the smooth filling was simply irresistible.
What I love most about this recipe is how easy it is to whip up. No baking means no fussing over the oven, and it’s perfect for those hot days when you want something sweet without heating up the kitchen. Plus, it’s a great way to get creative! You can adjust the swirl to your liking, making each cheesecake uniquely yours.
In this article, I’ll guide you through the ingredients, preparation steps, and tips to make your No-Bake Biscoff Swirl Cheesecake a showstopper. Whether you’re a seasoned baker or a beginner, I promise you’ll find joy in making this dessert. So, let’s dive into the world of creamy, dreamy cheesecake and get ready to impress!
Ingredients for No-Bake Biscoff Swirl Cheesecake
Before we dive into the delightful process of making the No-Bake Biscoff Swirl Cheesecake, let’s gather our ingredients. Having everything ready makes the cooking experience smoother and more enjoyable. Trust me, there’s nothing worse than realizing you’re missing a key ingredient halfway through! Here’s what you’ll need:
Main Ingredients
- 1 ½ cups Biscoff cookie crumbs (about 30 cookies, crushed)
- ½ cup unsalted butter, melted
- 16 oz cream cheese, softened (I prefer using full-fat for a richer taste)
- 1 cup powdered sugar
- 1 teaspoon vanilla extract
- 1 cup heavy whipping cream
- ½ cup Biscoff spread (for swirling)
When selecting your ingredients, I recommend using high-quality cream cheese and real vanilla extract. It makes a noticeable difference in flavor. And don’t skimp on the Biscoff spread; it’s the star of the show!
Optional Add-ons
- Chopped Biscoff cookies for garnish
- Chocolate shavings for a touch of decadence
- Fresh fruit, like strawberries or raspberries, for a pop of color and freshness
Feel free to get creative with these optional add-ons! I often sprinkle some chopped Biscoff cookies on top for that extra crunch. It not only looks beautiful but also adds a delightful texture to each bite. You can even mix in some fruit for a refreshing twist. The possibilities are endless!
How to Prepare No-Bake Biscoff Swirl Cheesecake
Now that we have our ingredients ready, it’s time to roll up our sleeves and dive into the fun part—preparing the No-Bake Biscoff Swirl Cheesecake! I promise, this process is as enjoyable as the final product is delicious. Let’s break it down step by step.
Step 1: Prepare the Crust
First things first, we need to create a solid foundation for our cheesecake. The crust is where the magic begins!
- In a mixing bowl, combine the Biscoff cookie crumbs and melted butter. Stir until the crumbs are fully coated and the mixture resembles wet sand.
- Press the mixture firmly into the bottom of a 9-inch springform pan. Make sure it’s even and compact; this will help it hold together when you slice the cheesecake.
Tips for a Perfect Crust
To achieve a perfect crust, I like to use the bottom of a measuring cup to press down the crumbs. It gives a nice, even surface. If you want a thicker crust, feel free to add a bit more cookie crumbs and butter. Just remember, balance is key!
Step 2: Make the Cheesecake Filling
Next up is the creamy filling that will make your taste buds dance! This part is super simple.
- In a large mixing bowl, beat the softened cream cheese until it’s smooth and creamy. I usually use an electric mixer for this, but a whisk works too if you’re feeling strong!
- Add in the powdered sugar and vanilla extract, mixing until well combined.
- In another bowl, whip the heavy cream until stiff peaks form. Gently fold the whipped cream into the cream cheese mixture until fully incorporated. This step is crucial for that light, airy texture.
Tips for Creamy Filling
Make sure your cream cheese is at room temperature; this helps it blend smoothly without lumps. If you want an extra touch of flavor, consider adding a pinch of salt to balance the sweetness!
Step 3: Swirl in the Biscoff Spread
Now comes the fun part—swirling in that luscious Biscoff spread! This is where the cheesecake gets its signature flavor.
- Take the Biscoff spread and gently warm it in the microwave for about 10-15 seconds. This makes it easier to swirl.
- Pour half of the cheesecake filling over the crust, then drizzle half of the warmed Biscoff spread on top.
- Using a knife or a skewer, gently swirl the Biscoff into the filling. Don’t overdo it; you want to see those beautiful swirls!
- Repeat with the remaining filling and Biscoff spread, swirling again.
Tips for Swirling Technique
When swirling, think of it like painting a canvas. You want to create beautiful patterns without mixing everything together. A gentle hand is key here!
Step 4: Assemble and Chill
We’re almost there! Now it’s time to assemble everything and let it chill.
- Once you’ve swirled in the Biscoff, smooth the top with a spatula.
- Cover the cheesecake with plastic wrap and place it in the refrigerator. Let it chill for at least 4 hours, or overnight if you can wait!
Tips for Chilling Time
Patience is a virtue when it comes to cheesecakes! The longer it chills, the better the flavors meld together. If you’re in a hurry, a minimum of 4 hours will do, but overnight is ideal for that perfect slice.
Equipment Needed for No-Bake Biscoff Swirl Cheesecake
Before we dive into the delicious world of No-Bake Biscoff Swirl Cheesecake, let’s make sure we have the right tools at our disposal. Having the right equipment can make the process smoother and more enjoyable. Here’s what you’ll need:
- 9-inch springform pan: This is essential for easy removal of the cheesecake once it’s set. If you don’t have one, a regular pie dish will work, but slicing might be a bit trickier.
- Mixing bowls: I recommend having at least two—one for the cream cheese filling and another for whipping the cream. It keeps things organized!
- Electric mixer or whisk: An electric mixer makes whipping the cream cheese and heavy cream a breeze. However, if you’re feeling adventurous, a good old-fashioned whisk will do the trick, just be prepared for a workout!
- Spatula: A rubber spatula is perfect for folding the whipped cream into the cheesecake mixture and smoothing the top.
- Knife or skewer: This is what you’ll use to create those beautiful swirls in the Biscoff spread. A simple butter knife works just fine!
- Plastic wrap: To cover the cheesecake while it chills in the fridge, keeping it fresh and preventing any unwanted odors from seeping in.
With these tools in hand, you’re all set to create your No-Bake Biscoff Swirl Cheesecake masterpiece! Remember, the right equipment can make all the difference, so gather your gear and let’s get cooking!
Variations of No-Bake Biscoff Swirl Cheesecake
As I’ve experimented with my No-Bake Biscoff Swirl Cheesecake, I’ve discovered that there are so many delightful variations to try! Each twist adds a unique flavor profile, making this dessert even more exciting. Here are a few of my favorite variations that you might want to explore:
- Chocolate Biscoff Cheesecake: For all the chocolate lovers out there, try adding melted chocolate to the cheesecake filling. You can also swirl in some chocolate ganache along with the Biscoff spread for a double treat!
- Nutty Biscoff Cheesecake: Incorporate crushed nuts, like pecans or walnuts, into the crust for an added crunch. You can also sprinkle some on top for garnish, giving it a delightful texture contrast.
- Fruit-Infused Biscoff Cheesecake: Add a layer of fresh fruit, like sliced strawberries or blueberries, between the crust and the cheesecake filling. The fruity freshness pairs beautifully with the rich Biscoff flavor.
- Spiced Biscoff Cheesecake: Enhance the flavor by adding a pinch of cinnamon or nutmeg to the cheesecake filling. This adds a warm, cozy note that’s perfect for fall gatherings.
These variations not only keep things interesting but also allow you to tailor the cheesecake to your taste preferences. I love how a simple twist can transform a classic recipe into something new and exciting. So, don’t hesitate to get creative and make this No-Bake Biscoff Swirl Cheesecake your own!
Cooking Notes for No-Bake Biscoff Swirl Cheesecake
As I’ve whipped up my fair share of No-Bake Biscoff Swirl Cheesecakes, I’ve gathered a few cooking notes that can help you achieve the best results. These little tips can make a big difference in your cheesecake journey!
- Room Temperature Ingredients: Always start with room temperature cream cheese and heavy cream. This ensures a smooth, lump-free filling. I usually take them out of the fridge about an hour before I start.
- Chill Your Tools: If you want to whip your cream to perfection, chill your mixing bowl and beaters in the fridge for about 15 minutes. Cold tools help the cream whip up faster and fluffier!
- Don’t Rush the Chilling: I know it’s tempting to dig in right away, but allowing the cheesecake to chill for the full time is crucial. It helps the flavors meld and the texture set beautifully.
- Use a Hot Knife for Slicing: For clean slices, dip your knife in hot water and wipe it dry before cutting. This little trick makes each slice look picture-perfect!
- Store Properly: If you have leftovers (which is rare!), cover the cheesecake tightly with plastic wrap and store it in the fridge. It should last for about 3-4 days, but I doubt it will last that long!
These cooking notes are like little nuggets of wisdom I’ve picked up along the way. They help ensure that your No-Bake Biscoff Swirl Cheesecake turns out as delicious as possible. Happy baking, and enjoy every creamy, dreamy bite!
Serving Suggestions for No-Bake Biscoff Swirl Cheesecake
Now that your No-Bake Biscoff Swirl Cheesecake is ready to dazzle, let’s talk about how to serve it up in style! Presentation can elevate your dessert from delicious to downright spectacular. Here are some of my favorite serving suggestions that will make your cheesecake the star of any gathering:
- Garnish with Biscoff Crumbs: Before serving, sprinkle some crushed Biscoff cookies on top. It adds a lovely crunch and a visual pop that’s sure to impress your guests.
- Drizzle with Caramel Sauce: A warm drizzle of caramel sauce over each slice adds an extra layer of sweetness and a beautiful glossy finish. It’s like a sweet hug for your cheesecake!
- Fresh Berries: Serve with a side of fresh berries, like strawberries or raspberries. Their tartness balances the richness of the cheesecake, creating a delightful flavor contrast.
- Whipped Cream Clouds: A dollop of freshly whipped cream on top not only looks inviting but also adds a light, airy touch. You can even sprinkle a bit of cinnamon on the cream for an extra flair!
- Chocolate Shavings: For a touch of elegance, add some chocolate shavings on top. It’s a simple yet sophisticated way to enhance the dessert’s visual appeal.
These serving suggestions are just the icing on the cake—literally! Each one adds a unique twist to your No-Bake Biscoff Swirl Cheesecake, making it even more enjoyable. So, gather your friends and family, slice up that cheesecake, and watch as their faces light up with delight!
Tips for Making No-Bake Biscoff Swirl Cheesecake
As I’ve journeyed through the delightful world of making No-Bake Biscoff Swirl Cheesecake, I’ve gathered a treasure trove of tips that can help you create the perfect dessert. These little nuggets of wisdom can make all the difference in your cheesecake-making adventure!
- Measure Accurately: Precision is key! Use a kitchen scale for the best results, especially for the cream cheese and powdered sugar. It ensures a consistent texture every time.
- Don’t Overmix: When folding the whipped cream into the cheesecake mixture, be gentle. Overmixing can deflate the airiness, resulting in a denser cheesecake. Think of it as a dance—gentle and graceful!
- Experiment with Flavors: Don’t hesitate to add your personal touch! A splash of almond extract or a hint of lemon zest can elevate the flavor profile. It’s all about making it uniquely yours!
- Use Quality Ingredients: The better the ingredients, the better the cheesecake! Opt for high-quality cream cheese and real vanilla extract. Trust me, it makes a world of difference in taste.
- Chill Before Serving: For the best texture, let your cheesecake chill for at least 4 hours, but overnight is even better. This allows the flavors to meld beautifully, creating a harmonious dessert.
These tips are like little guiding stars on your cheesecake-making journey. With a sprinkle of patience and a dash of creativity, you’ll be well on your way to impressing everyone with your No-Bake Biscoff Swirl Cheesecake. Happy baking!
Breakdown of Time for No-Bake Biscoff Swirl Cheesecake
As a home cook, I know that time management is key when preparing any dish, especially desserts. The No-Bake Biscoff Swirl Cheesecake is no exception! Here’s a quick breakdown of the time you’ll need to whip up this delightful treat:
- Prep Time: 30 minutes
- Chilling Time: 4 hours (or overnight for best results)
- Total Time: 4 hours 30 minutes (or overnight if you choose)
While the prep time is relatively short, the chilling time is essential for achieving that perfect texture and flavor. I often find myself eagerly waiting, but trust me, the wait is worth it! If you can plan ahead and let it chill overnight, you’ll be rewarded with a cheesecake that’s not only delicious but also beautifully set. So, grab your ingredients, set aside some time, and let’s create a masterpiece!
Nutritional Information for No-Bake Biscoff Swirl Cheesecake
As a passionate home cook, I believe that enjoying dessert doesn’t have to come with guilt. While the No-Bake Biscoff Swirl Cheesecake is undeniably rich and indulgent, it’s also important to be mindful of what we’re putting into our bodies. Here’s a general breakdown of the nutritional information per slice (assuming the cheesecake is cut into 12 slices):
- Calories: Approximately 320
- Fat: 22g
- Saturated Fat: 12g
- Carbohydrates: 30g
- Fiber: 1g
- Sugar: 18g
- Protein: 4g
Keep in mind that these values can vary based on the specific brands of ingredients you use and any optional add-ons you choose to include. If you’re looking to lighten things up a bit, consider using reduced-fat cream cheese or a sugar substitute. However, I always say that moderation is key! Enjoying a slice of this creamy delight every now and then is part of the joy of cooking and sharing with loved ones.
Frequently Asked Questions about No-Bake Biscoff Swirl Cheesecake
As I’ve shared my love for the No-Bake Biscoff Swirl Cheesecake, I’ve often encountered a few common questions from fellow dessert enthusiasts. I’m excited to address these queries, as they can help you navigate your cheesecake-making journey with ease. Here are some of the most frequently asked questions:
Can I use a different type of cookie for the crust?
Absolutely! While Biscoff cookies create a deliciously unique flavor, you can substitute them with other cookies like graham crackers, Oreos, or even digestive biscuits. Just remember to adjust the amount of butter based on the cookie type to achieve that perfect crust consistency.
How long can I store the cheesecake?
If you have any leftovers (which is rare!), you can store the No-Bake Biscoff Swirl Cheesecake in the refrigerator for about 3-4 days. Just make sure to cover it tightly with plastic wrap to keep it fresh and prevent any odors from seeping in.
Can I freeze the cheesecake?
Yes, you can freeze the cheesecake! Just make sure to wrap it well in plastic wrap and then in aluminum foil to prevent freezer burn. It can be stored in the freezer for up to 2 months. When you’re ready to enjoy it, simply thaw it in the refrigerator overnight before serving.
What can I use instead of heavy cream?
If you’re looking for a lighter option, you can substitute heavy cream with whipped coconut cream or a non-dairy whipped topping. Keep in mind that the texture and flavor may vary slightly, but it can still be delicious!
Can I make this cheesecake ahead of time?
Definitely! In fact, making the No-Bake Biscoff Swirl Cheesecake a day in advance is a great idea. It allows the flavors to meld beautifully and ensures a perfectly set texture. Just remember to cover it well while it chills in the fridge!
These FAQs are just a glimpse into the wonderful world of No-Bake Biscoff Swirl Cheesecake. I hope they help you feel more confident as you embark on your cheesecake-making adventure. Remember, the joy of cooking comes from experimenting and sharing delicious moments with those you love. Happy baking!
Conclusion on No-Bake Biscoff Swirl Cheesecake
As I wrap up my journey through the delightful world of No-Bake Biscoff Swirl Cheesecake, I can’t help but feel a sense of excitement. This dessert is not just a treat; it’s an experience that brings joy to both the maker and the eater. The creamy texture, the rich flavor of Biscoff, and the ease of preparation make it a standout choice for any occasion.
What I love most about this cheesecake is its versatility. Whether you’re hosting a gathering, celebrating a special moment, or simply indulging in a sweet craving, this recipe fits the bill perfectly. Plus, the no-bake aspect means you can whip it up without the stress of an oven, making it accessible for cooks of all skill levels.
So, gather your ingredients, unleash your creativity, and dive into the world of No-Bake Biscoff Swirl Cheesecake. I promise you’ll create not just a dessert, but a memory that will linger long after the last bite. Happy baking, and may your kitchen be filled with laughter and love!


