Introduction to No-Bake Biscoff Mousse Cake Recipe
As a passionate home cook, I often find myself on a delightful journey through flavors and textures. One of my favorite stops along this culinary path is the world of no-bake desserts. They are like a breath of fresh air, offering a sweet escape without the fuss of an oven. Today, I’m excited to share my No-Bake Biscoff Mousse Cake Recipe, a treat that has become a staple in my kitchen.
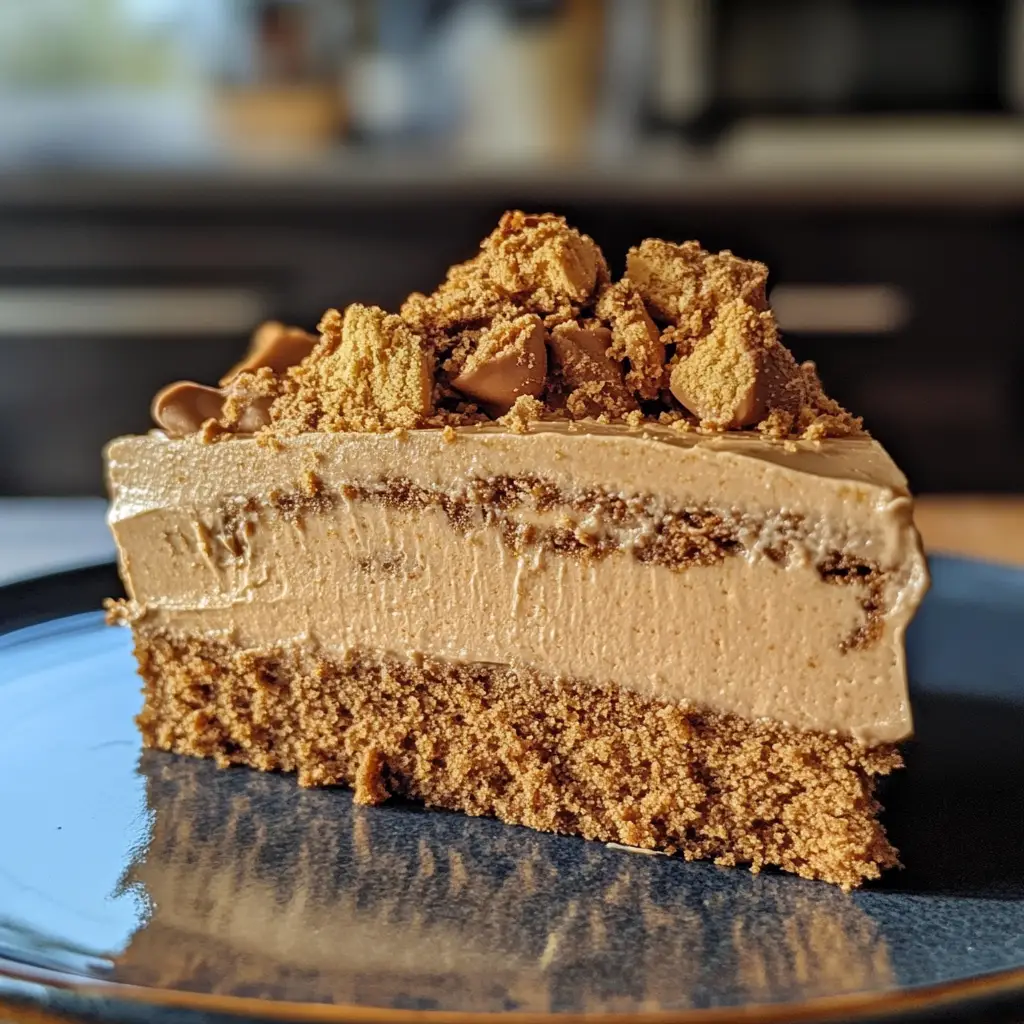
Imagine a cake that’s as light as a cloud yet rich with the warm, caramel notes of Biscoff cookies. This dessert is not just a feast for the taste buds; it’s a celebration of simplicity and indulgence. I remember the first time I made this cake. It was a sunny afternoon, and I had friends over for tea. I wanted to impress them without spending hours in the kitchen. That’s when I stumbled upon the idea of a no-bake mousse cake. With just a few ingredients and a little patience, I created something magical.
The beauty of this recipe lies in its versatility. You can whip it up for a special occasion or simply to satisfy a sweet craving. Each bite is a creamy, dreamy experience that transports you to a cozy café, where the aroma of freshly brewed coffee mingles with the scent of baked goods. Plus, it’s a fantastic way to showcase the beloved Biscoff cookie, which adds a unique twist to traditional mousse cakes.
So, grab your mixing bowls and let’s embark on this delicious adventure together! I promise, once you try this No-Bake Biscoff Mousse Cake, it will become a cherished recipe in your home, just like it has in mine.
Ingredients for No-Bake Biscoff Mousse Cake Recipe
Before we dive into the delightful process of making this No-Bake Biscoff Mousse Cake, let’s gather our ingredients. Having everything ready is like setting the stage for a beautiful performance. Each ingredient plays its part in creating a symphony of flavors that will dance on your palate. Here’s what you’ll need:
Main Ingredients
- 200g Biscoff cookies (about 2 cups, crushed)
- 100g unsalted butter (melted, about ½ cup)
- 400ml heavy cream (whipped, about 1 ⅔ cups)
- 250g cream cheese (softened, about 1 cup)
- 100g powdered sugar (about ½ cup)
- 200g Biscoff spread (about ¾ cup)
- 1 teaspoon vanilla extract
When choosing your ingredients, I always recommend going for high-quality products. The Biscoff cookies are the star of the show, so opt for the original brand if you can. It makes a world of difference in flavor! The heavy cream should be fresh and cold for the best whipping results, while the cream cheese should be at room temperature to blend smoothly.
Optional Add-ons
- Chocolate shavings or cocoa powder for garnish
- Chopped nuts (like hazelnuts or almonds) for added crunch
- Fresh berries (like raspberries or strawberries) for a fruity twist
- Extra Biscoff cookies for decoration
These optional add-ons can elevate your cake to new heights. I love adding a sprinkle of chocolate shavings on top for a touch of elegance. If you’re feeling adventurous, a handful of fresh berries can add a refreshing contrast to the creamy mousse. The possibilities are endless, and that’s what makes this recipe so fun!
Now that we have our ingredients ready, let’s move on to the exciting part—preparing our No-Bake Biscoff Mousse Cake!
How to Prepare No-Bake Biscoff Mousse Cake Recipe
Now that we have our ingredients ready, it’s time to roll up our sleeves and dive into the fun part—preparing our No-Bake Biscoff Mousse Cake! This process is like a dance, where each step flows into the next, creating a beautiful dessert that will wow your friends and family. Let’s get started!
Step 1: Prepare the Biscuit Base
First things first, we need to create a solid foundation for our cake. The biscuit base is crucial as it adds texture and flavor. Here’s how to do it:
- In a food processor, crush the Biscoff cookies until they resemble fine crumbs. You can also place them in a zip-lock bag and crush them with a rolling pin if you don’t have a food processor.
- In a mixing bowl, combine the crushed cookies with the melted butter. Stir until the mixture resembles wet sand.
- Press the mixture firmly into the bottom of a springform pan to create an even layer. Use the back of a measuring cup to pack it down tightly.
Tips for Step 1
Make sure to pack the biscuit base tightly. This will help it hold together when you slice the cake later. If you want a little extra flavor, you can add a pinch of cinnamon to the cookie mixture. It adds a warm, cozy note that pairs beautifully with the Biscoff!
Step 2: Make the Biscoff Mousse
Next up is the star of the show—the Biscoff mousse! This creamy layer is what makes the cake so dreamy and delicious. Here’s how to whip it up:
- In a large mixing bowl, beat the softened cream cheese until smooth and creamy.
- Add the powdered sugar and vanilla extract, mixing until well combined.
- Gently fold in the Biscoff spread until fully incorporated.
- In another bowl, whip the heavy cream until stiff peaks form. This is where the magic happens—fluffy, airy cream!
- Carefully fold the whipped cream into the Biscoff mixture. Be gentle to keep the mousse light and airy.
Tips for Step 2
When folding the whipped cream, use a spatula and a gentle motion. This helps maintain the fluffiness of the mousse. If you want a richer flavor, you can add a bit more Biscoff spread—who can resist that?
Step 3: Assemble the Cake
Now that we have our biscuit base and luscious mousse, it’s time to bring everything together:
- Pour the Biscoff mousse over the prepared biscuit base, spreading it evenly with a spatula.
- Tap the pan gently on the counter to remove any air bubbles and ensure an even layer.
- If you’re using any optional add-ons, like chopped nuts or chocolate shavings, sprinkle them on top of the mousse now.
Tips for Step 3
Don’t be afraid to get creative with the toppings! A sprinkle of crushed Biscoff cookies on top adds a nice crunch and looks beautiful. Plus, it’s a great way to hint at the deliciousness that awaits!
Step 4: Chill the Cake
The final step is to let our cake chill and set. This is where the flavors meld together, creating a harmonious dessert:
- Cover the springform pan with plastic wrap or a lid.
- Place it in the refrigerator for at least 4 hours, or overnight if you can wait!
Tips for Step 4
Patience is key here! The longer you let it chill, the better the flavors will develop. If you’re in a hurry, a minimum of 4 hours will still yield a delicious cake, but overnight is truly the way to go for the best results.
And there you have it! With these steps, you’re well on your way to creating a stunning No-Bake Biscoff Mousse Cake that will impress everyone. I can already picture the smiles on your loved ones’ faces as they take their first bite!
Equipment Needed for No-Bake Biscoff Mousse Cake Recipe
Before we dive into the kitchen, let’s gather the essential tools for our No-Bake Biscoff Mousse Cake. Having the right equipment makes the process smoother and more enjoyable. Here’s what you’ll need:
- Springform Pan: This is a must-have for easy removal of the cake. If you don’t have one, a regular round cake pan will work, but be careful when serving.
- Food Processor or Rolling Pin: To crush the Biscoff cookies. A food processor is quick and efficient, but a rolling pin and a zip-lock bag can do the trick too!
- Mixing Bowls: You’ll need a couple of medium to large mixing bowls for combining ingredients. I love using glass bowls because they’re easy to clean and look pretty!
- Electric Mixer: A hand mixer or stand mixer is perfect for whipping the cream and beating the cream cheese. If you don’t have one, a whisk will work, but it requires a bit more elbow grease!
- Spatula: A silicone spatula is great for folding the whipped cream into the mousse without deflating it.
- Measuring Cups and Spoons: Accurate measurements are key to a successful cake, so don’t skip these!
With these tools in hand, you’re all set to create your No-Bake Biscoff Mousse Cake. Remember, cooking is all about improvisation, so feel free to adapt as needed. Let’s get baking—well, no-baking, that is!
Variations of No-Bake Biscoff Mousse Cake Recipe
As I’ve explored the world of no-bake desserts, I’ve discovered that the No-Bake Biscoff Mousse Cake is a fantastic canvas for creativity. Just like a painter with a blank canvas, you can add your own flair to this recipe. Here are a few delightful variations that I’ve tried and loved:
- Chocolate Biscoff Mousse Cake: For all the chocolate lovers out there, why not mix in some melted dark chocolate into the mousse? It adds a rich depth that pairs beautifully with the Biscoff flavor.
- Peanut Butter Twist: If you’re a fan of peanut butter, fold in some creamy peanut butter into the mousse. The combination of Biscoff and peanut butter is like a match made in dessert heaven!
- Fruit-Infused Delight: Add a layer of fresh fruit, like sliced bananas or strawberries, between the biscuit base and the mousse. It adds a refreshing burst of flavor and a pop of color.
- Spiced Pumpkin Version: For a seasonal twist, incorporate pumpkin puree and a dash of pumpkin spice into the mousse. It’s perfect for fall gatherings and adds a cozy warmth to the cake.
These variations not only keep things exciting but also allow you to cater to different tastes and preferences. I love experimenting with flavors, and each time I make this cake, it feels like a new adventure. So, don’t hesitate to get creative and make this No-Bake Biscoff Mousse Cake your own!
Cooking Notes for No-Bake Biscoff Mousse Cake Recipe
As I’ve whipped up my fair share of No-Bake Biscoff Mousse Cakes, I’ve gathered a few cooking notes that can help you achieve the best results. Think of these as little nuggets of wisdom that can elevate your dessert-making game!
- Room Temperature Ingredients: Make sure your cream cheese is at room temperature before mixing. This helps it blend smoothly into the mousse, avoiding any lumps. Trust me, a smooth mousse is a happy mousse!
- Whipping Cream: When whipping the heavy cream, ensure your mixing bowl and beaters are cold. This helps the cream whip up faster and achieve those lovely stiff peaks. A little chill goes a long way!
- Chilling Time: While I recommend chilling the cake for at least 4 hours, overnight is ideal. This allows the flavors to meld beautifully, creating a richer taste. If you can resist the temptation, let it sit longer!
- Serving Tips: When it’s time to serve, run a knife around the edge of the springform pan before releasing it. This helps prevent any sticking and ensures a clean slice. A warm knife dipped in hot water works wonders for cutting through the mousse!
These cooking notes are like little secrets I’ve learned along the way. They can make a big difference in your No-Bake Biscoff Mousse Cake experience. So, keep them in mind as you embark on this delicious journey!
Serving Suggestions for No-Bake Biscoff Mousse Cake Recipe
Now that our No-Bake Biscoff Mousse Cake is ready to dazzle, let’s talk about how to serve it up in style! Presentation is key, and I love to make each slice feel like a special treat. Here are some of my favorite serving suggestions that will elevate your dessert experience:
- Garnish with Whipped Cream: A dollop of freshly whipped cream on top adds a light and airy touch. You can even sprinkle a bit of crushed Biscoff cookies on the cream for that extra flair!
- Fresh Fruit: Serve slices with a side of fresh berries, like strawberries or raspberries. The tartness of the fruit beautifully balances the sweetness of the mousse.
- Chocolate Drizzle: A drizzle of melted chocolate over the top can turn your cake into a showstopper. It adds a rich contrast that’s simply irresistible.
- Pair with Coffee or Tea: This cake pairs wonderfully with a cup of coffee or tea. The warm, comforting flavors complement the creamy mousse perfectly, making it a delightful afternoon treat.
When I serve this cake, I love to arrange it on a beautiful platter, showcasing its layers. It’s all about creating an inviting atmosphere that makes everyone feel special. So, whether it’s a casual family gathering or a fancy dinner party, these serving suggestions will surely impress your guests and make your No-Bake Biscoff Mousse Cake the star of the show!
Tips for Perfecting No-Bake Biscoff Mousse Cake Recipe
As I’ve crafted my No-Bake Biscoff Mousse Cake time and time again, I’ve picked up a few tips that can truly elevate your dessert game. Think of these as little treasures that can help you achieve a cake that’s not just good, but absolutely spectacular!
- Use Quality Ingredients: The better the ingredients, the better the cake! Opt for high-quality Biscoff cookies and spread. It makes a noticeable difference in flavor.
- Don’t Rush the Chilling: I know it’s tempting to dig in right away, but patience is key. Allowing the cake to chill overnight enhances the flavors and texture, making each bite a dream.
- Experiment with Flavors: Don’t hesitate to add your own twist! Whether it’s a hint of cinnamon or a splash of coffee, small additions can create a unique flavor profile that’s all your own.
- Perfect Your Whipping Technique: When whipping the cream, keep an eye on it. Stop as soon as you see stiff peaks. Over-whipping can lead to a grainy texture, and we want our mousse to be silky smooth!
- Presentation Matters: A beautiful presentation can make your cake even more enticing. Use a sharp knife for clean slices and consider garnishing with fresh fruit or chocolate shavings for that wow factor.
With these tips in your back pocket, you’re well on your way to creating a No-Bake Biscoff Mousse Cake that will leave everyone asking for seconds. Happy baking—oops, I mean no-baking!
Breakdown of Time for No-Bake Biscoff Mousse Cake Recipe
As a home cook, I know that time management is key in the kitchen. When it comes to my No-Bake Biscoff Mousse Cake, understanding the time involved helps me plan my day better. Here’s a quick breakdown of the time you’ll need to whip up this delightful dessert:
- Prep Time: Approximately 30 minutes. This includes gathering your ingredients, preparing the biscuit base, and making the mousse. It’s a fun and engaging process that flies by!
- Chilling Time: At least 4 hours, but I recommend overnight for the best flavor and texture. This is the time when the magic happens, allowing the mousse to set perfectly.
- Total Time: About 4 hours and 30 minutes (or longer if you choose to chill overnight). This total time includes both the prep and chilling phases, making it a great option for a make-ahead dessert.
Knowing this time breakdown helps me plan ahead, especially when I have guests coming over. I often prepare the cake the night before, allowing me to relax and enjoy the company of my friends without any last-minute stress. Plus, the anticipation of waiting for it to chill only adds to the excitement of serving this delicious treat!
Nutritional Information for No-Bake Biscoff Mousse Cake Recipe
As a passionate home cook, I believe that enjoying dessert doesn’t have to come with guilt. Understanding the nutritional information of my No-Bake Biscoff Mousse Cake helps me appreciate each delightful bite while keeping my health in mind. Here’s a general breakdown of the nutritional content per slice (assuming the cake is cut into 12 slices):
- Calories: Approximately 320 calories
- Fat: 22g (Saturated Fat: 12g)
- Carbohydrates: 30g (Sugars: 18g)
- Protein: 3g
- Fiber: 1g
These values can vary based on the specific brands of ingredients you use and any optional add-ons you choose to include. While this cake is certainly a treat, it’s also a reminder that moderation is key. I often enjoy a slice with a cup of tea, savoring the flavors and textures without overindulging.
Remember, it’s all about balance! This No-Bake Biscoff Mousse Cake can be a delightful part of a well-rounded diet, especially when shared with loved ones. So, go ahead and treat yourself—you deserve it!
Frequently Asked Questions about No-Bake Biscoff Mousse Cake Recipe
As I’ve shared my No-Bake Biscoff Mousse Cake with friends and family, I’ve noticed a few common questions pop up. It’s always great to clarify any doubts and ensure everyone feels confident in making this delightful dessert. Here are some frequently asked questions that I hope will help you on your baking journey!
Can I use a different type of cookie for the base?
Absolutely! While Biscoff cookies are the star of this recipe, you can experiment with other cookies like Oreos or digestive biscuits. Just keep in mind that the flavor will change slightly, but it can still be delicious!
How long can I store the No-Bake Biscoff Mousse Cake?
This cake can be stored in the refrigerator for up to 5 days. Just make sure to cover it well with plastic wrap or a lid to keep it fresh. I often find that the flavors deepen after a day or two, making it even more enjoyable!
Can I freeze the No-Bake Biscoff Mousse Cake?
Yes, you can freeze it! Just slice the cake and wrap each piece tightly in plastic wrap, then place them in an airtight container. It can be frozen for up to a month. When you’re ready to enjoy, simply thaw it in the refrigerator overnight.
What can I substitute for heavy cream?
If you’re looking for a lighter option, you can use whipped coconut cream or a dairy-free alternative. Just make sure it’s suitable for whipping. The texture may vary slightly, but it can still create a lovely mousse!
Can I make this cake ahead of time?
Definitely! In fact, I recommend making it a day in advance. The longer it chills, the better the flavors meld together. It’s a perfect make-ahead dessert for parties or gatherings!
These questions reflect the curiosity and excitement that come with trying a new recipe. I hope this FAQ section helps you feel more prepared and inspired to create your own No-Bake Biscoff Mousse Cake. Remember, cooking is all about exploration and enjoyment, so don’t hesitate to ask more questions as you embark on this delicious adventure!
Conclusion on No-Bake Biscoff Mousse Cake Recipe
As I wrap up this delightful journey through my No-Bake Biscoff Mousse Cake Recipe, I can’t help but feel a sense of joy. This cake is more than just a dessert; it’s a celebration of flavors, creativity, and the simple pleasure of sharing something sweet with loved ones. The creamy mousse, combined with the crunchy biscuit base, creates a texture that dances on your palate, making each bite a little moment of happiness.
What I love most about this recipe is its versatility. Whether you’re hosting a fancy dinner party or just treating yourself on a quiet evening, this cake fits the occasion perfectly. Plus, it’s incredibly easy to make, allowing you to spend less time in the kitchen and more time enjoying the company of friends and family.
So, if you’re looking for a show-stopping dessert that’s sure to impress, look no further than this No-Bake Biscoff Mousse Cake. With its rich flavors and delightful textures, it’s bound to become a cherished recipe in your home, just as it has in mine. I can’t wait for you to experience the joy of making and sharing this cake. Happy no-baking!


