Introduction to Hawaiian Rice Pudding Recipe
As a passionate home cook, I find joy in exploring the flavors of different cultures. One dish that has captured my heart is the delightful Hawaiian rice pudding. This creamy, dreamy dessert is not just a treat for the taste buds; it’s a warm hug on a chilly evening. I remember the first time I tasted it during a family gathering in Hawaii. The sweet aroma of coconut and the comforting texture of rice danced together, creating a memory I cherish to this day.
Hawaiian rice pudding is a beautiful blend of simple ingredients that come together to create something extraordinary. It’s a dish that tells a story, one that reflects the rich culinary heritage of the islands. The use of coconut milk adds a tropical twist, making it a perfect dessert for any occasion. Whether you’re celebrating a special event or simply indulging in a quiet evening at home, this pudding brings a taste of paradise right to your kitchen.
In this recipe, I’ll share not only the steps to create this delicious dessert but also some personal tips and tricks I’ve learned along the way. From selecting the right rice to the perfect toppings, I want to ensure your experience is as delightful as mine was. So, grab your apron, and let’s embark on this culinary adventure together!
Ingredients for Hawaiian Rice Pudding Recipe
Before we dive into the cooking process, let’s gather our ingredients. Having everything ready makes the cooking experience smoother and more enjoyable. I always find that when I have my ingredients prepped, it feels like I’m setting the stage for a delicious performance in the kitchen!
Main Ingredients
- 1 cup of short-grain rice (I prefer using sushi rice for its sticky texture)
- 2 cups of coconut milk (look for full-fat for a creamier pudding)
- 1 cup of water
- ½ cup of granulated sugar (you can adjust this based on your sweetness preference)
- 1 teaspoon of vanilla extract (pure vanilla makes a world of difference)
- ¼ teaspoon of salt (this enhances the flavors beautifully)
When selecting your ingredients, I recommend using high-quality coconut milk. It’s the star of the show! Look for brands that use minimal additives. Trust me, the flavor will shine through in your pudding.
Optional Add-ons
- 1 teaspoon of cinnamon (for a warm, spicy kick)
- Fresh fruit like mango or pineapple (to add a tropical flair)
- Toasted coconut flakes (for a delightful crunch)
- Chopped nuts (like macadamia or almonds for added texture)
- Chocolate chips (for a sweet twist that kids will love)
These optional add-ons can elevate your Hawaiian rice pudding to new heights. I often experiment with different toppings based on what I have on hand. Sometimes, I’ll sprinkle a bit of cinnamon for warmth, or I’ll add fresh mango slices for a burst of sweetness. The possibilities are endless, and that’s what makes cooking so much fun!
How to Prepare Hawaiian Rice Pudding Recipe
Now that we have our ingredients ready, it’s time to roll up our sleeves and get cooking! Preparing Hawaiian rice pudding is a delightful journey that fills your kitchen with sweet, tropical aromas. I always feel a sense of excitement as I move through each step, knowing that a delicious treat awaits at the end. Let’s dive into the process together!
Step 1: Rinse the Rice
First things first, we need to rinse the rice. This step is crucial as it removes excess starch, which can make our pudding too gummy. I usually place the rice in a fine-mesh strainer and rinse it under cold water until the water runs clear. It’s like giving the rice a refreshing shower!
Tips for Rinsing Rice
- Use cold water to rinse the rice. It helps keep the grains firm.
- Don’t skip this step! Rinsing makes a big difference in texture.
- Be gentle while rinsing to avoid breaking the grains.
Step 2: Cook the Rice
Next, we’ll cook the rice. In a medium saucepan, combine the rinsed rice, water, and a pinch of salt. Bring it to a boil over medium heat, then reduce the heat to low, cover, and let it simmer for about 15 minutes. The rice should absorb all the water and become tender. I love watching the steam rise as it cooks; it’s like a little show in my kitchen!
Tips for Cooking Rice
- Keep the lid on while it cooks to trap the steam.
- Check the rice towards the end of cooking. If it’s not tender, add a splash more water.
- Let it sit covered for a few minutes after cooking to fluff it up.
Step 3: Combine Ingredients
Once the rice is cooked, it’s time to combine it with our creamy coconut milk and sugar. In the same saucepan, add the coconut milk, sugar, vanilla extract, and a pinch of salt to the cooked rice. Stir everything together gently, allowing the flavors to meld. The mixture will start to thicken, and the aroma will be simply heavenly!
Tips for Combining Ingredients
- Stir gently to avoid breaking the rice grains.
- Feel free to taste the mixture and adjust the sweetness if needed.
- Make sure everything is well combined for even flavor.
Step 4: Simmer the Mixture
Now comes the fun part—simmering! Bring the mixture to a gentle simmer over low heat. Let it cook for about 20-25 minutes, stirring occasionally. This step allows the pudding to thicken and develop that rich, creamy texture we all love. I often find myself daydreaming about tropical beaches while I stir!
Tips for Simmering
- Keep the heat low to prevent the pudding from sticking to the bottom.
- Stir regularly to ensure even cooking.
- Don’t rush this step; patience is key for a perfect pudding!
Step 5: Add Toppings
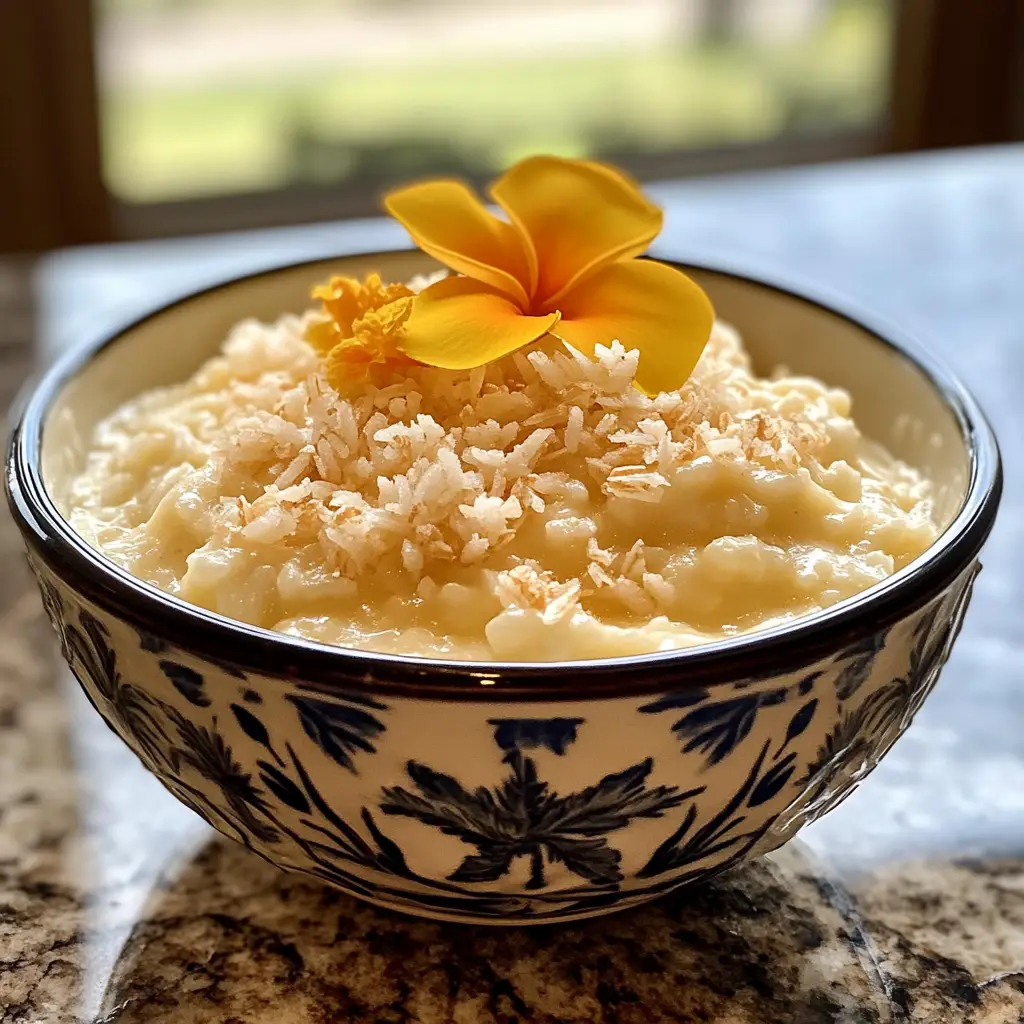
Finally, it’s time to add our toppings! Once the pudding has thickened to your desired consistency, remove it from the heat. You can serve it warm or chilled, depending on your preference. I love to top mine with fresh fruit, toasted coconut flakes, or a sprinkle of cinnamon. It’s like adding the finishing touches to a beautiful painting!
Tips for Toppings
- Get creative! Mix and match toppings based on your mood.
- For a tropical twist, add diced mango or pineapple.
- Toasted coconut adds a lovely crunch and enhances the coconut flavor.
How to Prepare Hawaiian Rice Pudding Recipe
Now that we have our ingredients ready, it’s time to roll up our sleeves and get cooking! Preparing Hawaiian rice pudding is a delightful journey that fills your kitchen with sweet, tropical aromas. I always feel a sense of excitement as I move through each step, knowing that a delicious treat awaits at the end. Let’s dive into the process together!
Step 1: Rinse the Rice
First things first, we need to rinse the rice. This step is crucial as it removes excess starch, which can make our pudding too gummy. I usually place the rice in a fine-mesh strainer and rinse it under cold water until the water runs clear. It’s like giving the rice a refreshing shower!
Tips for Rinsing Rice
- Use cold water to rinse the rice. It helps keep the grains firm.
- Don’t skip this step! Rinsing makes a big difference in texture.
- Be gentle while rinsing to avoid breaking the grains.
Step 2: Cook the Rice
Next, we’ll cook the rice. In a medium saucepan, combine the rinsed rice, water, and a pinch of salt. Bring it to a boil over medium heat, then reduce the heat to low, cover, and let it simmer for about 15 minutes. The rice should absorb all the water and become tender. I love watching the steam rise as it cooks; it’s like a little show in my kitchen!
Tips for Cooking Rice
- Keep the lid on while it cooks to trap the steam.
- Check the rice towards the end of cooking. If it’s not tender, add a splash more water.
- Let it sit covered for a few minutes after cooking to fluff it up.
Step 3: Combine Ingredients
Once the rice is cooked, it’s time to combine it with our creamy coconut milk and sugar. In the same saucepan, add the coconut milk, sugar, vanilla extract, and a pinch of salt to the cooked rice. Stir everything together gently, allowing the flavors to meld. The mixture will start to thicken, and the aroma will be simply heavenly!
Tips for Combining Ingredients
- Stir gently to avoid breaking the rice grains.
- Feel free to taste the mixture and adjust the sweetness if needed.
- Make sure everything is well combined for even flavor.
Step 4: Simmer the Mixture
Now comes the fun part—simmering! Bring the mixture to a gentle simmer over low heat. Let it cook for about 20-25 minutes, stirring occasionally. This step allows the pudding to thicken and develop that rich, creamy texture we all love. I often find myself daydreaming about tropical beaches while I stir!
Tips for Simmering
- Keep the heat low to prevent the pudding from sticking to the bottom.
- Stir regularly to ensure even cooking.
- Don’t rush this step; patience is key for a perfect pudding!
Step 5: Add Toppings
Finally, it’s time to add our toppings! Once the pudding has thickened to your desired consistency, remove it from the heat. You can serve it warm or chilled, depending on your preference. I love to top mine with fresh fruit, toasted coconut flakes, or a sprinkle of cinnamon. It’s like adding the finishing touches to a beautiful painting!
Tips for Toppings
- Get creative! Mix and match toppings based on your mood.
- For a tropical twist, add diced mango or pineapple.
- Toasted coconut adds a lovely crunch and enhances the coconut flavor.
Equipment Needed for Hawaiian Rice Pudding Recipe
Before we dive into the cooking process, let’s make sure we have the right tools at our disposal. Having the right equipment can make all the difference in creating a smooth and creamy Hawaiian rice pudding. Here’s what you’ll need:
- Medium saucepan: This is where the magic happens! A medium-sized pot is perfect for cooking the rice and combining all the ingredients.
- Fine-mesh strainer: Essential for rinsing the rice. If you don’t have one, a regular colander will work in a pinch, just be gentle!
- Wooden spoon or spatula: I love using a wooden spoon for stirring. It feels more personal, like I’m connecting with the dish as I cook.
- Measuring cups and spoons: Accurate measurements are key to achieving the perfect balance of flavors.
- Serving bowls: Choose your favorite bowls to showcase your beautiful pudding. Presentation is half the fun!
If you don’t have a fine-mesh strainer, you can also rinse the rice in a bowl, changing the water a few times until it runs clear. Cooking is all about improvisation, and sometimes, a little creativity can lead to delightful surprises!
Variations of Hawaiian Rice Pudding Recipe
As a home cook, I love to experiment with flavors and textures, and Hawaiian rice pudding is no exception! While the classic recipe is absolutely delicious, there are so many fun variations to explore. Each twist brings a new layer of excitement to this beloved dessert. Here are a few of my favorite variations:
- Pineapple Coconut Rice Pudding: Add crushed pineapple to the pudding while it simmers. The sweet and tangy fruit pairs beautifully with the creamy coconut, creating a tropical explosion in every bite.
- Chocolate Coconut Rice Pudding: For the chocolate lovers out there, stir in some cocoa powder or chocolate chips as the pudding thickens. The rich chocolate flavor combined with coconut is simply divine!
- Matcha Coconut Rice Pudding: If you’re feeling adventurous, try adding a teaspoon of matcha powder for a unique twist. The earthy flavor of matcha complements the sweetness of the pudding, making it a delightful treat.
- Spiced Coconut Rice Pudding: Experiment with spices like cardamom or nutmeg for a warm, aromatic touch. Just a pinch can elevate the flavor profile and make your pudding feel extra special.
These variations not only keep things interesting but also allow you to tailor the pudding to your taste preferences. I often find myself trying out different combinations based on what I have in my pantry. Cooking is all about creativity, and I encourage you to let your imagination run wild with this delightful dessert!
Cooking Notes for Hawaiian Rice Pudding Recipe
As I’ve journeyed through the delightful world of Hawaiian rice pudding, I’ve picked up a few cooking notes that can help you achieve the best results. These little nuggets of wisdom can make a big difference in your pudding-making adventure!
- Rice Type Matters: While short-grain rice is ideal for its sticky texture, you can also use medium-grain rice if that’s what you have on hand. Just keep an eye on the cooking time, as it may vary slightly.
- Adjusting Sweetness: Everyone has different taste preferences. I often start with less sugar and add more as needed. Taste as you go to find your perfect balance!
- Consistency Check: If your pudding seems too thick, don’t hesitate to add a splash of coconut milk or water to loosen it up. It should be creamy but not overly stiff.
- Chilling Time: If you prefer your pudding chilled, allow it to cool at room temperature before transferring it to the fridge. This helps prevent condensation from forming.
- Storage Tips: Leftover pudding can be stored in an airtight container in the fridge for up to three days. Just give it a good stir before serving, as it may thicken in the fridge.
These cooking notes are like little guiding stars in your culinary journey. They help ensure that your Hawaiian rice pudding turns out just as delicious as you envision. Happy cooking!
Serving Suggestions for Hawaiian Rice Pudding Recipe
Now that our Hawaiian rice pudding is ready, it’s time to think about how to serve it! Presentation can elevate the experience, making it even more enjoyable. I love to get creative with my serving ideas, and here are a few suggestions that have always delighted my family and friends:
- Chilled Delight: Serve the pudding chilled in individual dessert cups. Top each cup with a slice of fresh mango or a sprinkle of toasted coconut for a tropical touch.
- Warm Comfort: If you prefer it warm, ladle the pudding into bowls and drizzle with a bit of honey or maple syrup. A dollop of whipped cream on top adds a luxurious finish!
- Layered Parfait: Create a beautiful parfait by layering the pudding with fresh fruits and granola in a tall glass. It’s not only visually appealing but also adds a delightful crunch.
- Family Style: For a cozy gathering, serve the pudding in a large bowl, allowing everyone to help themselves. Provide a variety of toppings on the side, like nuts, chocolate chips, and fruits, so guests can customize their bowls.
These serving suggestions not only enhance the visual appeal but also invite everyone to enjoy the pudding in their own unique way. I always find that sharing food brings people together, and Hawaiian rice pudding is the perfect centerpiece for any gathering. So, gather your loved ones, and let the deliciousness begin!
Tips for Making Hawaiian Rice Pudding Recipe
As I’ve whipped up countless batches of Hawaiian rice pudding, I’ve gathered a treasure trove of tips that can help you create the perfect dessert. These little nuggets of wisdom can make your cooking experience smoother and more enjoyable. Here are my top tips:
- Choose the Right Rice: Stick to short-grain rice for that delightful sticky texture. It’s the key to achieving that creamy consistency we all love!
- Don’t Rush the Simmer: Allow the pudding to simmer gently. This slow cooking process helps develop the rich flavors and creamy texture. Patience is a virtue in the kitchen!
- Experiment with Flavors: Feel free to add your favorite spices or extracts. A hint of almond extract or a sprinkle of nutmeg can add a delightful twist to the classic recipe.
- Adjust Consistency: If your pudding is too thick, simply stir in a bit more coconut milk or water until you reach your desired creaminess. It should be smooth and luscious!
- Chill for Best Results: If you prefer your pudding cold, let it chill in the fridge for a few hours. The flavors meld beautifully, making each bite even more delicious.
These tips are like little guiding stars on your culinary journey. They’ll help you navigate the process and create a Hawaiian rice pudding that’s not just good, but truly unforgettable. Happy cooking!
Breakdown of Time for Hawaiian Rice Pudding Recipe
As a home cook, I know that time management is key to a successful cooking experience. When it comes to making Hawaiian rice pudding, it’s helpful to have a clear idea of how long each step will take. Here’s a quick breakdown of the time you’ll need:
- Prep Time: 10 minutes – This includes gathering your ingredients, rinsing the rice, and measuring everything out. It’s a great time to get your kitchen organized!
- Cooking Time: 40 minutes – This covers cooking the rice, combining the ingredients, and simmering the mixture to achieve that creamy texture. It’s a wonderful time to enjoy the delightful aromas filling your kitchen!
- Total Time: 50 minutes – In just under an hour, you’ll have a delicious Hawaiian rice pudding ready to serve. Perfect for a cozy dessert or a sweet treat any time of the day!
Knowing the time breakdown helps me plan my cooking sessions better. It allows me to enjoy the process without feeling rushed. Plus, it’s always satisfying to see how quickly a delicious dessert can come together!
Nutritional Information for Hawaiian Rice Pudding Recipe
As a passionate home cook, I believe that enjoying delicious desserts like Hawaiian rice pudding can be part of a balanced lifestyle. While this creamy treat is indulgent, it also offers some nutritional benefits. Here’s a quick look at the nutritional information for a typical serving of Hawaiian rice pudding:
- Calories: Approximately 250-300 calories per serving (1/2 cup)
- Protein: 4 grams
- Fat: 12 grams (mostly from coconut milk, which contains healthy fats)
- Carbohydrates: 38 grams
- Sugar: 10-15 grams (depending on how much sugar you add)
- Fiber: 1 gram
Keep in mind that these values can vary based on the specific ingredients you use and any optional add-ons you choose to include. For instance, adding fresh fruit or nuts can enhance the nutritional profile, providing vitamins, minerals, and healthy fats. I often remind myself that moderation is key, and enjoying a small bowl of this delightful pudding can be a sweet way to treat myself while still being mindful of my overall diet.
Frequently Asked Questions about Hawaiian Rice Pudding Recipe
As I’ve shared my love for Hawaiian rice pudding, I’ve often encountered questions from fellow home cooks eager to try this delightful dessert. Here are some of the most frequently asked questions, along with my personal insights to help you on your culinary journey!
Can I use regular milk instead of coconut milk?
While you can use regular milk, I highly recommend sticking with coconut milk for that authentic Hawaiian flavor. The creaminess and tropical essence of coconut milk truly elevate the dish. If you’re looking for a lighter option, you could try a mix of coconut milk and almond milk for a unique twist!
How do I store leftover Hawaiian rice pudding?
Leftover pudding can be stored in an airtight container in the fridge for up to three days. Just give it a good stir before serving, as it may thicken in the fridge. If you find it too thick, simply add a splash of coconut milk or water to loosen it up!
Can I make Hawaiian rice pudding ahead of time?
Absolutely! Hawaiian rice pudding can be made a day in advance. In fact, letting it chill overnight allows the flavors to meld beautifully. Just remember to cover it well to prevent it from absorbing any odors from the fridge.
What type of rice is best for this recipe?
I recommend using short-grain rice, like sushi rice, for its sticky texture. This type of rice helps create that creamy consistency we all love. However, medium-grain rice can work too; just keep an eye on the cooking time!
Can I add other flavors or ingredients?
Definitely! One of the joys of cooking is experimenting with flavors. You can add spices like cinnamon or nutmeg, or even mix in fresh fruits like mango or pineapple. The possibilities are endless, and I encourage you to get creative!
These questions reflect the curiosity and excitement that come with trying a new recipe. I hope my answers inspire you to dive into the world of Hawaiian rice pudding and create your own delicious version. Happy cooking!
Conclusion on Hawaiian Rice Pudding Recipe
As I reflect on my journey with Hawaiian rice pudding, I can’t help but smile at the joy it brings. This delightful dessert is more than just a sweet treat; it’s a celebration of flavors and memories. The creamy coconut milk, the tender rice, and the optional toppings create a symphony of taste that transports you to the sunny shores of Hawaii with every bite.
What I love most about this recipe is its versatility. Whether you’re enjoying it warm on a cozy evening or chilled on a hot summer day, Hawaiian rice pudding adapts to your mood and occasion. Plus, it’s a fantastic way to get creative in the kitchen! With endless variations and toppings, you can make it uniquely yours.
So, whether you’re sharing it with loved ones or savoring it solo, Hawaiian rice pudding is sure to bring a little slice of paradise into your home. I encourage you to give this recipe a try and experience the magic for yourself. Happy cooking, and may your kitchen always be filled with love and delicious aromas!


