Introduction to Hawaiian Cheesecake Salad Recipe
As a passionate home cook, I often find myself on a delightful culinary adventure, exploring flavors that transport me to far-off places. One such journey led me to the sunny shores of Hawaii, where the vibrant culture and tropical ingredients inspired me to create a dish that captures the essence of paradise. Enter the Hawaiian Cheesecake Salad—a delightful blend of creamy goodness and fruity freshness that dances on your taste buds.
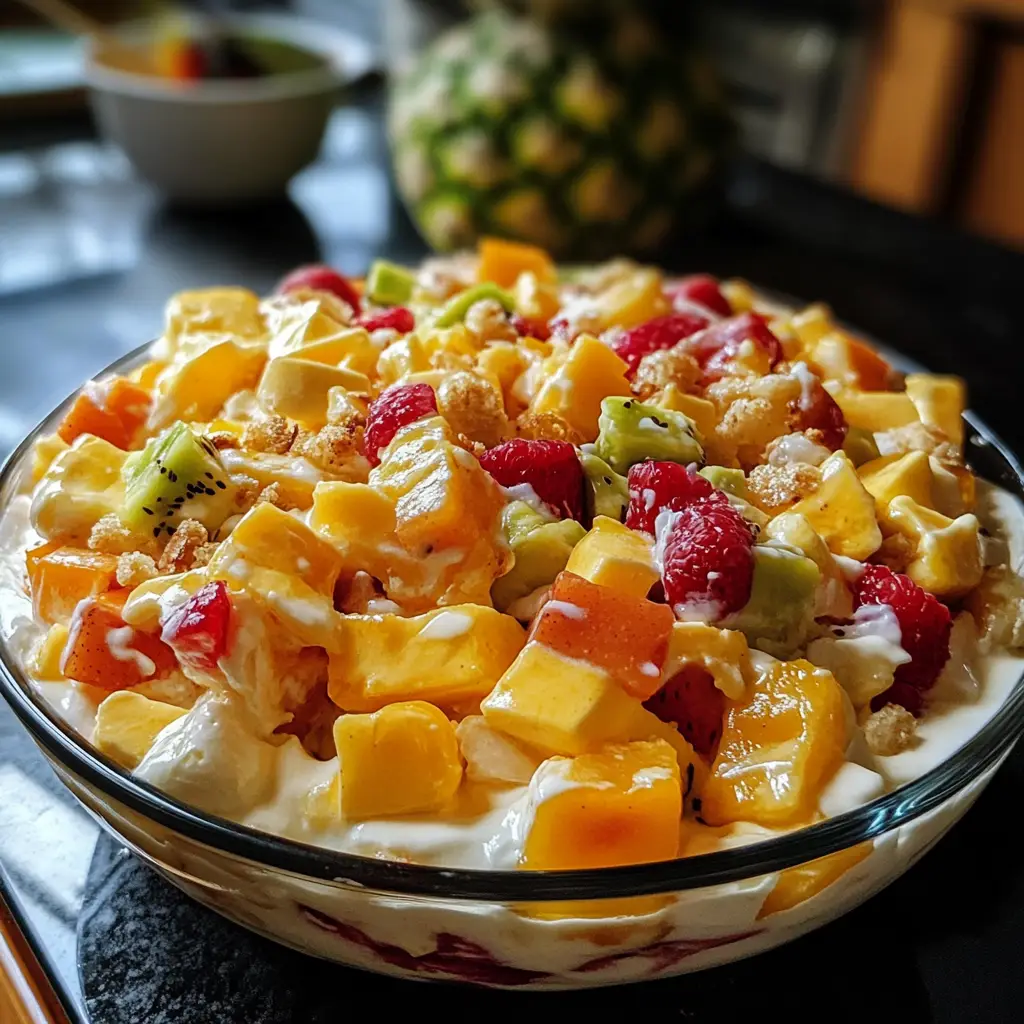
Picture this: a warm summer day, the sun shining brightly, and the gentle sound of waves lapping against the shore. I remember the first time I tasted a version of this salad at a family gathering. It was a hit! The combination of sweet pineapple, rich cream cheese, and fluffy whipped topping was like a tropical vacation in a bowl. I knew I had to recreate it in my own kitchen.
This recipe is not just about the ingredients; it’s about the memories we create while sharing food with loved ones. Whether it’s a potluck, a picnic, or just a casual dinner at home, this Hawaiian Cheesecake Salad brings smiles and joy to the table. It’s a dish that invites everyone to dig in and savor the moment, making it perfect for any occasion.
In this article, I’ll guide you through the simple steps to whip up this delightful salad. With a few fresh ingredients and a sprinkle of love, you’ll be able to create a dish that not only tastes amazing but also brings a little slice of Hawaii into your home. So, let’s dive into the world of flavors and textures that make the Hawaiian Cheesecake Salad a must-try!
Ingredients for Hawaiian Cheesecake Salad Recipe
Before we embark on our culinary journey, let’s gather all the ingredients needed to create this tropical delight. I always believe that the quality of ingredients can make or break a dish, so I recommend using fresh, ripe fruits and high-quality dairy products. Here’s what you’ll need:
Main Ingredients
- 1 (8 oz) package of cream cheese, softened
- 1 cup powdered sugar
- 1 (8 oz) container of whipped topping (like Cool Whip)
- 1 (20 oz) can of crushed pineapple, drained
- 1 cup mini marshmallows
- 1 cup shredded coconut (sweetened or unsweetened, based on your preference)
- 1/2 cup chopped pecans or walnuts (optional, but adds a nice crunch)
Optional Add-ons
While the main ingredients create a fantastic base, feel free to get creative! Here are some optional add-ons that can elevate your Hawaiian Cheesecake Salad:
- 1 cup diced fresh strawberries or mango for an extra fruity twist
- 1/2 teaspoon vanilla extract for added flavor
- 1/4 cup maraschino cherries for a pop of color and sweetness
- 1/2 cup chopped bananas for a creamy texture
When selecting your ingredients, I often opt for organic fruits and dairy whenever possible. It not only enhances the flavor but also supports sustainable farming practices. Plus, who doesn’t love the taste of fresh, juicy pineapple? It’s like sunshine in every bite!
Now that we have our ingredients ready, let’s move on to the next exciting step—preparing this delicious Hawaiian Cheesecake Salad!
How to Prepare Hawaiian Cheesecake Salad Recipe
Now that we have all our ingredients gathered, it’s time to roll up our sleeves and dive into the fun part—preparing the Hawaiian Cheesecake Salad! This process is simple and enjoyable, and I promise you’ll be rewarded with a delightful dish that will impress everyone. Let’s get started!
Step 1: Prepare the Base
First things first, we need to create a solid base for our salad. Start by taking your softened cream cheese and placing it in a mixing bowl. Using an electric mixer or a sturdy whisk, beat the cream cheese until it’s smooth and creamy. This step is crucial because it sets the stage for the luscious texture of the salad.
Tips for Step 1
- Make sure your cream cheese is at room temperature. This makes it easier to blend and prevents lumps.
- If you don’t have an electric mixer, a whisk will do just fine, but it may take a bit more elbow grease!
Step 2: Mix the Cream Cheese Filling
Once your cream cheese is nice and smooth, it’s time to add the powdered sugar. Gradually mix it in until fully incorporated. This will sweeten the cream cheese and give it that cheesecake flavor we all love. Next, gently fold in the whipped topping until everything is well combined. The mixture should be light and fluffy, like a cloud of deliciousness!
Tips for Step 2
- Be gentle when folding in the whipped topping. You want to keep that airy texture!
- For a little extra flavor, consider adding a splash of vanilla extract at this stage.
Step 3: Combine Ingredients
Now comes the fun part—combining all the ingredients! In a large mixing bowl, add the drained crushed pineapple, mini marshmallows, shredded coconut, and any optional add-ons you’ve chosen. Pour the cream cheese mixture over the top and gently fold everything together until well mixed. The colors and textures will start to come together beautifully, and you’ll be tempted to dive right in!
Tips for Step 3
- Make sure to drain the pineapple well to avoid excess liquid in your salad.
- Feel free to adjust the amount of coconut or nuts based on your personal preference.
Step 4: Chill the Salad
After everything is combined, it’s time to let the flavors meld together. Transfer the salad to a serving bowl or a covered dish and place it in the refrigerator. Allow it to chill for at least two hours, or even overnight if you can wait that long! This chilling time is essential as it helps the flavors develop and the salad to firm up.
Tips for Step 4
- If you’re short on time, a quick chill of one hour will still work, but the flavors will be even better if you can wait longer.
- Before serving, give the salad a gentle stir to redistribute the ingredients.
And there you have it! With these simple steps, you’ll have a Hawaiian Cheesecake Salad that’s not only delicious but also a feast for the eyes. I can’t wait for you to taste it and share it with your loved ones!
Equipment Needed for Hawaiian Cheesecake Salad Recipe
Before we dive into the kitchen, let’s make sure we have all the necessary tools to whip up this delightful Hawaiian Cheesecake Salad. The good news is that you won’t need any fancy gadgets—just some basic kitchen equipment will do the trick! Here’s what you’ll need:
- Mixing Bowls: A couple of medium-sized mixing bowls will be perfect for combining your ingredients. I like to use glass bowls because they’re easy to clean and let me see the beautiful colors of the salad.
- Electric Mixer or Whisk: An electric mixer makes blending the cream cheese a breeze, but if you don’t have one, a sturdy whisk will work just fine. Just be prepared for a little workout!
- Spatula: A rubber spatula is great for folding in the whipped topping and scraping down the sides of the bowl. It helps ensure that every bit of deliciousness is mixed in.
- Measuring Cups and Spoons: Accurate measurements are key to achieving the perfect balance of flavors, so don’t forget your measuring tools!
- Serving Bowl or Dish: Once your salad is ready, you’ll need a lovely bowl to present it. A clear glass bowl can showcase the vibrant colors of the salad beautifully.
If you find yourself missing any of these items, don’t worry! You can always improvise. For example, a large coffee mug can serve as a measuring cup in a pinch, and a sturdy fork can help mix your ingredients if you don’t have a whisk. The most important thing is to have fun and enjoy the process of creating this tropical treat!
Variations of Hawaiian Cheesecake Salad Recipe
As I’ve explored the delightful world of the Hawaiian Cheesecake Salad, I’ve discovered that there are so many fun variations to try! Each twist adds a unique flavor and flair, making this dish even more versatile. Here are a few of my favorite variations that you might want to experiment with:
- Tropical Fruit Medley: Swap out the crushed pineapple for a mix of tropical fruits like diced mango, kiwi, and papaya. This adds a burst of color and a refreshing taste that’s perfect for summer gatherings.
- Chocolate Lovers Delight: For those who can’t resist chocolate, consider folding in mini chocolate chips or drizzling some chocolate syrup over the top before serving. It’s a sweet twist that will have everyone coming back for seconds!
- Nutty Coconut Crunch: If you love a bit of crunch, try adding toasted coconut flakes or even some granola. This adds texture and a delightful nutty flavor that complements the creaminess of the salad.
- Berry Bliss: Incorporate fresh berries like blueberries, raspberries, or strawberries for a pop of color and a tangy sweetness. The berries not only enhance the flavor but also make the salad look stunning!
These variations are just the tip of the iceberg! Feel free to mix and match ingredients based on what you have on hand or what flavors you love. The beauty of the Hawaiian Cheesecake Salad is its adaptability, allowing you to create a version that’s uniquely yours. I can’t wait to hear about your delicious creations!
Cooking Notes for Hawaiian Cheesecake Salad Recipe
As I’ve whipped up this Hawaiian Cheesecake Salad countless times, I’ve gathered a few cooking notes that can help you achieve the best results. These little tips can make a big difference in your final dish!
- Room Temperature Ingredients: Always remember to let your cream cheese and whipped topping sit at room temperature for about 30 minutes before mixing. This ensures a smooth and creamy texture, making it easier to blend.
- Drain Well: When using canned crushed pineapple, make sure to drain it thoroughly. Excess liquid can make your salad watery, which is not what we want!
- Chill Time: While I recommend chilling the salad for at least two hours, letting it sit overnight can enhance the flavors even more. The longer it chills, the more the ingredients meld together, creating a delicious harmony.
- Presentation: For a beautiful presentation, consider garnishing your salad with a sprinkle of shredded coconut or a few fresh fruit slices on top just before serving. It adds a lovely touch that will impress your guests!
- Storage: If you have leftovers (which is rare in my house!), store them in an airtight container in the refrigerator. The salad is best enjoyed within three days, but I doubt it will last that long!
With these cooking notes in mind, you’ll be well on your way to creating a Hawaiian Cheesecake Salad that’s not only delicious but also a joy to share with family and friends. Happy cooking!
Serving Suggestions for Hawaiian Cheesecake Salad Recipe
Now that your Hawaiian Cheesecake Salad is ready to dazzle, it’s time to think about how to serve it! Presentation can elevate any dish, and this salad is no exception. Here are some delightful serving suggestions that I’ve found to make this tropical treat even more enjoyable:
- Chilled Bowls: Serve the salad in chilled bowls or dessert cups. The coolness enhances the refreshing flavors, making each bite feel like a mini vacation.
- Garnish with Fresh Fruit: Top each serving with a slice of fresh pineapple or a few berries. This not only adds a pop of color but also a burst of freshness that complements the creamy salad.
- Layered Parfaits: For a fun twist, layer the salad in clear glasses with additional fruit or crushed graham crackers. This creates a beautiful visual effect and makes for an impressive dessert at gatherings.
- Picnic Perfection: If you’re heading to a picnic or potluck, pack the salad in a portable container. It’s a crowd-pleaser that’s easy to share and enjoy outdoors!
- Pair with Grilled Meats: This salad makes a fantastic side dish for grilled meats like chicken or pork. The creamy sweetness balances the savory flavors beautifully.
With these serving suggestions, you’ll not only impress your guests but also create a memorable dining experience. I love how this Hawaiian Cheesecake Salad can be the star of the show, bringing a taste of the tropics to any table. Enjoy every bite and the smiles it brings!
Tips for Making Hawaiian Cheesecake Salad Recipe
As I’ve crafted this Hawaiian Cheesecake Salad over the years, I’ve picked up a few handy tips that can make your cooking experience even smoother and more enjoyable. These little nuggets of wisdom can help you create a salad that’s not only delicious but also visually stunning. Here’s what I’ve learned:
- Prep Ahead: If you’re short on time, consider prepping your ingredients the night before. Chop your fruits, drain the pineapple, and even mix the cream cheese filling. This way, you can simply combine everything when you’re ready to assemble the salad.
- Experiment with Flavors: Don’t be afraid to play around with flavors! Add a splash of coconut milk for a richer taste or a squeeze of lime juice for a zesty kick. The beauty of this salad is its versatility!
- Use Fresh Ingredients: Whenever possible, opt for fresh fruits over canned ones. Fresh pineapple, for instance, adds a burst of flavor that canned pineapple just can’t match. Plus, it’s a great way to support local farmers!
- Mind the Sweetness: Taste as you go! Depending on your preference, you might want to adjust the amount of powdered sugar or coconut. A little less sweetness can let the natural flavors shine through.
- Make it a Family Affair: Involve your family in the preparation! It’s a fun way to bond, and kids love helping out in the kitchen. They can mix, fold, or even decorate the salad with toppings!
With these tips in your back pocket, you’ll be well-equipped to create a Hawaiian Cheesecake Salad that’s bursting with flavor and joy. Happy cooking, and may your kitchen be filled with laughter and delicious aromas!
Breakdown of Time for Hawaiian Cheesecake Salad Recipe
Now that we’ve covered the ingredients and preparation steps, let’s talk about the time it takes to create this delightful Hawaiian Cheesecake Salad. I always find it helpful to have a clear idea of the time commitment before diving into a recipe. Here’s a quick breakdown:
- Prep Time: 20 minutes. This includes gathering your ingredients, mixing the cream cheese filling, and combining everything together. It’s a fun and quick process that gets you excited for the final dish!
- Chill Time: 2 hours (or more). This is the time you’ll want to let the salad chill in the refrigerator. It’s essential for allowing the flavors to meld together and for the salad to firm up. If you can wait overnight, I highly recommend it!
- Total Time: 2 hours and 20 minutes (or more if you choose to chill overnight). This total time includes both the prep and chill time, giving you a clear picture of when you can expect to enjoy your delicious creation.
With this time breakdown, you can easily plan your cooking session. Whether you’re preparing for a special occasion or just a casual family dinner, knowing how long it takes helps you manage your time effectively. I can’t wait for you to experience the joy of making and sharing this Hawaiian Cheesecake Salad!
Nutritional Information for Hawaiian Cheesecake Salad Recipe
As a home cook, I always find it important to consider the nutritional aspects of the dishes I prepare. The Hawaiian Cheesecake Salad is not only a treat for the taste buds but also offers some nutritional benefits. Here’s a quick overview of the nutritional information per serving, based on a standard recipe that serves about 8 people:
- Calories: Approximately 250 calories
- Protein: 3 grams
- Fat: 12 grams
- Carbohydrates: 35 grams
- Fiber: 1 gram
- Sugar: 20 grams
- Sodium: 150 mg
While this salad is a delightful dessert, it’s also packed with some wholesome ingredients. The crushed pineapple provides a dose of vitamin C, while the nuts add healthy fats and a bit of protein. Of course, moderation is key, especially with the sweetness from the powdered sugar and whipped topping. I always encourage enjoying this salad as part of a balanced diet, and it’s perfect for sharing at gatherings!
So, whether you’re indulging in a scoop or two, remember that it’s all about savoring the flavors and the moments spent with loved ones. Happy eating!
Frequently Asked Questions about Hawaiian Cheesecake Salad Recipe
As I’ve shared my love for the Hawaiian Cheesecake Salad, I’ve often received questions from fellow home cooks eager to try their hand at this tropical delight. I love that curiosity! Here are some of the most common questions I’ve encountered, along with my answers to help you on your culinary journey:
Can I use fresh pineapple instead of canned?
Absolutely! Fresh pineapple adds a burst of flavor that’s hard to beat. Just make sure to chop it into small pieces and drain any excess juice before adding it to the salad. It’s like bringing a piece of Hawaii right into your kitchen!
How long can I store leftovers?
If you happen to have any leftovers (which is rare in my house!), you can store the Hawaiian Cheesecake Salad in an airtight container in the refrigerator for up to three days. Just give it a gentle stir before serving again to redistribute the ingredients.
Can I make this salad ahead of time?
Yes! In fact, making it a day ahead is a great idea. The flavors meld together beautifully when it sits overnight in the fridge. Just remember to cover it well to keep it fresh and delicious!
Is there a way to make this salad healthier?
Definitely! You can reduce the amount of powdered sugar or use a sugar substitute if you prefer. Additionally, swapping out the whipped topping for a lighter version or Greek yogurt can cut down on calories while still keeping that creamy texture. It’s all about finding the balance that works for you!
What can I serve with Hawaiian Cheesecake Salad?
This salad pairs wonderfully with grilled meats, making it a perfect side dish for barbecues. It also shines as a dessert on its own or alongside tropical-themed dishes. Think of it as a sweet, refreshing companion to any meal!
Can I customize the ingredients?
With these answers in mind, I hope you feel more confident in your ability to create this delightful Hawaiian Cheesecake Salad. It’s all about enjoying the process and sharing the joy of cooking with those you love. Happy cooking, and may your kitchen be filled with laughter and delicious aromas!
Conclusion on Hawaiian Cheesecake Salad Recipe
As I wrap up this delightful journey through the Hawaiian Cheesecake Salad recipe, I can’t help but reflect on the joy it brings to my kitchen and my gatherings. This salad is more than just a dish; it’s a celebration of flavors, memories, and the spirit of aloha. With its creamy texture, sweet tropical fruits, and a hint of crunch, it’s a treat that appeals to both the eyes and the palate.
What I love most about this recipe is its versatility. Whether you’re hosting a summer barbecue, attending a potluck, or simply craving a sweet treat, this salad fits the bill perfectly. It’s easy to prepare, and the ingredients can be customized to suit your taste, making it a dish that everyone can enjoy. Plus, the smiles it brings to the faces of family and friends are truly priceless.
So, as you embark on your own culinary adventure with the Hawaiian Cheesecake Salad, remember to savor each moment. Cooking is not just about the food; it’s about the connections we create and the love we share. I hope this recipe inspires you to bring a little slice of paradise into your home. Happy cooking, and may your kitchen be filled with laughter and delicious aromas!


