Introduction to Grilled Chocolate Marshmallow Cones
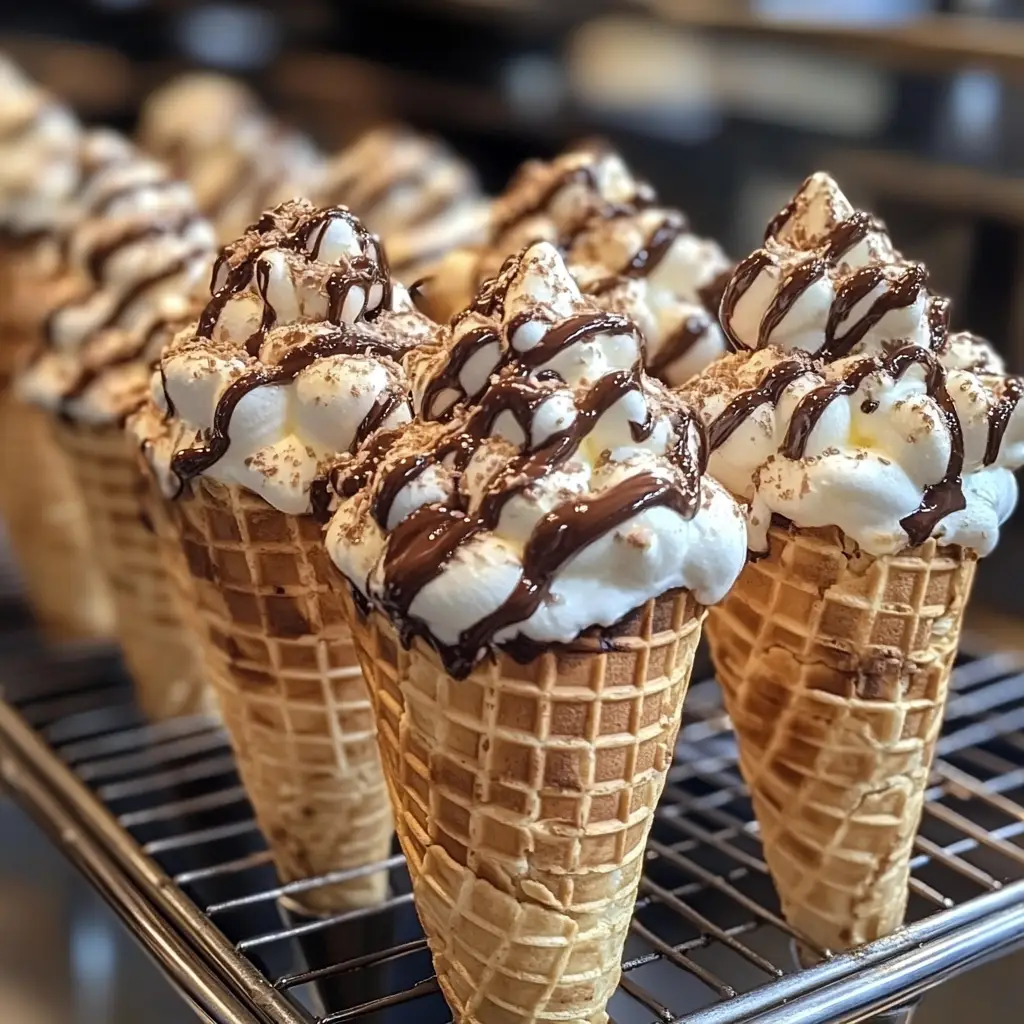
As a passionate home cook, I find joy in creating delightful treats that bring smiles to faces. One of my all-time favorite desserts is the Grilled Chocolate Marshmallow Cone. Picture this: a warm, crispy cone filled with gooey marshmallows and rich chocolate, all perfectly grilled to create a melty masterpiece. It’s like a campfire in your kitchen, and every bite is a sweet hug for your taste buds!
My love for these cones began during a summer camping trip with friends. We gathered around the fire, roasting marshmallows and sharing stories. Someone had the brilliant idea to fill waffle cones with chocolate and marshmallows before toasting them over the flames. The result was pure magic! The chocolate melted, the marshmallows puffed up, and we couldn’t get enough. Ever since that night, I’ve been on a mission to recreate that deliciousness at home.
What I adore about Grilled Chocolate Marshmallow Cones is their versatility. You can customize them with your favorite chocolates, add a sprinkle of nuts, or even drizzle some caramel on top. They’re perfect for parties, family gatherings, or just a cozy night in. Plus, they’re super easy to make, which means you can whip them up in no time!
So, grab your ingredients and let’s dive into this sweet adventure together. I promise, once you try these cones, they’ll become a staple in your dessert repertoire. Let’s get grilling!
Ingredients for Grilled Chocolate Marshmallow Cones
Before we embark on this delicious journey, let’s gather our ingredients. Having everything ready makes the cooking process smoother and more enjoyable. Here’s what you’ll need to create these delightful Grilled Chocolate Marshmallow Cones.
Main Ingredients
- 4 waffle cones
- 1 cup of mini marshmallows
- 1 cup of chocolate chips (milk chocolate or dark chocolate, depending on your preference)
- 1 tablespoon of butter (for greasing the foil)
When choosing your chocolate chips, I recommend going for high-quality brands. The better the chocolate, the richer the flavor! If you’re feeling adventurous, try using flavored chocolate chips, like peanut butter or mint, to add a unique twist.
Optional Add-ons
- Chopped nuts (like almonds or pecans) for added crunch
- Caramel sauce or chocolate drizzle for extra sweetness
- Fresh fruit pieces (like strawberries or bananas) for a fruity surprise
- Sprinkles or crushed cookies for a fun topping
These optional add-ons can elevate your cones to a whole new level! I love adding a sprinkle of sea salt on top of the chocolate for a sweet and salty combination. It’s like a party in your mouth!
Now that we have our ingredients ready, let’s move on to the next step of preparing these scrumptious cones. Trust me, your taste buds will thank you!
How to Prepare Grilled Chocolate Marshmallow Cones
Now that we have our ingredients ready, it’s time to dive into the fun part—preparing our Grilled Chocolate Marshmallow Cones! I love this part because it’s where the magic happens. Follow these simple steps, and you’ll be on your way to creating a delicious treat that will impress everyone!
Step 1: Prepare the Cones
First things first, let’s get our waffle cones ready. I like to give them a little extra love to ensure they hold all that gooey goodness.
Tips for Step 1
- Check for any cracks in the cones. If you find any, gently press them together to seal. This will help keep the chocolate and marshmallows from leaking out.
- For an added touch, you can lightly toast the cones in a dry skillet for a minute or two. This gives them a nice crunch and enhances their flavor!
Step 2: Fill the Cones with Chocolate and Marshmallows
Next, it’s time to fill those cones! This is where you can get creative. I love layering the chocolate and marshmallows for a delightful surprise in every bite.
Tips for Step 2
- Start by adding a layer of chocolate chips at the bottom of each cone. This helps create a barrier that keeps the marshmallows from falling out.
- Then, add a generous handful of mini marshmallows. Don’t be shy—pack them in there! You want a good mix of chocolate and marshmallows.
- Feel free to sprinkle in some of those optional add-ons, like nuts or fruit, for an extra flavor boost!
Step 3: Wrap the Cones for Grilling
Now that our cones are filled to the brim, it’s time to wrap them up. This step is crucial for keeping everything together while grilling.
Tips for Step 3
- Use aluminum foil to wrap each cone tightly. Make sure to cover the top and bottom well to prevent any melting chocolate from escaping.
- Don’t worry if the foil looks a bit messy; it’s all part of the fun! Just ensure it’s secure so the cones don’t fall apart on the grill.
Step 4: Grill the Cones
Finally, it’s time to grill our cones! This is where the magic truly happens, and the aroma will have everyone gathering around.
Tips for Step 4
- Preheat your grill to medium heat. If you’re using a charcoal grill, let the coals burn down until they’re covered with white ash.
- Place the wrapped cones on the grill and cook for about 5-7 minutes. Keep an eye on them to avoid burning. You want the chocolate to melt and the marshmallows to puff up!
- Once they’re done, carefully remove them from the grill using tongs. Let them cool for a minute before unwrapping. Trust me, the wait will be worth it!
And there you have it! Your Grilled Chocolate Marshmallow Cones are ready to be devoured. I can already taste the melty chocolate and fluffy marshmallows. Let’s move on to the next section, where we’ll talk about the equipment you’ll need for this sweet adventure!
Equipment Needed for Grilled Chocolate Marshmallow Cones
Before we get our hands dirty with those delicious Grilled Chocolate Marshmallow Cones, let’s make sure we have the right tools at our disposal. Having the right equipment can make the process smoother and more enjoyable. Here’s what you’ll need:
- Grill: Whether it’s a gas grill or a charcoal grill, both work wonderfully for this recipe. If you don’t have a grill, you can use an oven broiler as an alternative.
- Aluminum Foil: This is essential for wrapping the cones. It keeps everything contained while grilling and prevents any melty chocolate from escaping.
- Tongs: A good pair of tongs will help you safely flip and remove the cones from the grill without burning your fingers.
- Skillet (optional): If you choose to toast your cones before filling them, a dry skillet will do the trick. It’s not necessary, but it adds a nice touch!
With these tools in hand, you’re all set to create your sweet masterpiece. Let’s keep the momentum going and explore some fun variations of these cones!
Variations of Grilled Chocolate Marshmallow Cones
One of the best things about Grilled Chocolate Marshmallow Cones is their versatility. You can easily switch things up to suit your taste or the occasion. Here are a few fun variations that I absolutely love:
- Nutty Delight: Add a handful of chopped nuts, like almonds or hazelnuts, to the chocolate and marshmallow mix. The crunch pairs beautifully with the gooey texture!
- Fruity Twist: Toss in some fresh fruit pieces, such as strawberries or banana slices, for a refreshing burst of flavor. The sweetness of the fruit complements the chocolate perfectly.
- Minty Fresh: Use mint chocolate chips instead of regular chocolate. The cool mint flavor adds a delightful twist that’s perfect for summer!
- Caramel Drizzle: Drizzle some caramel sauce over the top of your filled cones before grilling. The warm caramel will melt into the chocolate and marshmallows, creating a decadent treat.
- Cookie Crumble: Crush up your favorite cookies, like Oreos or graham crackers, and mix them in with the chocolate and marshmallows. It adds a fun texture and flavor!
These variations not only keep things exciting but also allow you to get creative in the kitchen. I love experimenting with different flavors and textures, and I encourage you to do the same! Each variation brings its own unique charm to the classic Grilled Chocolate Marshmallow Cone.
Cooking Notes for Grilled Chocolate Marshmallow Cones
As I’ve learned from my culinary adventures, a few cooking notes can make all the difference when preparing Grilled Chocolate Marshmallow Cones. Here are some tips that I’ve picked up along the way to ensure your cones turn out perfectly every time:
- Watch the Heat: Grilling is all about the right temperature. Too high, and you risk burning the cones; too low, and the chocolate won’t melt. Medium heat is your best friend here!
- Experiment with Timing: Every grill is different. Keep an eye on your cones and adjust the cooking time as needed. You want the marshmallows to puff up and the chocolate to melt, but not to the point of oozing out everywhere.
- Let Them Cool: After grilling, give your cones a minute to cool before unwrapping. This helps the chocolate set slightly, making it easier to enjoy without a mess.
- Use Quality Ingredients: The better the chocolate and marshmallows, the more delicious your cones will be. Don’t skimp on quality; it truly makes a difference in flavor!
- Get Creative: Don’t hesitate to try new combinations of fillings and toppings. The beauty of these cones is their adaptability, so let your imagination run wild!
With these cooking notes in mind, you’re well on your way to creating the most delightful Grilled Chocolate Marshmallow Cones. I can’t wait for you to experience the joy of biting into one of these sweet treats!
Serving Suggestions for Grilled Chocolate Marshmallow Cones
Once your Grilled Chocolate Marshmallow Cones are ready, it’s time to serve them up in style! I love to make the presentation as delightful as the treat itself. Here are some fun serving suggestions that will elevate your dessert experience:
- Serve with Ice Cream: Place your warm cones in a bowl and add a scoop of your favorite ice cream on the side. The combination of hot and cold is simply divine!
- Garnish with Fresh Berries: A handful of fresh strawberries or raspberries on the plate adds a pop of color and a refreshing contrast to the sweetness of the cones.
- Drizzle with Sauces: A drizzle of chocolate or caramel sauce over the top of the cones can make them look extra tempting. It’s like adding a cherry on top!
- Pair with Hot Chocolate: For a cozy treat, serve your cones alongside a warm cup of hot chocolate. It’s a match made in dessert heaven!
- Use Fun Serving Dishes: Consider using colorful paper cups or decorative plates to serve your cones. It adds a festive touch, especially for parties or gatherings.
These serving suggestions not only enhance the visual appeal but also create a delightful experience for everyone enjoying these sweet treats. I can already imagine the smiles on faces as they dig into their Grilled Chocolate Marshmallow Cones!
Tips for Perfect Grilled Chocolate Marshmallow Cones
Creating the perfect Grilled Chocolate Marshmallow Cones is all about the little details. Over the years, I’ve gathered some handy tips that can help you achieve cone perfection every time. Here’s what I’ve learned:
- Preheat the Grill: Always preheat your grill before placing the cones on it. This ensures even cooking and helps the chocolate melt beautifully.
- Don’t Overfill: While it’s tempting to pack in as many marshmallows and chocolate chips as possible, be careful not to overfill the cones. Leave a little space at the top to prevent overflow while grilling.
- Use Heavy-Duty Foil: Opt for heavy-duty aluminum foil to wrap your cones. It holds up better on the grill and prevents any leaks from the melted chocolate.
- Rotate the Cones: If you can, rotate the cones halfway through grilling. This helps them cook evenly and ensures that every side gets that delicious grilled flavor.
- Serve Immediately: These cones are best enjoyed fresh off the grill. The chocolate and marshmallows are at their gooey best, so don’t wait too long to dig in!
With these tips in your back pocket, you’re all set to create the most scrumptious Grilled Chocolate Marshmallow Cones. I can’t wait for you to experience the joy of sharing these delightful treats with family and friends!
Breakdown of Time for Grilled Chocolate Marshmallow Cones
Now that we’ve covered all the delicious details, let’s talk about the time it takes to whip up these delightful Grilled Chocolate Marshmallow Cones. Knowing the timing can help you plan your dessert adventure better. Here’s a quick breakdown:
- Prep Time: 15 minutes. This includes gathering your ingredients, preparing the cones, and filling them with chocolate and marshmallows.
- Cooking Time: 7 minutes. This is the time spent grilling the cones to perfection, allowing the chocolate to melt and the marshmallows to puff up.
- Total Time: 22 minutes. In just under half an hour, you can have these scrumptious treats ready to enjoy!
With this time breakdown, you can easily fit these cones into your day, whether it’s for a quick dessert after dinner or a fun treat for a gathering. I love how simple and quick they are to make, and I’m sure you will too!
Nutritional Information for Grilled Chocolate Marshmallow Cones
As a passionate home cook, I always find it helpful to know the nutritional information of the treats I create. While Grilled Chocolate Marshmallow Cones are undeniably a sweet indulgence, they can still fit into a balanced diet when enjoyed in moderation. Here’s a general breakdown of the nutritional content for one cone, based on the ingredients listed:
- Calories: Approximately 250-300 calories
- Fat: 10-12 grams (depending on the type of chocolate used)
- Carbohydrates: 40-45 grams
- Protein: 3-4 grams
- Sugar: 20-25 grams
Keep in mind that these values can vary based on the specific brands of ingredients you choose and any optional add-ons you include. For instance, adding nuts or using dark chocolate can change the nutritional profile. I always encourage my friends and family to enjoy these cones as a special treat rather than an everyday snack. After all, life is all about balance, and a little sweetness can go a long way in brightening your day!
Frequently Asked Questions about Grilled Chocolate Marshmallow Cones
As I’ve shared my love for Grilled Chocolate Marshmallow Cones, I often get questions from fellow dessert enthusiasts. Here are some of the most common queries I’ve encountered, along with my answers to help you on your sweet journey:
Can I use different types of cones?
Absolutely! While waffle cones are my favorite, you can experiment with sugar cones or even homemade cones. Each type brings its own unique flavor and texture!
What if I don’t have a grill?
No worries! You can use an oven broiler as an alternative. Just place the wrapped cones on a baking sheet and broil them for a few minutes, keeping a close eye to prevent burning.
How do I store leftover cones?
If you have any leftover cones (which is rare!), store them in an airtight container in the fridge. They’re best enjoyed fresh, but you can reheat them in the oven for a few minutes to revive that gooey goodness.
Can I make these ahead of time?
While it’s best to grill them fresh, you can prepare the filled cones ahead of time and wrap them in foil. Just pop them on the grill when you’re ready to enjoy!
What are some good toppings for these cones?
The possibilities are endless! You can top them with whipped cream, fresh fruit, or even a sprinkle of crushed cookies. Get creative and make them your own!
These FAQs should help clear up any uncertainties you might have. I love sharing my passion for these cones, and I hope you feel inspired to try making them yourself!
Conclusion on Grilled Chocolate Marshmallow Cones
In conclusion, Grilled Chocolate Marshmallow Cones are not just a dessert; they’re a delightful experience that brings joy to any occasion. The combination of warm, gooey marshmallows and rich, melted chocolate nestled in a crispy cone is simply irresistible. I love how easy they are to make, allowing anyone to whip them up for a cozy night in or a fun gathering with friends and family.
What truly makes these cones special is their versatility. You can customize them with your favorite flavors, toppings, and add-ins, making each cone a unique creation. Whether you’re a chocolate lover, a fruit enthusiast, or someone who enjoys a little crunch, there’s a variation for everyone!
So, the next time you’re looking for a sweet treat that’s sure to impress, remember these Grilled Chocolate Marshmallow Cones. They’re a perfect blend of nostalgia and creativity, and I can guarantee they’ll become a cherished favorite in your dessert repertoire. Happy grilling, and enjoy every delicious bite!


