Introduction to Campfire Chocolate Strawberry Cones
As a passionate home cook, I find joy in creating delightful treats that bring people together. One of my favorite memories is sitting around a crackling campfire, the warm glow illuminating the faces of my friends and family. The air was filled with laughter, stories, and the sweet aroma of melting chocolate. It was during one of these magical evenings that I stumbled upon the idea of Campfire Chocolate Strawberry Cones.
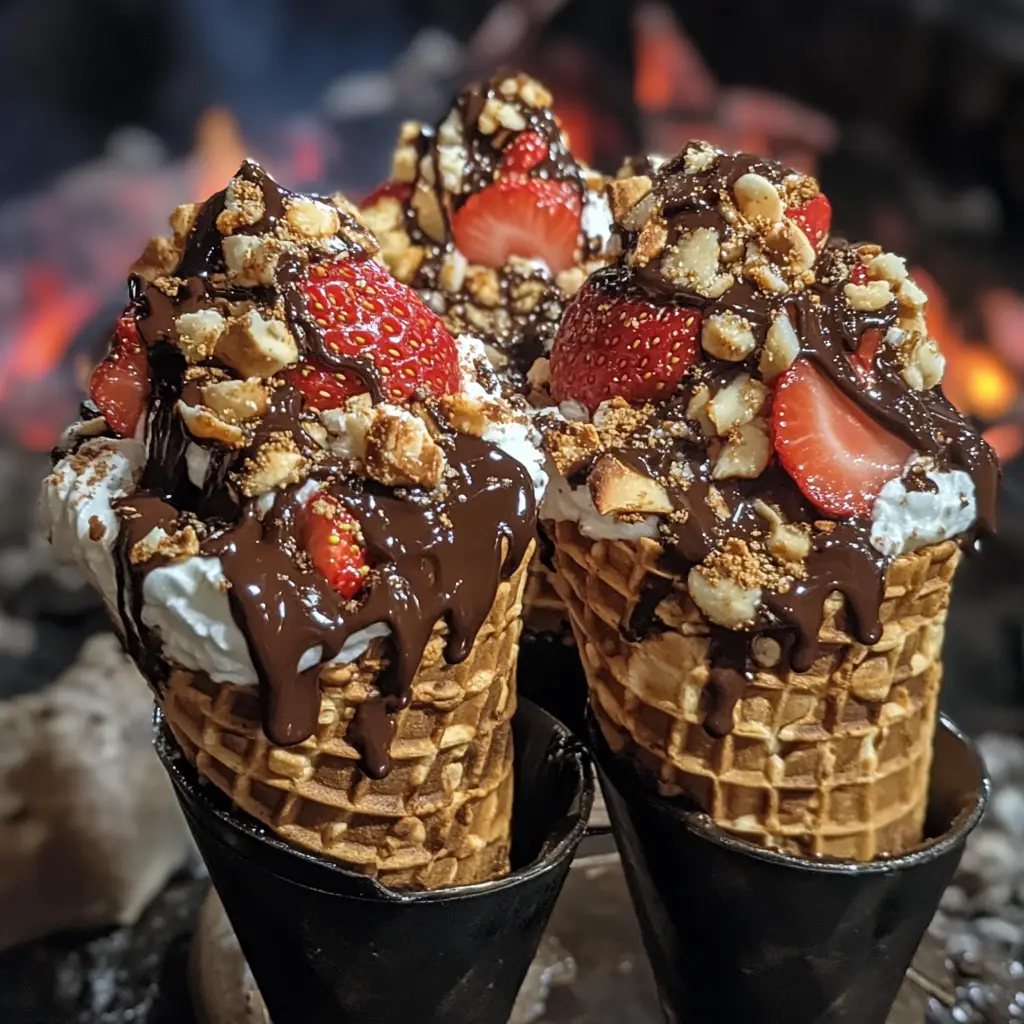
Imagine this: a crispy cone filled with juicy strawberries and rich chocolate, all wrapped up and toasted over an open flame. It’s like a s’more, but with a fruity twist! The first time I made these cones, I was amazed at how simple yet delicious they were. The combination of flavors and textures is simply irresistible. The sweetness of the strawberries pairs perfectly with the creamy chocolate, creating a symphony of taste that dances on your palate.
What I love most about these Campfire Chocolate Strawberry Cones is their versatility. You can customize them with your favorite ingredients, making them a hit for everyone, from kids to adults. Whether you’re camping in the great outdoors or just enjoying a backyard bonfire, these cones are the perfect treat to elevate your evening.
So, gather your loved ones, ignite that fire, and let’s dive into the delightful world of Campfire Chocolate Strawberry Cones. I promise, once you try them, they’ll become a staple in your outdoor cooking adventures!
Ingredients for Campfire Chocolate Strawberry Cones
Before we embark on this delicious journey, let’s gather our ingredients. I always believe that the best dishes start with quality ingredients. For these Campfire Chocolate Strawberry Cones, you’ll need a few simple items that come together to create a delightful treat. Here’s what you’ll need:
Main Ingredients
- 4 ice cream cones: Choose sturdy cones that can hold the filling without breaking. I prefer the classic sugar cones for their sweetness and crunch.
- 1 cup fresh strawberries: Look for ripe, juicy strawberries. They should be bright red and fragrant. If you can, buy them from a local farmer’s market for the best flavor.
- 1 cup chocolate chips: Semi-sweet or milk chocolate chips work wonderfully. I often use dark chocolate for a richer taste, but it’s all about your preference!
- 1 tablespoon of coconut oil (optional): This helps the chocolate melt smoothly and adds a hint of tropical flavor. You can also use butter if you prefer.
Optional Add-ons
- Mini marshmallows: For that extra gooeyness, add a handful of mini marshmallows to the mix.
- Chopped nuts: Walnuts or almonds can add a delightful crunch. Just sprinkle a few on top of the strawberries before wrapping.
- Other fruits: Feel free to mix in banana slices or raspberries for a fruity twist.
- Sprinkles: For a fun touch, add colorful sprinkles on top of the chocolate before wrapping the cones.
With these ingredients, you’re well on your way to creating a mouthwatering dessert that will impress everyone around the campfire. Remember, the beauty of these cones lies in their flexibility. You can mix and match to suit your taste, making each batch uniquely yours!
How to Prepare Campfire Chocolate Strawberry Cones
Now that we have our ingredients ready, it’s time to dive into the fun part—preparing our Campfire Chocolate Strawberry Cones! I love this part because it’s where the magic happens. Follow these simple steps, and you’ll be on your way to creating a delicious treat that everyone will adore.
Step 1: Gather Your Ingredients and Equipment
First things first, let’s make sure we have everything we need. Gather your ingredients and the necessary equipment. You’ll need:
- Your ingredients from the previous section.
- Aluminum foil (for wrapping the cones).
- A long skewer or roasting stick (for cooking over the fire).
Tips for Ingredient Selection
When selecting your strawberries, look for ones that are firm and sweet. If you can, give them a little sniff—ripe strawberries have a lovely fragrance! For chocolate, I recommend using high-quality chips for the best melting experience. Trust me, it makes a difference!
Step 2: Prepare the Cones
Next, let’s prepare our cones. This step is super easy and fun! Take each ice cream cone and gently press down on the bottom to make sure it’s sturdy. You want them to hold all that delicious filling without crumbling.
Tips for Preparing the Cones
If you’re using sugar cones, they’ll add a nice sweetness to your dessert. If you prefer a more neutral flavor, go for waffle cones. Just be careful not to squeeze too hard; we want them intact!
Step 3: Fill the Cones with Strawberries and Chocolate
Now comes the best part—filling the cones! Start by placing a few strawberries at the bottom of each cone. Then, sprinkle in some chocolate chips. I like to layer them, so I add a few more strawberries on top, followed by another layer of chocolate. It’s like building a delicious tower!
Tips for Filling the Cones
Don’t be shy with the chocolate! The more, the merrier. If you’re adding mini marshmallows or nuts, toss them in between the layers for extra flavor and texture. Just make sure not to overfill; we want to be able to wrap them up nicely!
Step 4: Wrap and Secure the Cones for Cooking
Once your cones are filled, it’s time to wrap them up. Take a piece of aluminum foil and place the cone in the center. Gently fold the foil around the cone, making sure it’s snug but not too tight. You want to keep the heat in while allowing some air to circulate.
Tips for Wrapping the Cones
Make sure to leave the top open so the chocolate can melt beautifully. If you’re camping, this is a great time to get the kids involved! They’ll love helping with the wrapping.
Step 5: Cook Over the Campfire
Finally, it’s time to cook our cones! Carefully place the wrapped cones on a skewer or roasting stick. Hold them over the campfire, rotating them every few minutes. You’ll want to cook them for about 5-10 minutes, depending on how hot your fire is.
Tips for Cooking Over the Fire
Keep an eye on them! You don’t want the chocolate to burn. The goal is to have the chocolate melted and the strawberries warmed through. The smell will be heavenly, and your friends will be eagerly waiting for their turn!
And there you have it! With these steps, you’re well on your way to enjoying your very own Campfire Chocolate Strawberry Cones. The anticipation of waiting for them to cook is half the fun, and the other half is, of course, indulging in that sweet, gooey goodness!
Equipment Needed for Campfire Chocolate Strawberry Cones
Before we get our hands dirty with those delicious Campfire Chocolate Strawberry Cones, let’s make sure we have the right tools at our disposal. Having the right equipment can make the process smoother and more enjoyable. Here’s what you’ll need:
- Aluminum foil: This is essential for wrapping your cones. It helps keep the heat in while allowing the chocolate to melt perfectly. If you don’t have aluminum foil, you can use parchment paper, but it may not hold the heat as well.
- Long skewer or roasting stick: You’ll need this to hold your cones over the fire. If you don’t have a skewer, a sturdy stick from the woods will do just fine. Just make sure it’s clean and not too thin, or it might break!
- Campfire or grill: Of course, you’ll need a source of heat! A campfire is ideal, but if you’re in your backyard, a grill works just as well. Just ensure it’s hot enough to melt the chocolate.
- Cutting board and knife: If you’re slicing strawberries or any other fruits, having a cutting board and a knife handy is a must. Safety first!
With these simple tools, you’re all set to create your Campfire Chocolate Strawberry Cones. Remember, the joy of cooking comes not just from the ingredients but also from the experience of preparing them. So gather your equipment, and let’s get cooking!
Variations of Campfire Chocolate Strawberry Cones
One of the things I adore about Campfire Chocolate Strawberry Cones is their flexibility. You can easily switch things up to suit your taste or the ingredients you have on hand. Here are a few fun variations that I’ve tried and loved:
- Peanut Butter Delight: Swap out some chocolate chips for creamy peanut butter. The combination of strawberries, peanut butter, and chocolate is simply divine!
- Berry Medley: Instead of just strawberries, mix in blueberries and raspberries for a colorful and flavorful twist. The burst of different berries adds a refreshing zing!
- Nutty Chocolate: Add a handful of chopped nuts, like pecans or hazelnuts, to the filling. The crunchiness pairs beautifully with the soft strawberries and melted chocolate.
- Minty Fresh: Toss in a few fresh mint leaves with the strawberries for a refreshing flavor. It’s like a summer garden in a cone!
- Cookie Crumble: Crushed cookies, like Oreos or graham crackers, can be layered in for an extra crunch. It’s a fun way to add texture and flavor!
These variations not only keep things exciting but also allow you to get creative with your Campfire Chocolate Strawberry Cones. Feel free to mix and match ingredients based on what you love or what’s available. The possibilities are endless, and that’s what makes this treat so special!
Cooking Notes for Campfire Chocolate Strawberry Cones
As I’ve learned from my own culinary adventures, a few cooking notes can make all the difference when preparing Campfire Chocolate Strawberry Cones. Here are some tips that I’ve gathered over the years to ensure your cones turn out perfectly every time:
- Watch the Heat: Campfires can vary in temperature. If your fire is too hot, the chocolate might burn before the strawberries warm up. Keep your cones at a safe distance from the flames, and rotate them regularly for even cooking.
- Timing is Key: Aim for about 5-10 minutes of cooking time. I like to check the cones after 5 minutes to see how the chocolate is melting. If it’s not quite there yet, give it a few more minutes.
- Experiment with Cooking Methods: If you’re not comfortable holding the cones over an open flame, you can also place them on a grill or in a campfire pit. Just make sure they’re secure and won’t tip over!
- Let Them Cool: Once you take the cones off the fire, let them cool for a minute before unwrapping. The chocolate will be super hot, and you don’t want to burn your fingers or mouth!
- Enjoy Fresh: These cones are best enjoyed right after cooking. The combination of warm chocolate and fresh strawberries is a treat that’s hard to resist!
With these cooking notes in mind, you’ll be well-equipped to create the most delicious Campfire Chocolate Strawberry Cones. Remember, cooking is all about having fun and experimenting, so don’t be afraid to make it your own!
Serving Suggestions for Campfire Chocolate Strawberry Cones
Once your Campfire Chocolate Strawberry Cones are ready, it’s time to serve them up in style! I love to make the experience even more special by adding a few fun touches. Here are some serving suggestions that will elevate your dessert and impress your friends and family:
- Garnish with Fresh Mint: A sprig of fresh mint on top adds a pop of color and a refreshing aroma. It’s like a little garden on your plate!
- Drizzle with Extra Chocolate: If you have some melted chocolate left over, drizzle it over the top of the cones for an extra indulgent touch. It’s a chocolate lover’s dream!
- Serve with Ice Cream: For an extra creamy treat, serve the cones alongside a scoop of vanilla or strawberry ice cream. The combination of warm and cold is simply delightful!
- Pair with Hot Beverages: Enjoy your cones with a warm cup of hot chocolate or a cozy mug of coffee. The warmth of the drink complements the sweet flavors of the cones perfectly.
- Set Up a Topping Bar: If you’re hosting a gathering, set up a toppings bar with various options like whipped cream, crushed cookies, or sprinkles. Let everyone customize their cones for a fun, interactive experience!
These serving suggestions not only enhance the presentation but also add layers of flavor and fun to your Campfire Chocolate Strawberry Cones. Remember, the joy of cooking is all about sharing and creating memorable moments with loved ones. So, gather around the fire, serve up those cones, and enjoy every delicious bite!
Tips for Making the Best Campfire Chocolate Strawberry Cones
As I’ve whipped up countless batches of Campfire Chocolate Strawberry Cones, I’ve gathered a treasure trove of tips that can elevate your cone-making experience. Here are my top suggestions to ensure your cones turn out absolutely scrumptious:
- Choose the Right Chocolate: Opt for high-quality chocolate chips or chunks. The better the chocolate, the richer the flavor. I often use a mix of semi-sweet and dark chocolate for a delightful balance.
- Prep Ahead: If you’re camping, consider prepping your cones at home. Fill them with strawberries and chocolate, wrap them in foil, and store them in a cooler. This way, you can simply toss them on the fire when you’re ready!
- Don’t Rush the Cooking: Patience is key! Allow the cones to cook slowly over the fire. This ensures the chocolate melts perfectly while the strawberries warm up without turning mushy.
- Experiment with Flavors: Don’t hesitate to get creative! Try adding a sprinkle of cinnamon or a dash of vanilla extract to the chocolate for an extra flavor boost. It’s all about making it your own!
- Involve Everyone: Cooking is more fun when shared! Get your friends or family involved in the filling and wrapping process. It’s a great way to bond and create lasting memories around the campfire.
With these tips in your back pocket, you’re all set to create the most delightful Campfire Chocolate Strawberry Cones. Remember, the joy of cooking comes not just from the food itself but from the experiences and memories you create along the way. Happy cooking!
Breakdown of Time for Campfire Chocolate Strawberry Cones
When it comes to making Campfire Chocolate Strawberry Cones, timing is everything! I love how this treat can be prepared quickly, allowing you to spend more time enjoying the great outdoors with friends and family. Here’s a simple breakdown of the time you’ll need:
- Prep Time: Approximately 15 minutes. This includes gathering your ingredients, preparing the cones, and filling them with strawberries and chocolate. It’s a fun and quick process that gets everyone excited!
- Cooking Time: About 5-10 minutes. Keep an eye on your cones as they cook over the campfire. The chocolate should melt beautifully, and the strawberries will warm up just right.
- Total Time: Roughly 20-25 minutes. In just under half an hour, you’ll have a delicious dessert ready to enjoy around the fire!
With this time breakdown, you can easily plan your evening. Whether you’re camping or having a backyard bonfire, these Campfire Chocolate Strawberry Cones are a quick and delightful treat that everyone will love. So, gather your ingredients, light that fire, and let the fun begin!
Nutritional Information for Campfire Chocolate Strawberry Cones
As a passionate home cook, I always find it helpful to know the nutritional value of the treats I create. While Campfire Chocolate Strawberry Cones are a delightful indulgence, they can also be enjoyed in moderation as part of a balanced diet. Here’s a general breakdown of the nutritional information for one cone, assuming you use the main ingredients listed:
- Calories: Approximately 200-250 calories per cone, depending on the type of chocolate and additional toppings used.
- Protein: About 3-4 grams, mainly from the chocolate and any nuts you might add.
- Carbohydrates: Roughly 30-35 grams, primarily from the ice cream cone and strawberries.
- Fat: Around 8-10 grams, depending on the chocolate and any added coconut oil or butter.
- Sugar: Approximately 15-20 grams, mostly from the chocolate and strawberries.
Keep in mind that these values can vary based on the specific ingredients you choose. If you want to make your cones a bit healthier, consider using dark chocolate, reducing the amount of added sugar, or incorporating more fruits. No matter how you make them, these Campfire Chocolate Strawberry Cones are sure to bring joy and sweetness to your outdoor adventures!
Frequently Asked Questions about Campfire Chocolate Strawberry Cones
As I’ve shared my love for Campfire Chocolate Strawberry Cones, I’ve often received questions from fellow cooking enthusiasts eager to try this delightful treat. Here are some of the most frequently asked questions, along with my answers to help you on your culinary adventure!
Can I make these cones ahead of time?
Absolutely! You can prepare the cones ahead of time by filling them with strawberries and chocolate, then wrapping them in aluminum foil. Just store them in a cooler until you’re ready to cook. This makes it super easy to enjoy them around the campfire without any fuss!
What if I don’t have a campfire?
No worries! You can easily make these cones on a grill or even in your oven. If using an oven, preheat it to 350°F (175°C) and place the wrapped cones on a baking sheet. Bake for about 10 minutes, or until the chocolate is melted and gooey. Just keep an eye on them!
Can I use frozen strawberries instead of fresh ones?
While fresh strawberries are my go-to for their juicy sweetness, you can use frozen strawberries in a pinch. Just remember to thaw them first and drain any excess liquid to avoid soggy cones. The flavor might be slightly different, but they’ll still be delicious!
How do I store leftover cones?
If you happen to have any leftover cones (which is rare!), you can store them in an airtight container in the fridge for a day or two. Just be aware that the texture may change, and the chocolate might harden. Reheat them in the oven for a few minutes to bring back that melty goodness!
Can I make these cones gluten-free?
Yes! Simply use gluten-free ice cream cones, which are widely available. You can find them at most grocery stores. The rest of the ingredients are naturally gluten-free, so you can enjoy these cones without worry!
These FAQs should help clear up any questions you might have about making Campfire Chocolate Strawberry Cones. Remember, cooking is all about experimenting and having fun, so don’t hesitate to make these cones your own. Happy cooking, and enjoy every delicious bite!
Conclusion on Campfire Chocolate Strawberry Cones
As I reflect on my culinary journey with Campfire Chocolate Strawberry Cones, I can’t help but smile at the joy they bring. These delightful treats are more than just a dessert; they’re a celebration of togetherness, creativity, and the simple pleasures of life. The combination of warm chocolate and fresh strawberries wrapped in a crispy cone creates a flavor explosion that’s hard to resist.
What I love most is their versatility. Whether you’re camping under the stars or enjoying a cozy backyard bonfire, these cones can be customized to suit any taste. From adding nuts to experimenting with different fruits, the possibilities are endless. Plus, they’re easy to prepare, making them a perfect choice for gatherings with friends and family.
So, the next time you find yourself around a campfire, don’t forget to whip up a batch of these Campfire Chocolate Strawberry Cones. They’re sure to become a cherished tradition, creating sweet memories that will last a lifetime. Happy cooking, and may your evenings be filled with laughter, warmth, and delicious treats!


