Introduction to Butterfinger Cookie Dough Balls Recipe
As a passionate home cook, I find joy in creating sweet treats that bring smiles to faces. One of my all-time favorites is the Butterfinger Cookie Dough Balls recipe. It’s a delightful blend of creamy cookie dough and crunchy Butterfinger pieces that makes my heart sing with happiness. I remember the first time I made these little bites of joy; the kitchen was filled with the sweet aroma of vanilla and chocolate, and I could hardly wait to share them with my family.
What I love most about this recipe is its simplicity. You don’t need to be a master chef to whip up these delicious treats. In fact, I often make them with my kids, turning our kitchen into a fun-filled baking adventure. We laugh, we mix, and we sneak bites of the dough when we think no one is watching. It’s these moments that make cooking so special.
Butterfinger Cookie Dough Balls are perfect for any occasion. Whether it’s a birthday party, a cozy movie night, or just a sweet treat to brighten your day, these little delights never fail to impress. Plus, they’re no-bake! That means less time in the kitchen and more time enjoying the company of loved ones.
So, grab your apron and let’s dive into this scrumptious recipe together. I promise you, once you take that first bite, you’ll be hooked! Let’s make some magic happen in the kitchen!
Ingredients for Butterfinger Cookie Dough Balls Recipe
Before we embark on our sweet adventure, let’s gather all the ingredients we need for these delightful Butterfinger Cookie Dough Balls. I always believe that using quality ingredients makes a world of difference in the final taste. So, let’s make sure we have everything ready!
Main Ingredients
- 1 cup of all-purpose flour
- ½ cup of unsalted butter, softened
- ¾ cup of brown sugar, packed
- ¼ cup of granulated sugar
- 1 teaspoon of vanilla extract
- 1 cup of mini chocolate chips
- 1 cup of Butterfinger candy bars, chopped into small pieces
- 1/4 teaspoon of salt
When I make these cookie dough balls, I always opt for high-quality butter and chocolate chips. It really elevates the flavor! If you can, try to find Butterfinger bars that are fresh; the crunchiness adds a delightful texture to the dough.
Optional Add-ons
- 1/2 cup of chopped nuts (like pecans or walnuts) for added crunch
- 1/4 cup of peanut butter for a richer flavor
- Sprinkles for a fun, colorful touch
Sometimes, I like to get creative with my add-ons. A scoop of peanut butter can make the dough even more indulgent, while a sprinkle of colorful sprinkles can turn these treats into a festive delight! Feel free to mix and match based on your taste preferences or what you have on hand.
How to Prepare Butterfinger Cookie Dough Balls Recipe
Now that we have all our ingredients ready, it’s time to roll up our sleeves and get to the fun part—preparing the Butterfinger Cookie Dough Balls! This process is simple and enjoyable, and I can’t wait to share my tips with you. Let’s dive in!
Step 1: Mixing the Dough
First things first, we need to mix our dough. In a large mixing bowl, cream together the softened butter, brown sugar, and granulated sugar until it’s light and fluffy. This usually takes about 2-3 minutes. Then, add in the vanilla extract and mix until combined. Finally, gradually add the flour and salt, mixing until just combined. You want to avoid overmixing, as it can make the dough tough.
Tips for Step 1
- Make sure your butter is at room temperature. It should be soft but not melted. This helps create that fluffy texture!
- Use a hand mixer or stand mixer for the best results. It saves time and energy!
Step 2: Incorporating Butterfinger Pieces
Once your dough is mixed, it’s time to add the star of the show—Butterfinger pieces! Gently fold in the chopped Butterfinger bars and mini chocolate chips using a spatula. This is where the magic happens, and you can already start to imagine the deliciousness!
Tips for Step 2
- Don’t be afraid to get your hands in there! Sometimes, using your hands to mix can help evenly distribute the Butterfinger pieces.
- Feel free to adjust the amount of Butterfinger based on your preference. More candy means more crunch!
Step 3: Chilling the Dough
After mixing in the goodies, it’s important to chill the dough. Cover the bowl with plastic wrap and place it in the refrigerator for about 30 minutes. Chilling helps the dough firm up, making it easier to shape into balls.
Tips for Step 3
- If you’re short on time, you can pop the dough in the freezer for about 15 minutes instead.
- While the dough chills, you can clean up your workspace. It’s a great way to stay organized!
Step 4: Forming the Balls
Once the dough is chilled, it’s time to form the cookie dough balls! Using a cookie scoop or your hands, take about a tablespoon of dough and roll it into a ball. Place the balls on a parchment-lined baking sheet, leaving some space between each one.
Tips for Step 4
- For uniform balls, a cookie scoop is your best friend. It ensures each ball is the same size!
- If the dough is too sticky, you can lightly dust your hands with flour to make rolling easier.
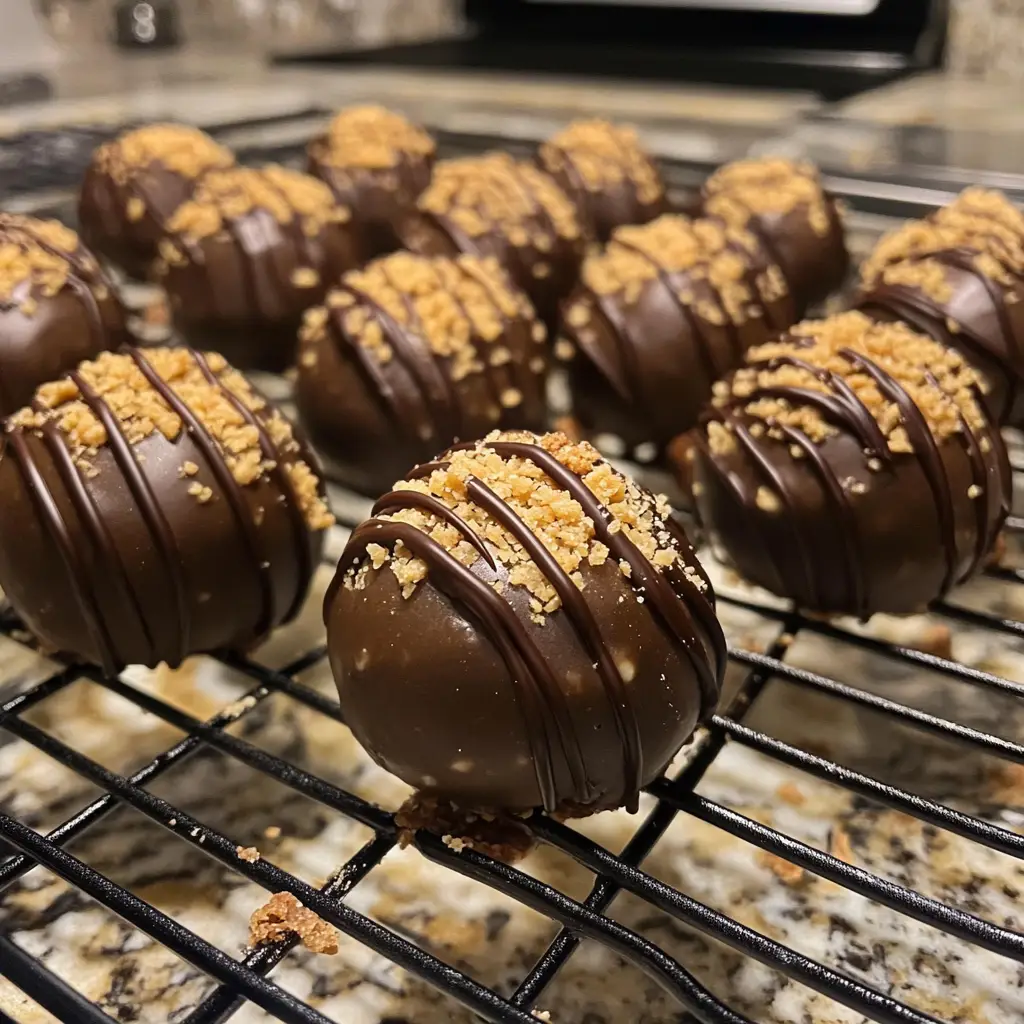
Step 5: Coating the Cookie Dough Balls
Finally, let’s add a little extra flair! You can roll the cookie dough balls in crushed Butterfinger pieces or sprinkles for a fun touch. This step is optional, but it adds a delightful crunch and makes them look even more appealing!
Tips for Step 5
- For a chocolatey twist, consider dipping the balls in melted chocolate before rolling them in toppings.
- Get creative! You can use different toppings like crushed nuts or coconut flakes for a unique flavor.
Equipment Needed for Butterfinger Cookie Dough Balls Recipe
Before we dive into the delicious world of Butterfinger Cookie Dough Balls, let’s make sure we have the right tools at our disposal. Having the right equipment can make the process smoother and more enjoyable. Here’s what you’ll need:
- Mixing Bowls: A large mixing bowl is essential for combining all the ingredients. I often use a glass bowl because it’s easy to clean and lets me see the mixture as I go.
- Hand Mixer or Stand Mixer: While you can mix by hand, a hand mixer or stand mixer saves time and effort. It’s especially helpful for creaming the butter and sugars together.
- Spatula: A sturdy spatula is perfect for folding in the Butterfinger pieces and chocolate chips. I love using a silicone spatula because it’s flexible and gets every last bit of dough out of the bowl!
- Cookie Scoop: This handy tool helps form uniform balls of dough. If you don’t have one, you can use your hands, but a scoop makes it much easier.
- Parchment Paper: Lining your baking sheet with parchment paper prevents the cookie dough balls from sticking. It also makes cleanup a breeze!
- Refrigerator or Freezer: You’ll need space to chill the dough. If you’re short on time, a freezer works just as well!
With these tools in hand, you’re all set to create your Butterfinger Cookie Dough Balls. Remember, cooking is all about having fun, so don’t stress if you don’t have every single item. Get creative with what you have, and let’s make some magic happen in the kitchen!
Variations of Butterfinger Cookie Dough Balls Recipe
As a home cook, I love experimenting with recipes to create new flavors and textures. The Butterfinger Cookie Dough Balls are no exception! Here are a few fun variations that I’ve tried and absolutely adore:
- Peanut Butter Lovers: For those who can’t get enough of peanut butter, try adding 1/4 cup of creamy peanut butter to the dough. It adds a rich, nutty flavor that pairs perfectly with the Butterfinger crunch.
- Chocolate Overload: If you’re a chocolate fanatic like me, consider rolling the cookie dough balls in melted chocolate before coating them with crushed Butterfinger pieces. It’s a chocolate lover’s dream!
- Minty Fresh: Add a few drops of peppermint extract to the dough for a refreshing twist. This variation is especially delightful around the holidays!
- Nutty Delight: Incorporate 1/2 cup of chopped nuts, like pecans or almonds, into the dough. The added crunch complements the Butterfinger pieces beautifully.
- Cookie Dough Swirl: For a fun presentation, you can swirl in some cookie dough ice cream into the mixture before forming the balls. It’s a delicious way to enjoy two treats in one!
These variations not only keep things exciting but also allow you to tailor the recipe to your taste preferences. So, don’t hesitate to get creative and make these Butterfinger Cookie Dough Balls your own! Each variation brings a new twist to this already delightful treat, and I can’t wait for you to try them all!
Cooking Notes for Butterfinger Cookie Dough Balls Recipe
As I’ve learned through my culinary adventures, a few cooking notes can make all the difference in achieving the perfect Butterfinger Cookie Dough Balls. Here are some tips that I always keep in mind when making this delightful treat:
- Room Temperature Ingredients: Ensure your butter is softened to room temperature before mixing. This helps create a smooth and creamy dough, which is essential for that melt-in-your-mouth texture.
- Don’t Skip the Chilling: Chilling the dough is crucial! It not only makes the dough easier to handle but also helps the flavors meld together beautifully. Trust me, the wait is worth it!
- Storage Tips: If you have any leftovers (which is rare in my house!), store the cookie dough balls in an airtight container in the refrigerator for up to a week. You can also freeze them for up to three months. Just make sure to separate them with parchment paper to prevent sticking.
- Experiment with Toppings: Feel free to get creative with your toppings! Whether it’s crushed nuts, sprinkles, or a drizzle of chocolate, these little additions can elevate your cookie dough balls to a whole new level.
- Share the Love: These treats are perfect for sharing! Whether it’s a family gathering or a friendly get-together, everyone will appreciate a sweet bite of these Butterfinger delights.
By keeping these cooking notes in mind, you’ll be well on your way to creating the most scrumptious Butterfinger Cookie Dough Balls. Happy cooking!
Serving Suggestions for Butterfinger Cookie Dough Balls Recipe
Now that we’ve created these delightful Butterfinger Cookie Dough Balls, it’s time to think about how to serve them! Presentation can elevate any treat, and I love to get a little creative when it comes to serving. Here are some of my favorite ways to enjoy these sweet bites:
- On a Dessert Platter: Arrange the cookie dough balls on a colorful platter, mixing in some fresh fruit like strawberries or blueberries. The vibrant colors make for an eye-catching display!
- With a Scoop of Ice Cream: For an indulgent treat, serve the cookie dough balls alongside a scoop of vanilla or chocolate ice cream. The combination of warm and cold is simply heavenly!
- As Party Favors: If you’re hosting a gathering, consider packaging the cookie dough balls in cute little bags tied with ribbons. They make for delightful party favors that guests will love!
- With a Drizzle of Chocolate: For an extra touch of decadence, drizzle melted chocolate over the cookie dough balls before serving. It adds a beautiful finish and enhances the chocolatey goodness!
- In a Milkshake: Blend a few cookie dough balls into a milkshake for a fun twist. It’s a delicious way to enjoy the flavors in a new form!
These serving suggestions not only make the Butterfinger Cookie Dough Balls more appealing but also create memorable moments with family and friends. Whether it’s a casual snack or a festive treat, these little delights are sure to impress!
Tips for Making the Best Butterfinger Cookie Dough Balls Recipe
As I’ve whipped up countless batches of Butterfinger Cookie Dough Balls, I’ve gathered a treasure trove of tips that can help you achieve cookie dough perfection. Here are my top suggestions to ensure your treats turn out absolutely delightful:
- Measure Accurately: Baking is a science, so measuring your ingredients accurately is key. I always use a kitchen scale for precision, especially with flour and sugar.
- Use Fresh Ingredients: Fresh Butterfinger bars and high-quality chocolate chips make a world of difference. The crunch and flavor are simply unbeatable!
- Don’t Rush the Chilling: I know it’s tempting to skip the chilling step, but trust me, it’s essential. Chilling the dough helps the flavors meld and makes rolling easier.
- Mix Gently: When incorporating the Butterfinger pieces and chocolate chips, mix gently. This keeps the pieces intact and ensures a delightful crunch in every bite.
- Experiment with Flavors: Don’t be afraid to get creative! Try adding different extracts or spices, like almond extract or cinnamon, to give your cookie dough balls a unique twist.
By following these tips, you’ll be well on your way to creating the most scrumptious Butterfinger Cookie Dough Balls. Each bite will be a delightful explosion of flavor and texture, and I can’t wait for you to share them with your loved ones!
Breakdown of Time for Butterfinger Cookie Dough Balls Recipe
As a home cook, I know that time management is key in the kitchen. When it comes to making Butterfinger Cookie Dough Balls, it’s all about enjoying the process without feeling rushed. Here’s a quick breakdown of the time you’ll need to whip up these delightful treats:
- Prep Time: 15 minutes – This includes gathering your ingredients, mixing the dough, and incorporating those delicious Butterfinger pieces.
- Chilling Time: 30 minutes – Chilling the dough is essential for the perfect texture, so don’t skip this step!
- Total Time: 45 minutes – In just under an hour, you’ll have a batch of scrumptious Butterfinger Cookie Dough Balls ready to enjoy!
With this time breakdown, you can easily plan your baking adventure. Whether you’re making these treats for a special occasion or just to satisfy a sweet craving, you’ll find that the time spent is well worth the delicious outcome. Happy baking!
Nutritional Information for Butterfinger Cookie Dough Balls Recipe
As a passionate home cook, I always find it helpful to know the nutritional information of the treats I make. It allows me to enjoy them mindfully while sharing them with family and friends. Here’s a quick breakdown of the nutritional content for one Butterfinger Cookie Dough Ball, assuming the recipe yields about 24 balls:
- Calories: Approximately 120 calories
- Fat: 6g (Saturated Fat: 3g)
- Carbohydrates: 15g (Sugars: 8g)
- Protein: 1g
- Sodium: 50mg
- Fiber: 0g
Keep in mind that these values can vary based on the specific brands of ingredients you use and any optional add-ons you choose to include. If you’re looking to make these treats a bit healthier, consider using less sugar or swapping in whole wheat flour. Regardless, these Butterfinger Cookie Dough Balls are a delightful indulgence that’s perfect for sharing!
Frequently Asked Questions about Butterfinger Cookie Dough Balls Recipe
As I’ve shared my Butterfinger Cookie Dough Balls recipe with friends and family, I’ve received quite a few questions along the way. I love that people are curious and eager to learn! Here are some of the most frequently asked questions, along with my answers to help you on your baking journey:
Can I use other types of candy instead of Butterfinger?
Absolutely! While Butterfinger adds a unique crunch and flavor, you can experiment with other candies like Reese’s Pieces, Snickers, or even M&M’s. Each candy will bring its own delightful twist to the cookie dough balls!
How long do these cookie dough balls last?
If stored in an airtight container in the refrigerator, these cookie dough balls can last up to a week. If you want to keep them longer, you can freeze them for up to three months. Just make sure to separate them with parchment paper to prevent sticking!
Can I make these cookie dough balls gluten-free?
Yes! You can easily make this recipe gluten-free by substituting all-purpose flour with a gluten-free flour blend. Just be sure to check that your Butterfinger bars are gluten-free as well, as some brands may vary.
Do I need to bake the cookie dough balls?
Nope! That’s the beauty of this recipe. These Butterfinger Cookie Dough Balls are no-bake, which means you can enjoy them straight from the fridge after chilling. Just roll them into balls, coat them if you like, and they’re ready to eat!
Can I add more chocolate chips to the recipe?
What’s the best way to serve these cookie dough balls?
There are so many fun ways to serve them! You can arrange them on a dessert platter, pair them with ice cream, or even package them as party favors. Drizzling melted chocolate on top adds a lovely touch, too!
These FAQs should help clarify any questions you might have as you embark on your Butterfinger Cookie Dough Balls adventure. Remember, cooking is all about having fun and experimenting, so don’t hesitate to make this recipe your own!
Conclusion on Butterfinger Cookie Dough Balls Recipe
In conclusion, the Butterfinger Cookie Dough Balls recipe is a delightful treat that combines simplicity with indulgence. As a passionate home cook, I can confidently say that these no-bake bites are perfect for any occasion, whether it’s a family gathering, a cozy night in, or a festive celebration. The blend of creamy cookie dough and crunchy Butterfinger pieces creates a flavor explosion that’s hard to resist!
What I love most about this recipe is its versatility. You can easily customize it with different add-ons or variations to suit your taste. Plus, the joy of making these treats with loved ones adds a special touch to the experience. So, gather your ingredients, roll up your sleeves, and let the magic happen in your kitchen!
Once you take that first bite, I promise you’ll be hooked. These Butterfinger Cookie Dough Balls are not just a treat; they’re a sweet memory waiting to be made. Happy baking, and enjoy every delicious moment!


