Introduction to Biscoff Cookie Butter Cheesecake Bars
As a passionate home cook, I often find myself on a delightful journey through flavors and textures. One of my favorite stops on this culinary adventure is the world of cheesecake. There’s something magical about the creamy, rich filling paired with a crunchy crust. But when I discovered Biscoff cookie butter, it felt like I had struck gold! The sweet, spiced flavor of those iconic cookies transformed my cheesecake dreams into a reality.
Let me take you back to the first time I tasted Biscoff cookie butter. I was at a cozy café, savoring a cup of coffee when I spotted a jar of this golden spread on the counter. Curious, I spread a little on a piece of toast, and my taste buds danced with joy! The combination of caramelized sugar and warm spices was unlike anything I had ever experienced. I knew I had to incorporate this delightful spread into my baking.
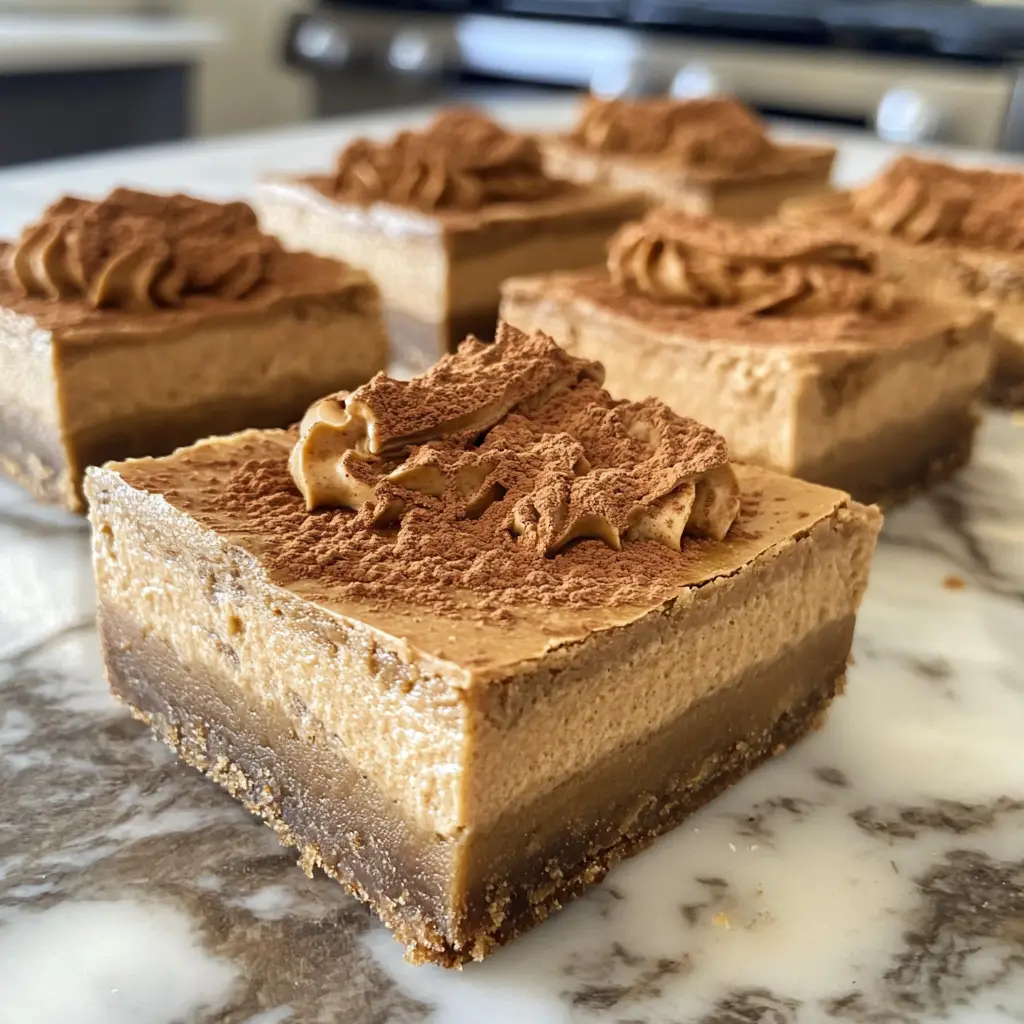
That’s when the idea for Biscoff Cookie Butter Cheesecake Bars was born. These bars are not just a dessert; they are a celebration of flavors that bring comfort and joy. Imagine biting into a creamy cheesecake filling, infused with the lusciousness of Biscoff cookie butter, all resting on a buttery, crumbly crust. It’s like a hug in dessert form!
In this recipe, I’ll guide you through each step, sharing tips and tricks that I’ve learned along the way. Whether you’re a seasoned baker or just starting out, I promise you’ll find joy in creating these bars. So, roll up your sleeves, and let’s embark on this delicious journey together!
Ingredients for Biscoff Cookie Butter Cheesecake Bars
Before we dive into the delightful process of making Biscoff Cookie Butter Cheesecake Bars, let’s gather our ingredients. Having everything ready makes the cooking experience smoother and more enjoyable. Here’s what you’ll need:
Main Ingredients
- 1 ½ cups Biscoff cookie crumbs (about 30 cookies, crushed)
- ½ cup unsalted butter, melted
- 16 oz cream cheese, softened (I recommend using full-fat for the best texture)
- 1 cup granulated sugar
- ½ cup Biscoff cookie butter (the star of the show!)
- 2 large eggs
- 1 tsp vanilla extract
- 1 tsp ground cinnamon (optional, but it adds a lovely warmth)
When selecting your ingredients, I always opt for high-quality cream cheese and butter. They truly make a difference in the creaminess and flavor of the cheesecake. If you can find it, using organic ingredients can elevate your dessert even further!
Optional Add-ons
- Chopped Biscoff cookies for topping (because who doesn’t love a little extra crunch?)
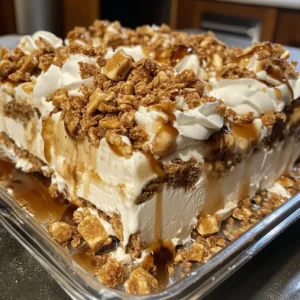
- Whipped cream for serving (a dollop of cream adds a nice touch)
- Chocolate drizzle (if you’re feeling adventurous, this adds a rich contrast)
- Caramel sauce (for those who want to take it over the top)
These optional add-ons can enhance your Biscoff Cookie Butter Cheesecake Bars, making them even more indulgent. Feel free to mix and match based on your preferences. I often find myself experimenting with different toppings, and it’s always a fun surprise!
How to Prepare Biscoff Cookie Butter Cheesecake Bars
Now that we have our ingredients ready, it’s time to roll up our sleeves and dive into the fun part—preparing our Biscoff Cookie Butter Cheesecake Bars! I love this part because it’s where the magic happens. Follow these steps, and you’ll be on your way to creating a dessert that will impress everyone!
Step 1: Prepare the Crust
First things first, let’s get that crust ready. It’s the foundation of our cheesecake bars, and it needs to be just right!
- Preheat your oven to 350°F (175°C).
- In a mixing bowl, combine the Biscoff cookie crumbs and melted butter. Stir until the crumbs are evenly coated.
- Press the mixture firmly into the bottom of a greased 9×9-inch baking pan. Make sure it’s packed tightly for a sturdy crust.
Tips for Step 1
To make pressing the crust easier, I like to use the bottom of a measuring cup. It helps create an even layer without making a mess. Also, don’t skip greasing the pan; it makes removing the bars a breeze later on!
Step 2: Make the Cheesecake Filling
Next up is the creamy filling that will make your taste buds sing!
- In a large mixing bowl, beat the softened cream cheese until smooth and creamy.
- Add the granulated sugar and continue to beat until well combined.
- Mix in the Biscoff cookie butter, eggs, vanilla extract, and ground cinnamon (if using). Beat until everything is smooth and fluffy.
Tips for Step 2
Make sure your cream cheese is at room temperature. This helps avoid lumps in your filling. I also like to scrape down the sides of the bowl with a spatula to ensure everything is mixed evenly. Trust me, it’s worth the extra minute!
Step 3: Assemble the Bars
Now it’s time to bring it all together!
- Pour the cheesecake filling over the prepared crust, spreading it evenly with a spatula.
- If you’re using any optional toppings, sprinkle them on top of the filling now.
Tips for Step 3
For a beautiful finish, I like to gently tap the pan on the counter to remove any air bubbles in the filling. This little trick helps create a smooth surface for your cheesecake bars!
Step 4: Bake the Cheesecake Bars
It’s time to bake our creation!
- Place the baking pan in the preheated oven and bake for about 30-35 minutes, or until the edges are set but the center still has a slight jiggle.
- Once done, turn off the oven and crack the door open, letting the bars cool in the oven for about 10 minutes.
Tips for Step 4
Keep an eye on the bars as they bake. Every oven is different, and you want to avoid overbaking. The slight jiggle in the center means it will set perfectly as it cools!
Step 5: Cool and Chill
Patience is key here, but I promise it’s worth it!
- Remove the pan from the oven and let it cool at room temperature for about 30 minutes.
- Once cooled, cover the pan with plastic wrap and refrigerate for at least 4 hours, or overnight for the best results.
Tips for Step 5
Chilling the bars overnight allows the flavors to meld beautifully. If you can wait, I highly recommend it! When you’re ready to serve, use a sharp knife to cut them into squares for that perfect presentation.
And there you have it! Each step brings you closer to enjoying these delightful Biscoff Cookie Butter Cheesecake Bars. I can already smell the sweet aroma wafting through my kitchen, and I can’t wait for you to experience it too!
Equipment Needed for Biscoff Cookie Butter Cheesecake Bars
Before we dive into the baking process, let’s make sure we have all the right tools at our fingertips. Having the right equipment can make a world of difference in your baking experience. Here’s what you’ll need to whip up these scrumptious Biscoff Cookie Butter Cheesecake Bars:
- 9×9-inch baking pan: This is essential for creating the perfect size for your cheesecake bars. If you don’t have one, an 8×8-inch pan will work too; just keep an eye on the baking time.
- Mixing bowls: A large bowl for the cheesecake filling and a smaller one for the crust will keep things organized.
- Electric mixer: While you can mix by hand, an electric mixer makes it easier to achieve that smooth, creamy texture for the filling.
- Spatula: A rubber spatula is perfect for scraping down the sides of the bowl and spreading the filling evenly.
- Measuring cups and spoons: Accurate measurements are key to baking success, so don’t forget these!
- Plastic wrap: This will help cover your cheesecake bars while they chill in the fridge.
If you find yourself missing any of these items, don’t fret! You can often substitute with what you have on hand. For example, a regular mixing bowl can work in place of a large one, and a whisk can substitute for an electric mixer in a pinch. Just remember, the goal is to have fun and enjoy the process of creating these delicious bars!
Variations of Biscoff Cookie Butter Cheesecake Bars
As I’ve experimented with my Biscoff Cookie Butter Cheesecake Bars, I’ve discovered that there are so many fun variations to try! Each twist adds a unique flair, making this dessert even more exciting. Here are a few ideas that I absolutely love:
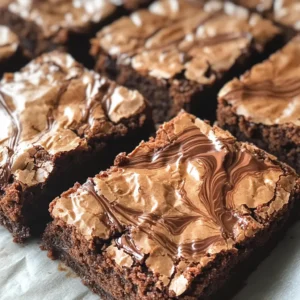
- Chocolate Swirl: For all the chocolate lovers out there, try swirling in some melted chocolate into the cheesecake filling before baking. It creates a beautiful marbled effect and adds a rich flavor.
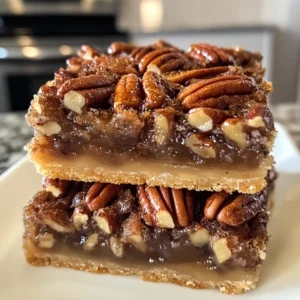
- Nutty Crunch: Add chopped nuts, like pecans or walnuts, to the crust for an extra crunch. The nutty flavor pairs wonderfully with the Biscoff cookie butter.
- Fruit Topping: After chilling, top your bars with fresh berries or sliced bananas. The fruity freshness balances the sweetness of the cheesecake beautifully.
- Spiced Pumpkin: For a seasonal twist, mix in some pumpkin puree and pumpkin spice into the cheesecake filling. It’s like a fall celebration in every bite!
These variations not only keep things interesting but also allow you to tailor the bars to your taste preferences or the season. I love to switch things up depending on what I have on hand or what I’m craving. The possibilities are endless, and that’s what makes baking so much fun!
Cooking Notes for Biscoff Cookie Butter Cheesecake Bars
As I’ve baked these Biscoff Cookie Butter Cheesecake Bars time and time again, I’ve gathered a few cooking notes that can help you achieve the best results. These little nuggets of wisdom can make a big difference in your baking journey!
- Room Temperature Ingredients: Always ensure your cream cheese and eggs are at room temperature before mixing. This helps create a smooth filling without lumps, making your cheesecake bars velvety and delightful.
- Don’t Overmix: When combining the filling ingredients, mix just until everything is combined. Overmixing can introduce too much air, leading to cracks in your cheesecake as it bakes.
- Cooling Gradually: Allow the cheesecake bars to cool gradually in the oven with the door slightly ajar. This helps prevent sudden temperature changes that can cause cracks.
- Chill Time is Key: Patience is essential! Chilling the bars for at least four hours (or overnight) allows the flavors to meld and the texture to set perfectly. Trust me, the wait is worth it!
- Storage Tips: Store any leftovers in an airtight container in the fridge. They can last up to a week, but I doubt they’ll last that long once you share them with friends and family!
These cooking notes are like little treasures I’ve picked up along the way. They help ensure that every batch of Biscoff Cookie Butter Cheesecake Bars turns out just as delicious as the last. Happy baking!
Serving Suggestions for Biscoff Cookie Butter Cheesecake Bars
Now that your Biscoff Cookie Butter Cheesecake Bars are ready to dazzle, let’s talk about how to serve them for maximum enjoyment! Presentation can elevate your dessert from delightful to absolutely stunning. Here are some of my favorite serving suggestions:
- Chilled and Sliced: Serve the bars chilled straight from the fridge. Cut them into neat squares for a clean, elegant look. I love to arrange them on a beautiful platter, showcasing their creamy layers.
- Garnish with Whipped Cream: A dollop of freshly whipped cream on top adds a light, airy touch. It complements the richness of the cheesecake perfectly!
- Drizzle with Caramel or Chocolate: For an extra indulgent treat, drizzle some caramel or chocolate sauce over the bars just before serving. It adds a delightful contrast and makes them even more irresistible.
- Fresh Fruit Accents: Top each bar with a few fresh berries or slices of banana. The fruity freshness brightens the flavors and adds a pop of color to your dessert table.
- Pair with Coffee or Tea: These cheesecake bars are a match made in heaven with a warm cup of coffee or a soothing herbal tea. The combination creates a cozy, comforting experience.
These serving suggestions not only enhance the visual appeal but also elevate the overall tasting experience. I often find that the way I present my desserts can spark joy and excitement among my family and friends. So, get creative and enjoy sharing these delightful Biscoff Cookie Butter Cheesecake Bars with your loved ones!
Tips for Perfect Biscoff Cookie Butter Cheesecake Bars
As I’ve baked these Biscoff Cookie Butter Cheesecake Bars, I’ve gathered a few golden tips that can help you achieve perfection every time. These little insights can make a world of difference in your baking journey!
- Use Quality Ingredients: The better the ingredients, the better your bars will taste. Opt for high-quality cream cheese and fresh eggs for a rich, creamy filling.
- Don’t Rush the Chilling: Allowing your cheesecake bars to chill for the recommended time is crucial. This step helps the flavors meld beautifully and ensures a firm texture.
- Check for Doneness: When baking, keep an eye on the edges. They should be set while the center remains slightly jiggly. This ensures a creamy texture once cooled.
- Cut with Care: For clean cuts, use a sharp knife and wipe it clean between slices. This keeps your bars looking neat and presentable.
- Experiment with Flavors: Don’t hesitate to add your twist! Whether it’s a hint of citrus zest or a sprinkle of nutmeg, personal touches can elevate your bars to new heights.
These tips are like little treasures I’ve picked up along the way. They help ensure that every batch of Biscoff Cookie Butter Cheesecake Bars turns out just as delicious as the last. Happy baking!
Breakdown of Time for Biscoff Cookie Butter Cheesecake Bars
As a home cook, I know that time management is key in the kitchen. When it comes to making Biscoff Cookie Butter Cheesecake Bars, having a clear idea of how long each step takes can help you plan your baking adventure. Here’s a quick breakdown of the time you’ll need:
- Prep Time: 20 minutes
- Cooking Time: 30-35 minutes
- Cooling Time: 30 minutes (in the oven)
- Chilling Time: 4 hours (or overnight for best results)
- Total Time: Approximately 4 hours and 50 minutes (including chilling)
While the prep and cooking times are relatively short, the chilling time is where the magic happens. I often find myself eagerly waiting, but trust me, letting the bars chill overnight allows the flavors to meld beautifully. It’s like a little gift to your taste buds! So, plan ahead, and enjoy the anticipation of indulging in these delicious Biscoff Cookie Butter Cheesecake Bars!
Nutritional Information for Biscoff Cookie Butter Cheesecake Bars
As a passionate home cook, I believe that knowing the nutritional information of our favorite treats can help us enjoy them even more mindfully. While these Biscoff Cookie Butter Cheesecake Bars are undeniably indulgent, they also bring a delightful balance of flavors and textures. Here’s a general breakdown of the nutritional information per serving (assuming 12 servings):
- Calories: Approximately 250
- Fat: 16g
- Carbohydrates: 25g
- Fiber: 1g
- Sugar: 15g
- Protein: 3g
Keep in mind that these values can vary based on the specific brands of ingredients you use and any optional add-ons you choose to include. If you’re looking to lighten things up a bit, consider using reduced-fat cream cheese or a sugar substitute. However, I always say that moderation is key! Enjoying a small piece of these delicious bars can be a delightful treat without any guilt.
So, whether you’re sharing them at a gathering or savoring them on a quiet evening, these Biscoff Cookie Butter Cheesecake Bars are sure to bring a smile to your face. Happy baking and indulging!
Frequently Asked Questions about Biscoff Cookie Butter Cheesecake Bars
As I’ve shared my love for Biscoff Cookie Butter Cheesecake Bars, I’ve often received questions from fellow home cooks eager to try their hand at this delightful dessert. Here are some of the most frequently asked questions, along with my answers to help you on your baking journey!
Can I use a different type of cookie for the crust?
Absolutely! While Biscoff cookies create a unique flavor, you can substitute them with other cookies like graham crackers or Oreos. Just keep in mind that the taste will change slightly, but it can still be delicious!
How do I store leftover cheesecake bars?
To keep your Biscoff Cookie Butter Cheesecake Bars fresh, store them in an airtight container in the refrigerator. They can last up to a week, but I doubt they’ll last that long once you share them with friends and family!
Can I freeze these cheesecake bars?
Yes, you can freeze them! Just make sure to wrap them tightly in plastic wrap and then place them in an airtight container. They can be frozen for up to three months. When you’re ready to enjoy, simply thaw them in the fridge overnight.
What can I use instead of cream cheese?
If you’re looking for a dairy-free option, you can use vegan cream cheese or a cashew cream. Just keep in mind that the texture and flavor may vary slightly, but it can still be a tasty alternative!
Can I make these bars ahead of time?
Definitely! In fact, making them a day in advance is a great idea. The flavors meld beautifully as they chill, making them even more delicious. Just remember to cover them well in the fridge!
These questions reflect the curiosity and excitement that come with baking. I hope my answers help you feel more confident as you embark on your own Biscoff Cookie Butter Cheesecake Bars adventure. Happy baking!
Conclusion on Biscoff Cookie Butter Cheesecake Bars
As I wrap up this delightful journey through the world of Biscoff Cookie Butter Cheesecake Bars, I can’t help but feel a sense of joy and satisfaction. These bars are more than just a dessert; they are a celebration of flavors that bring warmth and happiness to any occasion. The creamy filling, infused with the rich essence of Biscoff cookie butter, paired with a buttery crust, creates a symphony of taste that is simply irresistible.
Whether you’re baking for a special gathering or treating yourself to a sweet indulgence, these cheesecake bars are sure to impress. They are easy to make, and the variations allow you to get creative in the kitchen. Plus, the joy of sharing them with friends and family is truly priceless. So, gather your ingredients, follow the steps, and let the magic unfold in your kitchen!
In the end, I hope you find as much joy in making and enjoying these Biscoff Cookie Butter Cheesecake Bars as I do. Happy baking, and may your culinary adventures be filled with love and deliciousness!


